This Subnautica 2 Beginner’s Guide details all the tips and tricks to start your journey in Subnautica 2. Starting your journey in Subnautica 2 can feel exciting and stressful at the same time. One moment you are peacefully exploring the ocean, and the next you are completely lost, out of oxygen, or missing an important blueprint with no idea what to do next. The game leaves many mechanics unexplained.
Beginner’s Guide – Subnautica 2
The following are tips and tricks to kickstart your gameplay and avoid some basic mistakes that new players generally make in the game.
Build a Small Backup Base Early
At the start of the game, solar panels are your main source of power. They are cheap and simple to build, but they become unreliable once night falls. If your base loses power, you can suddenly lose oxygen generation too, which can become dangerous very quickly.
A good solution is building a tiny secondary base close to your main one. It does not need to be complicated. A single corridor, one hatch, and one solar panel are enough to create a safe oxygen spot. The materials needed are very common: four titanium and two quartz, so making one early is easy.
These mini bases are also useful during exploration. As long as the area has sunlight, you can stop there to refill oxygen and stay safe during long trips. Just remember that solar panels do not work properly in very deep areas, so placement matters.
Manual Saves Are Extremely Important
The game has both autosaves and manual saves, but they work differently. Autosaves can sometimes happen at terrible moments, including right after dying. That means simply reloading the game may not actually help you recover lost progress.
Before doing anything risky, make a manual save. If something goes wrong, like dying or losing your vehicle, quit the game and avoid saving when asked. Then load the manual save instead of the autosave. This lets you return to an earlier point before the disaster happened. Knowing how this system works can save you from losing hours of progress.
Scan Absolutely Everything
Whenever you find abandoned structures, wreckage, work sites, or strange-looking locations, take out your scanner and search carefully. Some important blueprint pieces are surprisingly easy to miss because they do not immediately look interactive.
It is a good idea to fully explore an area before leaving it behind. Missing a single blueprint can completely slow down progression later. This becomes even more noticeable once you reach the larger open ocean sections of the map, where finding what you missed can take a very long time. Many progression problems are simply caused by overlooked scans.
Learn How Battery Swapping Works
Batteries power most tools in the game, so carrying extras is always smart. At first, it may seem like batteries only swap automatically when they become nearly empty, but there is actually a manual way to change them whenever you want.
Select the tool you want, press up on the D-pad, and choose a different battery from your inventory. You can cycle through available batteries and pick the one with the highest remaining charge.
After returning to base, place drained batteries into the charging station so they are ready for future trips. Even though batteries last a decent amount of time, carrying at least one or two extras is still a good habit.
Use the Tadpole for Extra Storage
The Tadpole becomes incredibly useful early in the game because it acts as a portable oxygen source during exploration. What many players miss is that you can attach portable storage containers directly to it.
There is a hardpoint located at the back of the vehicle where equipment can snap into place. Adding storage gives you far more inventory space during long journeys, which helps a lot considering how limited your carrying capacity is at first. Even after installing other attachments like the scout module, you still keep another hardpoint available for extra storage.
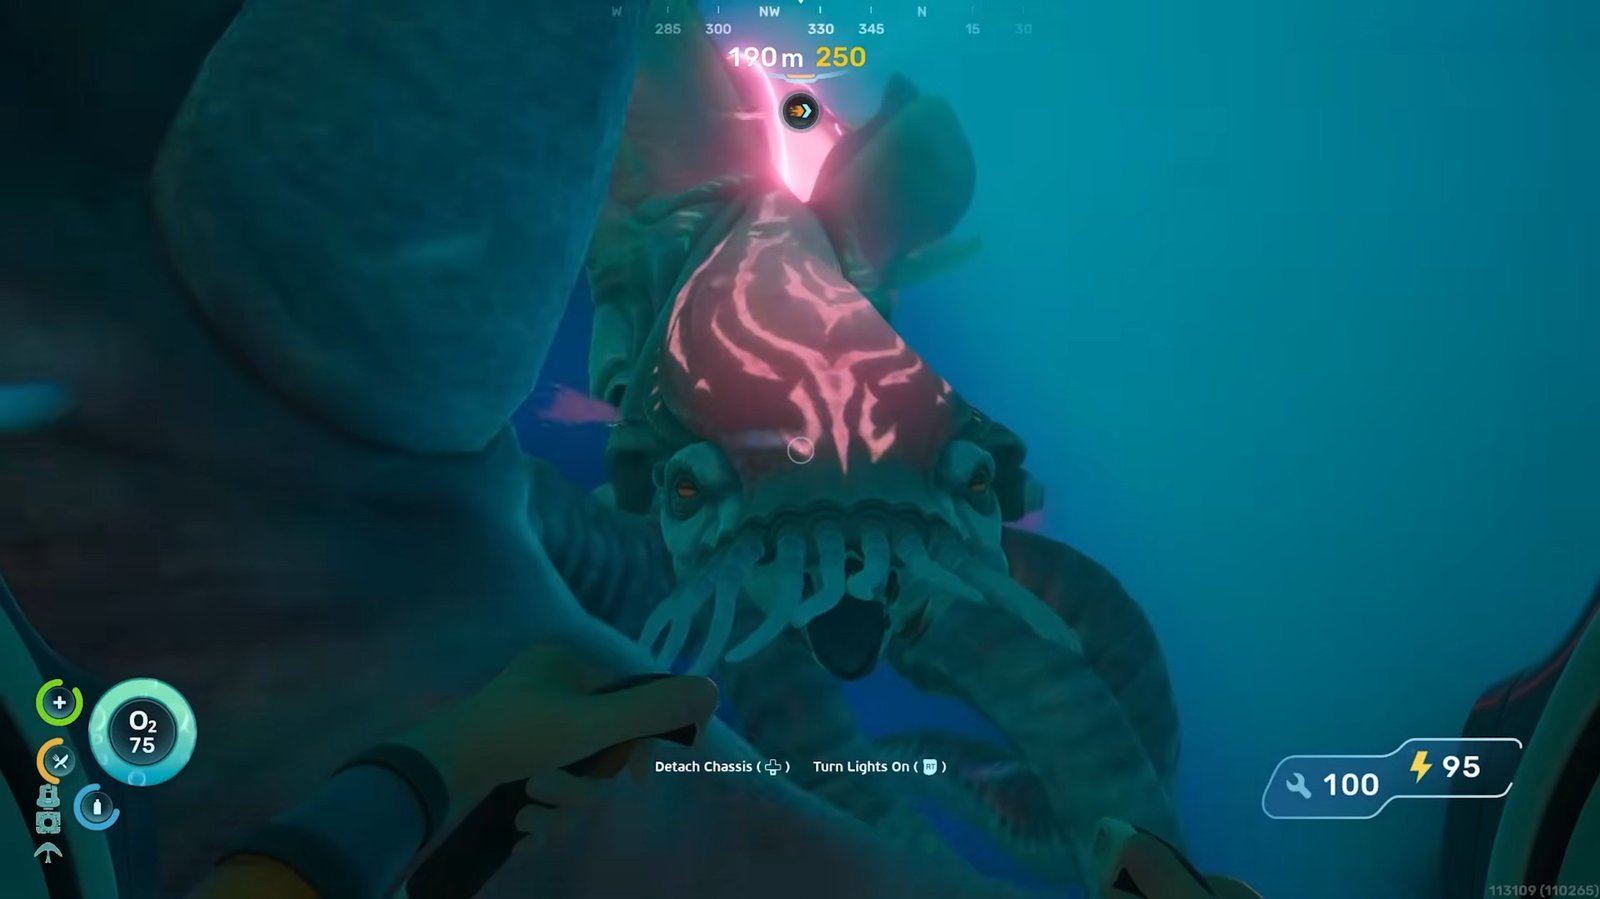
How to Find the Portable Oxygen Generator
You can unlock the portable oxygen generator fairly early if you know where to look. Travel southwest from the life pod for around 300 meters until you find a large clam-like creature.
Inside this area are the blueprint fragments needed for the portable oxygen generator. You only need to scan two pieces, and both are located nearby. One can be seen from outside, while the second is hidden inside beneath some scrap.
Be careful while exploring the area because triggering the tripwires will release poison. As long as you move carefully, though, it is manageable.
The oxygen generator becomes very useful for deep dives where oxygen bubbles are limited. It can even provide emergency air during difficult situations, though it needs time to recharge before use.
Strong Acid with Necrolei Cysts
Strong acid is required for many important crafting recipes, but gathering materials for it can become frustrating. A much easier method involves using Necrolei Cysts.
If you collect two Necrolei Cysts, they can be processed into strong acid using the processor. To find them, travel northwest from the life pod past the giant jelly creatures and into the purple forest-like biome.
The Necrolei Cysts grow on strange ball-shaped plants with glowing roots underneath. Use the multi-tool to remove them. This area contains many of these plants, making it a reliable place to stock up and avoid running low on strong acid later.
Safely Avoiding the Collector Leviathan
The area between the hot caves and the plateaus is patrolled by the dangerous Collector Leviathan. Crossing through normally can become very stressful, especially because players need to pass this region often while moving between major sections of the map.
One easier method is sticking close to the edge of the abyss and following the early access boundary wall. Doing this keeps the Collector Leviathan from attacking you.
However, you should never cross beyond the warning boundary itself. Going too far can attract an even more aggressive Leviathan that is much harder to escape. Staying close to the wall without crossing it is the safest route.
Where to Find the Depth Module MK1
The Depth Module MK1 is one of the most important upgrades in the current early access version because it increases how deep the Tadpole can safely travel.
You can find the blueprint inside the Needler Nest, the large structure surrounded by enemies that fire needles at you. Search inside the nest and look for a light left behind by a colonist. From there, swim deeper into the area until you spot a damaged Tadpole chassis.
Nearby is the blueprint for the Depth Module MK1. Once crafted, it increases your Tadpole’s depth limit by another 200 meters, allowing exploration down to 450 meters total.
Without this upgrade, deeper exploration becomes much more difficult.
Conduit Crystals Are Hard to Locate
Conduit Crystals are one of the biggest progression roadblocks in the game because they are needed for crafting the bioscanner. That scanner is required for scanning alien technology and progressing further into the story.
The difficult part is that conduit crystals do not always spawn in fixed locations. They are usually found near the large purple alien roots connected to the angel comb structures, but only in very deep areas around 250 meters or lower.
Sometimes entire root systems contain nothing at all, so searching can take time. Eventually, though, you will come across tree-shaped crystal formations containing the resource.
Because the crystals are spread out and located so deep underwater, scanners are not especially useful for finding them. Careful exploration works much better.
Build Checkpoint Bases While Exploring
One of the easiest ways to stay organized is by building small checkpoint bases in areas you are currently exploring. A simple room with a habitat beacon on top is enough to permanently mark important locations.
This becomes extremely useful when you need to return to your main base for supplies because you can quickly find your way back instead of searching the same area again. You can also place storage containers there and collect all the resources from the surrounding zone before transporting everything back later.
Using the Tadpole for repeated supply runs makes this system even more effective. Instead of randomly wandering across the map, you slowly clear and organize different regions one by one. It turns exploration into a much more controlled process.
If your goal is resource farming, you can expand these temporary outposts with multiple storage containers and completely strip an area of useful materials before moving on.
Stockpile Food and Water Early
A huge amount of wasted time in the game comes from constantly interrupting exploration to deal with hunger and thirst. Since progression depends heavily on carefully searching environments for blueprints, caves, black boxes, and important materials, repeatedly stopping for survival needs can completely break your focus.
A good solution is creating an entire storage room dedicated only to food and water supplies. Spend some time doing nothing except collecting survival materials and filling containers with snacks for future trips.
Once you build up enough supplies, exploration becomes much smoother. Instead of constantly returning home, you can simply restock quickly and head straight back out into the ocean. It also makes the game feel far less stressful because you are no longer juggling survival problems every few minutes.
Prepare Different Loadouts for Different Goals
Before leaving your base, it helps to decide exactly what you are planning to do. If you are gathering resources, bring materials like titanium so you can build small bases and storage containers during the trip.
If your goal is exploration and progression, focus more on food, water, batteries, medkits, and survival equipment instead. Inventory space is limited, so carrying unnecessary items only makes exploration harder.
The Tadpole inventory should also stay organized. Keeping food, water, titanium, and other important supplies inside the vehicle allows you to remain away from base much longer.
Planning your loadout properly before every trip saves a surprising amount of time later.
Choosing Between Storage and Oxygen Upgrades
At some point, you will need to decide whether your Tadpole should use portable storage or the oxygen tank upgrade.
Portable storage is excellent for long exploration runs because it lets you carry more materials and survival supplies. It works especially well if you are building checkpoint bases across the map.
However, deeper parts of the game contain important blueprints and black boxes located below the Tadpole’s normal safe depth. In these situations, the oxygen upgrade becomes much more valuable because the Tadpole starts acting like a mobile oxygen station while you dive deeper on foot.
The extra breathing room makes dangerous underwater trips much safer and gives you more time to search deeper locations carefully.
Use the Air Bladder to Escape Danger
Once you begin exploring areas deeper than 250 meters, there will be times when the Tadpole cannot safely follow you. This forces you to leave the vehicle and enter dangerous areas alone.
In these moments, the air bladder becomes surprisingly useful. Instead of only using it to reach the surface, it can help you quickly dodge enemies and rush back toward your Tadpole.
Since the Tadpole is far tougher than your character and can easily be repaired later, it basically becomes your mobile safe zone during dangerous dives. As long as you can return to it quickly, you can survive situations that would normally kill you.
In the later parts of the game, the air bladder becomes more of an escape tool than a survival tool.
Always Keep Healing Supplies Ready
Food and oxygen are important, but once you start entering deeper and more dangerous zones, health management becomes just as important.
Dying can force you to repeat long exploration routes and recover lost progress, which wastes a huge amount of time. Because of that, it is smart to collect plenty of healing materials and keep a large reserve stored back at your base.
Preparing medkits before long expeditions helps prevent unnecessary setbacks and makes exploration much less frustrating overall.
It’s Fine to Look Up Important Locations
Early exploration is one of the best parts of the game because everything feels mysterious and new. But later on, progression becomes much more specific. You may need a certain blueprint, black box, or material to continue, and searching endlessly without success can quickly become exhausting.
If you have already explored an area thoroughly and still cannot find what you need, looking up the location online is completely reasonable. Spending hours wandering around, frustrated, can easily ruin the experience.
Sometimes, finding that one missing blueprint piece is all you need to continue progressing and enjoying the game again.
Understanding Coordinates Helps a Lot
If you decide to search for locations online, learning how coordinates work makes navigation much easier.
The game tracks your location using X, Y, and Z values shown in the pause menu. X controls east and west movement across the map, Y tracks your vertical depth, and Z handles north and south positioning.
Using these numbers lets you travel directly toward important blueprints or locations instead of randomly searching huge sections of the ocean. This can save a massive amount of time, especially during later exploration.
That is all for this guide. Additional Subnautica 2 guides are linked below:
- Where to Get Silver in Subnautica 2
- How to Digest Food in Subnautica 2
- Subnautica 2 Upgraded Tools Guide – How to Get
- How to Increase Inventory Space in Subnautica 2
This concludes our Subnautica 2 Beginner’s Guide. If you want to add anything to this guide, feel free to use the comments section below.