In this Super Smash Bros. Ultimate Ken Guide, we will guide you on how to play if you choose Ken as your character of choice in a fight. We will highlight all the moves that are specific to Ken, plus his defending moves, special moves and his final smash. In addition, this guide will also give you a better understanding of his moves, for if you find yourself fighting against Ken.
This guide will focus on Ken’s attacks like neutral attacks, special attacks, and grounded attacks. We will also detailed the amount of damage each attack deals to an opponent. In the end, we will finish off with what his final smash looks like and what it does to your foe.
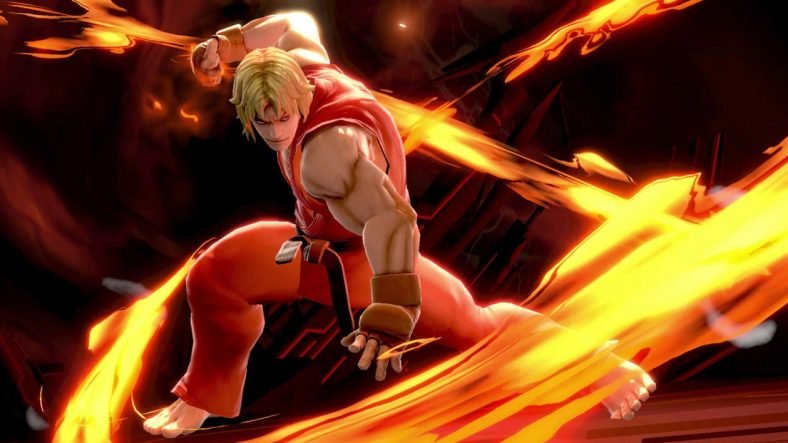
Super Smash Bros. Ultimate Ken Guide
Below we have listed all the attacks that are specific and special to Ken. Refer to each attack for a better understanding of how Ken combats in the stage.
Introduction
Ken comes with specialized mechanics that truly represent the combat of Street Fighter series. Ken comes equipped with many range of attacks, several of which have varying strengths depending on how the moves are executed.
Ken is not a lightweight fighter, and falls in the heavier categories of combatants in the game. Most of Ken’s moves sets come from the Street Fighter series, that has now been included in Super Smash Bros. Ultimate, with the same game plan applied to it.
Having said that, Ken comes with several of his signature Street Fighter combo attacks, that are specially powerful against grounded foes, allowing chained light attacks to finish with strong blows.
Grounded Attacks
This section of the guide contains all the grounded attacks that Ken can perform while on the stage.
Neural Attacks
Ken has three Neutral Attacks. The first is the Standing light punch that deals 1.5 damage, that can be followed with the Target Combo that deals 1.5, 1.5, 1.5, 5 damage, where this attack is three hit sequence that begins with a jab, transitioning to a right handed body blow, and finishing with a left hook.
The third neutral attack is the Inazuma Kick that deals 6, 6 damage, where he kicks the with his leg pointing up, and then transitioning to an axe kick. This attack works best as an anti-air or horizontal poke, being moderately effective against enemies coming from straight ahead or from above you.
Dash Attack
This attack deals 12 damage, where Ken delivers a flying kick, that will launch opponents up and away. The launch works in two ways, if you time the kick perfectly, the opponent is launched way up and far. But if the attack hits very late in the move, then the opponent is just launched straight up.
If Ken’s Dash is dodged or blocked, it leaves him vulnerable to retaliatory attack. However, it is fast paced and if you space your attack correctly, it can give you very good results.
Smashes
Ken has three smash attacks.
Side Smash
This attack is a standing hard kick that deals 16 damage. Ken delivers a heavy spinning roundhouse kick to the opponent’s body. It has high damage and decent range. However, this attack can leave Ken vulnerable if shielded or dodged.
Up Smash
This is a crouching hard punch that deals 17 damage. In this uppercut punch that is familiar with Ken, the opponent is launched in the air. This attack also works great against airborne enemies but is not cancelable.
Down Smash
This is a crouching hard kick that deals 16 damage. Ken sweeps the floor with his legs in front of him which knocks enemies away. This is high risk attack since it only covers one angle in the front, and that it can be cancelled, leaving Ken vulnerable from above and behind.
Defensive Attacks
Ken has two Defensive attacks. The first is the Ledge Attack that deals 10 damage, while the second is the Wake-up attack that deals 7 damage.
Tilts
Ken has seven different Tilt Attacks.
Up Tilt Tap
This attack deals 2 damage, where Ken performs an elbow strike that pops enemies airborne. This makes it a versatile attack, as it is a chainable move that can be followed by other moves in succession. This move is also an anti-air, that can be followed by a light kick or a heavy Shoryuken
Up Tilt Hold
This attack deals 12 damage that is strong uppercut, signature Ken move from the Street Fighter series. This uppercut launches opponents high in the sky and is an incredibly effective move against incoming airborne enemies. What makes this better than other tilt attacks is that it can be cancelled, which makes it less risky when the move is about to be shielded or dodged
Side Tilt Tap
This attack deals 6.8 damage, where Ken delivers a leg trust right into the middle of the opponent’s body and launching them in the air. This attack is also cancelable if it is about to be dodged or shielded.
Close Side Tilt Tap
This attack deals 6 damage hits with his right elbow to the opponent, this is also a cancelable attack.
Side Tilt Hold
This is the Standing hard punch that deals 10 damage. If you connect with first portion of the move, it will deal the maximum damage. However, it lack speed, and cannot be cancelled, with not much range to it.
Down Tilt Tap
This attack deals 1.6 damage, where Ken attacks at the enemy’s foot with his own. This attack is a chainable that can be followed with combos. The following attacks can be cancelled which can make it a very effective move to initiate an attack with. This tilt is also a low profile attack, which means you can also dodge straight attacks above you.
Down Tilt Hold
This attack deals 7 damage, where Ken crouches low and attacks at the feet of enemies with a far reaching foot thrust. With the features of being cancelled, and having range, this is a very good attack to have. Once an enemy is hit by this attack, they pop up in the air, providing many combo opportunities.
Grabs
Ken has 5 Grab attacks. The firs is the Grab attack that deals 1.3 damage. Next are the Front and Back throw that deal 9 and 12 damage respectively. Finally, the Up throw deals 8 damage, while the Down throw deals 6 damage.
When Ken grabs an opponent, it can followed by any of the four attacks you wish from him. While the Front and Back throw are obvious and deal more damage, the Up throw launches opponent directly above, and the down throw allows for a slightly further throw in the air that cane be followed up with combos.
Aerial Attacks
This section of the guide will cover all the Aerial attacks that Ken has.
Neutral Air Attack
This attack deals 8 damage, where Ken extends a quick kick in the air, that is best used as air to air or air to ground attack with decent range. It requires you to be accurate as it is a short attack, but it allows for a quick follow up with jumping neutral attacks, and effectively making it a safe poking option.
Forward Air Attack
This attack deals 14 damage, where Ken delivers a jumping hard kick attack from the air. It deals decent damage and has a high damage sweet spot around his extended foot, making it a very good descent attack while fast falling on an opponent.
Back Air Attack
This attack deals 16 damage, where Ken jumps into the air, and brings down a rear roundhouse kick. This is his back air attack that gives out the most damage in any other aerial attack that Ken has.
Up Air Attack
This attack deals 6.5 damage, where Ken quickly performs an aerial crane kick, thrusting his right leg into the air. This incredibly fast aerial air to air move is a staple attack in your arsenal when it comes to aerial combat. Since this attack is designed for opponents that are above you, it is great for taking advantage of juggling falling opponents, giving you good air to air option.
Down Air Attack
This attack deals 21 damage, where Ken descends onto an opponent with a fierce fist thrust, striking them down. This can be followed by many other attacks which is the only thing that makes it special about this move.
Special Moves
Ken has 4 special moves. All of them are detailed below. Ken’s Special moves usually come with three levels of power and damage., and each depends on what attack you choose. Each of his of special move comes with three level of strengths: Weak, medium , and strong.
With a short hold, your move activates quickly but leaves you less vulnerable. But if you hold the attack long, it is more powerful and has longer reach.
Neutral Special – Hadoken
This attack deals 4.5 (5.6) / 5 (6.2) / 5.5 (6.8) damage, where fires hi signature fireball energy wave straight ahead. This attack comes in three strength variants that depend on how long you hold before releasing the attack.
The longer the Attack button is pressed when performing Hadoken, the faster and stronger the projectile becomes. The light version generally provides the most utility since, more often than not, slow-moving projectiles are more difficult to deal with. Hadoken is one of your best edge-guarding attacks, as it puts out a dangerous obstacle for a recovering foe to get past while they try to break your edge-guarding posture.
Side Special – Tatsumaki Senpukyaku
This attack deals 6 (6.9) / 12 (13.9) damage, where Ken becomes a human hurricane, flying forward with a flurry of spinning kicks. Tatsumaki Senpukyaku is a multi-hit, multifunctional hurricane kick. It can be used as a gap-closing horizontal-mobility option, a combo-finisher, and an escape.
The longer the Attack button is held, the farther you travel and the more damage you deal in total, assuming all of your kicks connect
Up Special – Shoryuken
This attack deals 13 (15.6) / 14 (16.8) / 15 (20) damage, where Ken flies into the air with a jumping uppercut, also known as the Shoryuken. Ken’s iconic uppercut special doubles as an anti-air and ledge-recovery tool. Shoryuken power level determines the height Ken flies into the air, as well as the total damage of the attack. Like Hadoken and Tatsumaki Senpukyaku, the longer you hold the Attack button upon executing the attack, the higher the resulting power level
Shoryuken is an outstanding anti-air that deals an incredible amount of damage, but can be considerably dangerous to use. While descending from the attack, Ken is almost completely helpless—you can modify your trajectory slightly, and you’re vulnerable to reprisal until your feet hit solid ground. A misplaced Shoryuken off a ledge can mean your death, so mind your surroundings
Down Special – Focus Attack
This attack deals 12 / 17 (max charge) damage, where Ken swings his leg back, posturing and charging up a powerful kick while becoming resilient against an incoming attack. This attack can be cancelled which adds an extra offensive dimension in your attack list. Against a shielding opponent, you can cancel your jumping and grounded normal attacks with Focus Attack to bait the opponent into counterattacking, then release the Focus Attack when their hit is absorbed.
Nata Otoshi Geri
This attack deals 10 (15 with Inazuma Kick) damage, where Ken does a swift two hit reverse heel kick. This attack ahs the ability to transition into an Inazuma Kick if the attack button is held down.
This follow-up version of the Inazuma Kick differs from the normal neutral attack hold in that it deals much more block damage, making Mata Otoshi Geri most effective as a block string ender in order to punish your opponent’s shielding habit with a potential shield-break stun.
Oosoto Mawashi Geri
This attack deals 10, 10 (Inazuma Kick) damage, where Ken delivers a powerful roundhouse kick to the opponent’s face, sending them flying away. Like Nata Otoshi Geri, this roundhouse kick can only be done with a special command and also works the same.
The most notable difference is that it knocks enemies farther away on hit. The Attack button can be held upon execution to transition into a shield-breaking Inazuma Kick. Both Nata Otoshi Geri and Oosoto Mawashi Geri are best used as special cancels from Ken’s normal attacks
Final Smash – Shippu Jinraikyaku / Shinryuken
Ken twirls around, then rises with Shinryuken, dealing damage to opponents by tossing them into the air. If the opponent is close to Ken, the attack becomes Shippu Jinraikyaku, instead unleashing a flurry of kicks.
For other characters, check out our Super Smash Bros. Ultimate Characters Guide.
Read more Super Smash Bros. Ultimate Guides.
- Super Smash Bros. Ultimate – Beginners Guide
- Super Smash Bros Ultimate Assist Trophies Guides
- Super Smash Bros. Ultimate Items Guide
- Super Smash Bros. Ultimate – How to Unlock Characters Quickly
- Super Smash Bros Ultimate Poke Balls & Master Balls Guide
This concludes our Super Smash Bros. Ultimate Ken Guide. If you want to add anything to this guide, feel free to use the comments section below.