This GTA 6 Gameplay Settings Guide covers the best settings to make your gameplay feel smoother, more responsive, and comfortable. From changing the controller layout and improving aiming accuracy to adjusting the camera, display, and accessibility options, these recommendations will help you get more control over the game.
Gameplay Settings Guide – GTA 6
While you may prefer different settings, the following settings will make your experience as close to the classic GTA experience as possible.
Switch to the Classic Controller Layout
One of the first changes worth making is the controller scheme. GTA 6 uses a different default layout from previous Rockstar games, which may feel unfamiliar if you have spent years playing GTA V.
The default controls are:
- L3: Run
- X: Jump
- Circle: Crouch
- Square: Melee
If you prefer the traditional GTA controls, switch the control scheme to Classic. This restores the familiar layout:
- X: Sprint
- Square: Jump
- Circle: Melee
- L3: Crouch
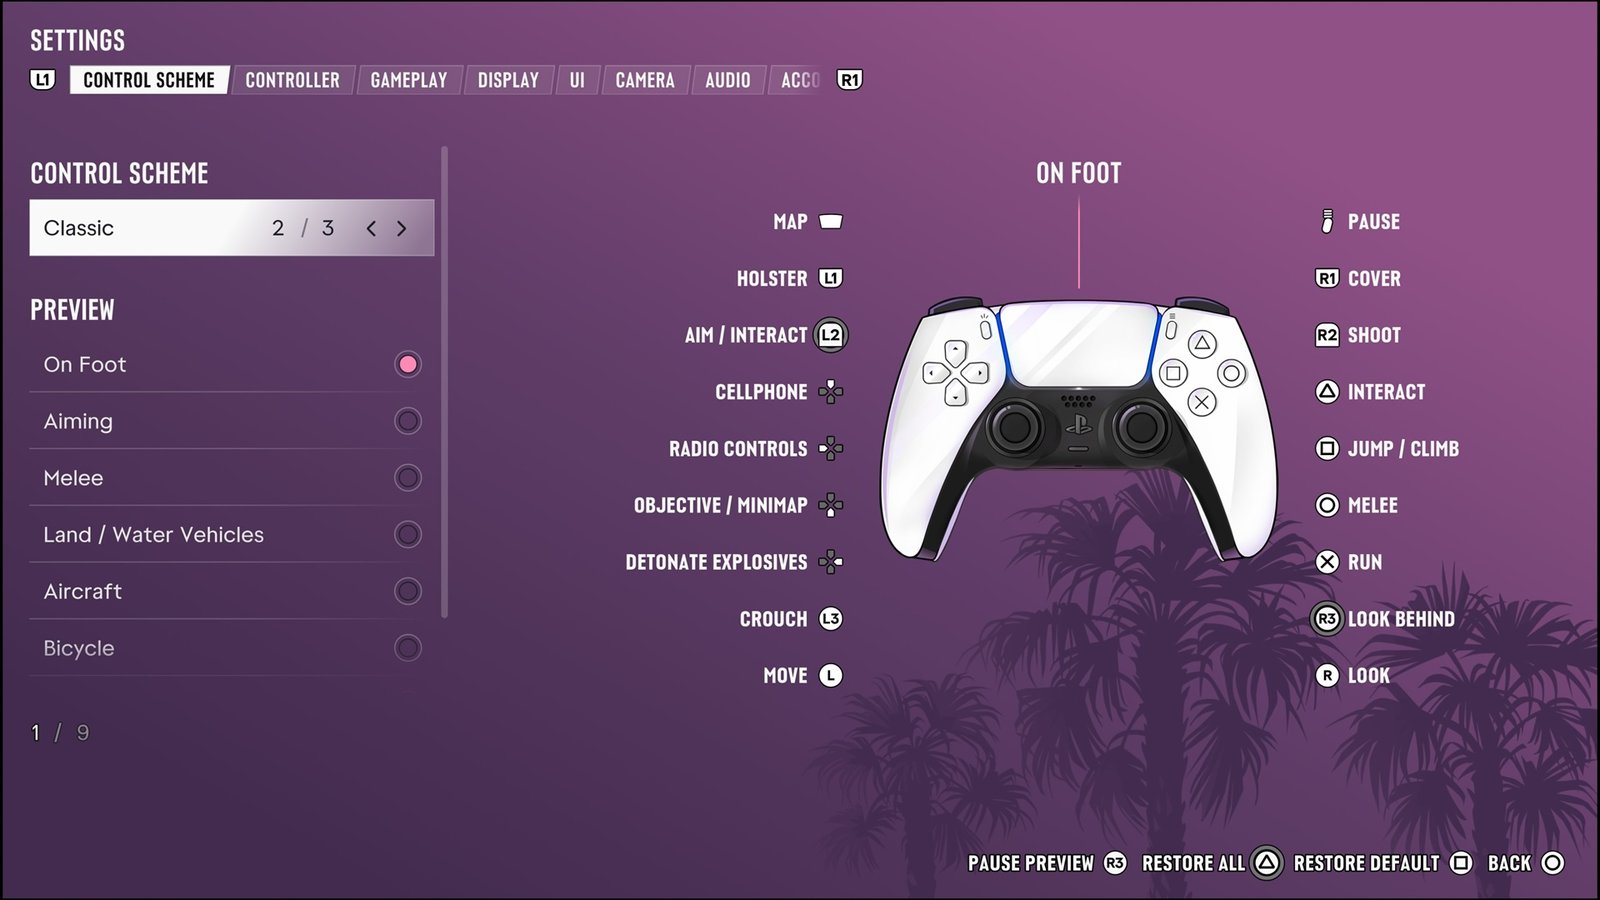
This layout may feel more natural if you are used to GTA V. However, it does require repeatedly pressing X to sprint.
Increase Your Aim and Look Sensitivity
The default camera and aiming sensitivity can feel quite slow, particularly when you need to turn around quickly during combat.
Increasing sensitivity allows you to move your camera faster, react to enemies more quickly, and maintain better awareness of your surroundings.
You don’t necessarily need to set everything to maximum. Start by increasing the values and adjust them until you find a comfortable balance.
The recommended approach is to:
- Raise your look sensitivity so you can turn around more quickly.
- Increase your aim sensitivity to make targeting more responsive.
- Adjust acceleration rather than leaving it unnecessarily high.
Set the Aim Response Curve to Linear
GTA 6 introduces an Aim Response Curve setting that controls how the game responds to your analogue stick movements.
Different curves change how quickly your aim moves depending on how far you push the stick. For example, some settings make small movements slower while increasing sensitivity when you push the stick further.
The recommended option is Linear. With Linear selected, the game responds consistently to your analogue stick input. Whether you move the stick slightly or push it all the way, the response follows the same input pattern.
Adjust DualSense Controller Features
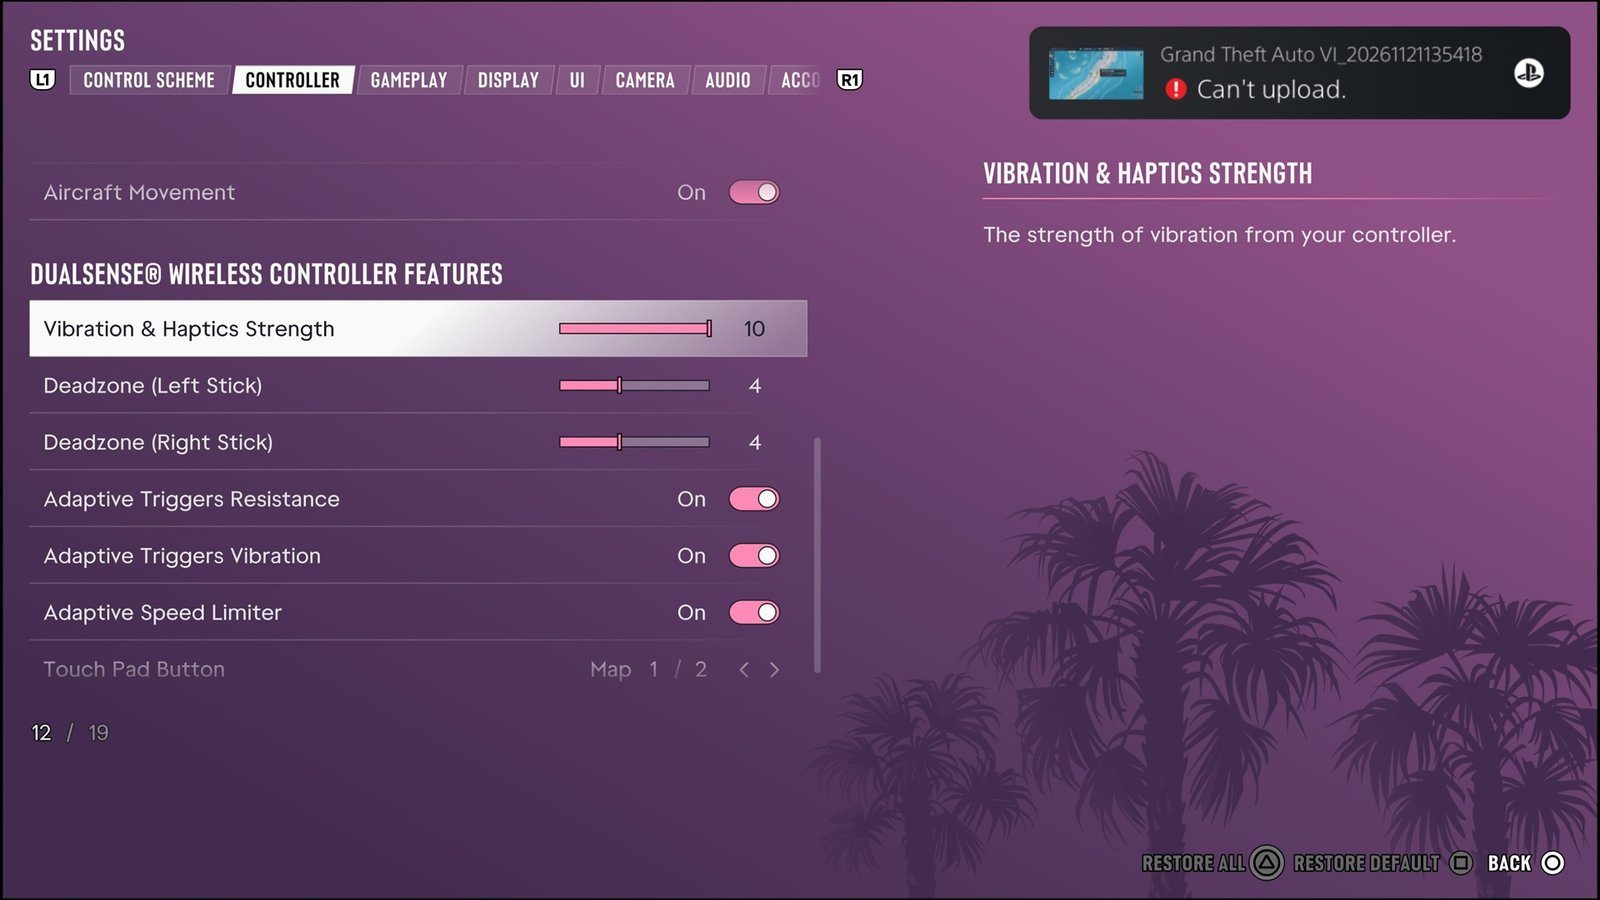
If you are playing on PS5, GTA 6 includes several settings specifically for the DualSense controller. These options can affect how responsive the controls feel.
Recommended DualSense adjustments include:
- Vibration and Haptic Strength: If you prefer a controller without vibration, turn this setting off. However, this is entirely personal preference, so you can leave it enabled if you enjoy the feedback.
- Stick Dead Zones: Dead zones determine how far you need to move an analogue stick before the game registers your input. The default value is four; try lowering it to two or three to make aiming more responsive and avoid setting it to zero. Even minor stick drift could then affect your gameplay because the game would register very small movements.
- Adaptive Triggers: The adaptive triggers add resistance when performing actions such as firing weapons or lifting weights. While this feature can make certain interactions feel more realistic, it may also slow down your response when using the triggers.
Change the Touchpad Button Function
The DualSense touchpad has an important setting that can make switching camera perspectives much easier.
By default, pressing the touchpad opens the map. This can be inconvenient for players who are used to changing camera views with a single button press in GTA V.
You can change the touchpad function from Map to Camera. After making this adjustment, pressing the touchpad will cycle through the available camera perspectives.
The downside is that you will no longer be able to open the map with one touchpad press. Instead, you will need to press the Start button and select the map from the menu.
Choose the Right Targeting Mode
Targeting mode is one of the most important settings to adjust because it directly affects how aiming works during gunfights.
The table below shows three options offered in GTA 6:
| Targeting mode | How it works |
| Lock On | Automatically locks onto enemies and tracks them |
| Partial | Provides some aiming assistance without maintaining a full lock |
| Free Aim | Gives you direct control over aiming, with adjustable aim assistance |
The recommended option is Free Aim.
Unlike GTA V, GTA 6 provides aim assistance even when playing in Free Aim. This means you can still receive some help when aiming at enemies without allowing the game to take complete control.
You can adjust the Aim Assist Strength to control how much the game slows down your aim and guides it towards a target.
It is recommended to have a strength of 2. This provides some assistance while still requiring you to aim and control your shots yourself.
If you prefer a more skill-based shooting experience rather than relying on automatic targeting, this is a good setting to try.
Make Running Easier with Movement Speed
If you prefer the Classic control scheme but don’t want to repeatedly press X to sprint, GTA 6 has a useful movement option.
The Movement Speed setting determines what happens when you push the left analogue stick completely forward.
By default, this is set to Walk. Even when you push the stick all the way forward, your character will only walk unless you press the sprint button.
Changing this option to Run makes your character automatically run when you fully push the stick forward.
You can still walk by moving the analogue stick only partially. But with this setting enabled, you also don’t need to repeatedly tap X to sprint. Simply hold X to move into a full sprint.
Explore the Accessibility Options
GTA 6 includes accessibility settings that can make certain gameplay mechanics easier.
Two options worth knowing about are:
- Accessible Combat: Makes combat easier to manage.
- Reduced Vehicle Damage: Reduces the damage vehicles receive.
These settings can be useful if you want a less challenging experience. However, if you prefer the standard gameplay difficulty, you can leave them at their default values.
Adjust Motion Blur for a More Comfortable Display
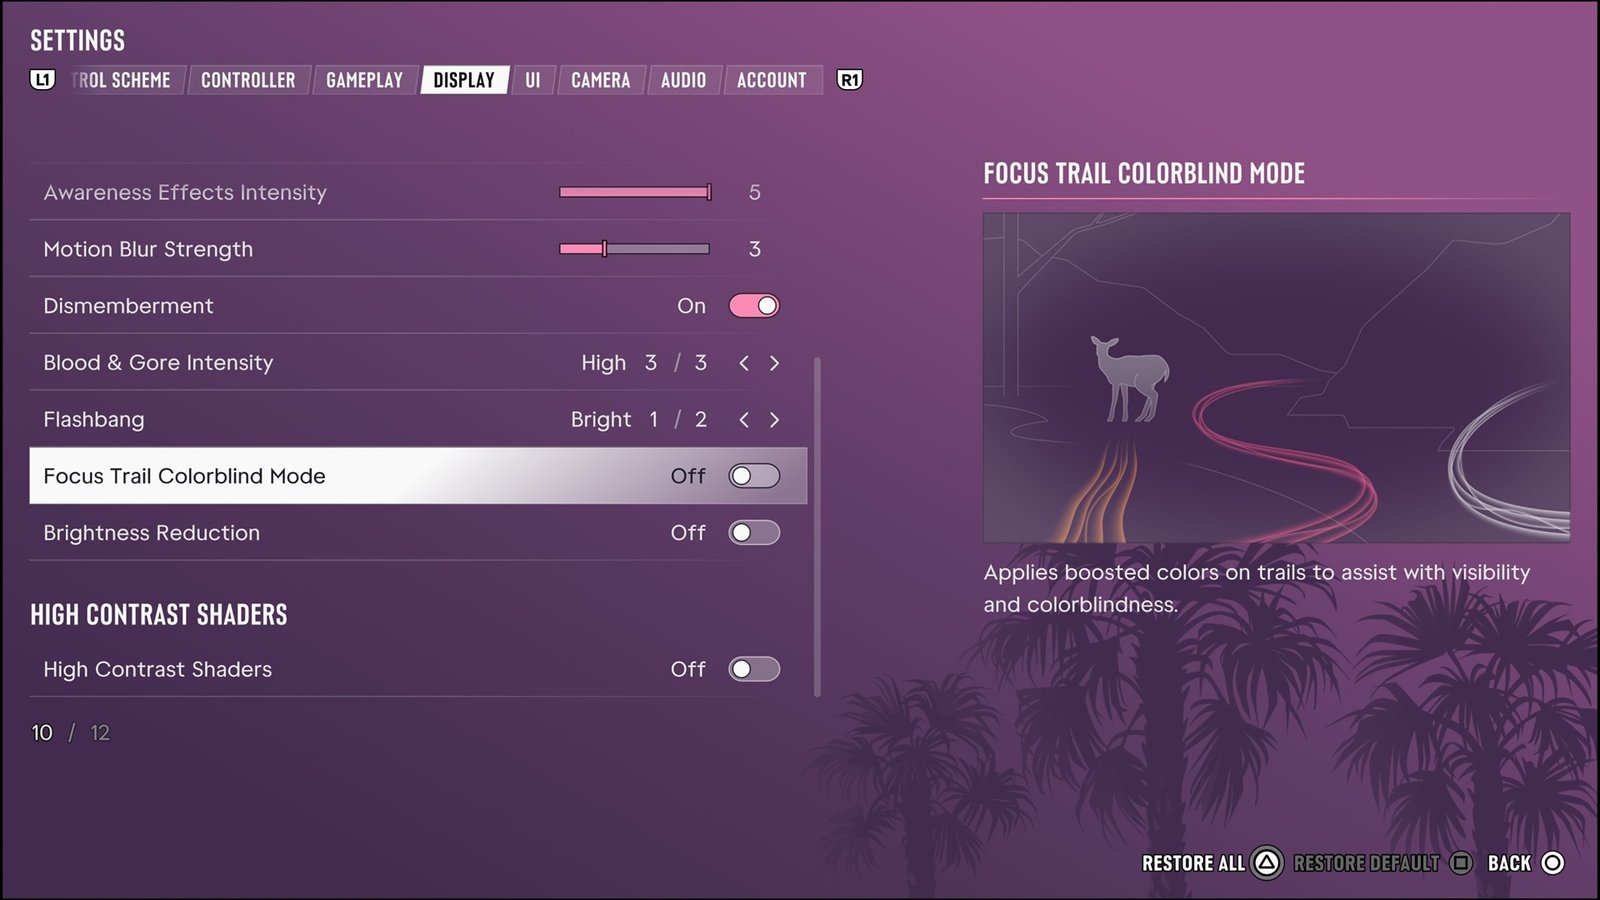
The main display setting worth changing is Motion Blur. GTA 6 runs at 30 FPS in the tested setup. When combined with higher camera sensitivity, completely disabling motion blur can make quick camera movements feel less comfortable.
It is recommended to keep Motion Blur at its default value of 3. Increasing it to the maximum can create too much blur, making it harder to see clearly when looking around. A value of three provides a more balanced result.
Increase the Subtitle Size
Under the UI settings, you can change the subtitle size from Small to Medium.
The default subtitles may appear too small, especially when trying to read dialogue while playing. Medium makes them easier to read, although this ultimately depends on your screen size and personal preference.
Choose a Suitable Reticule Style
GTA 6 provides four different reticule options, allowing you to decide how your aiming indicator appears on screen. The table below describes these options:
| Reticule option | Description |
| Complex | Changes the reticule depending on the weapon equipped |
| Simple | Uses a dot with a faint circle around it to show weapon bloom |
| Dot | Displays the traditional GTA V-style dot |
| None | Removes the reticule completely |
The recommended choices are Complex or Simple.
You should also consider reducing the reticule’s visibility, so it does not cover too much of your screen.
The suggested settings are to set Equipped Reticule Visibility to 3 and Aiming Reticule Visibility to 8.
Adjust Your Camera Height
Camera height controls how high the camera sits behind your character.
You can choose between Low, Medium, and High. However, the difference between Medium and High is relatively small.
Both options work well, but avoid using Low if you find that your character takes up too much of the screen.
Turn Off Weapon Sway, Camera Shake, and Camera Bob
Three camera-related settings are strongly recommended to disable:
- Weapon Sway: Turn off.
- Camera Shake: Turn off.
- Camera Bob: Turn off.
These effects add unnecessary movement to the screen and can make controlling your character less comfortable.
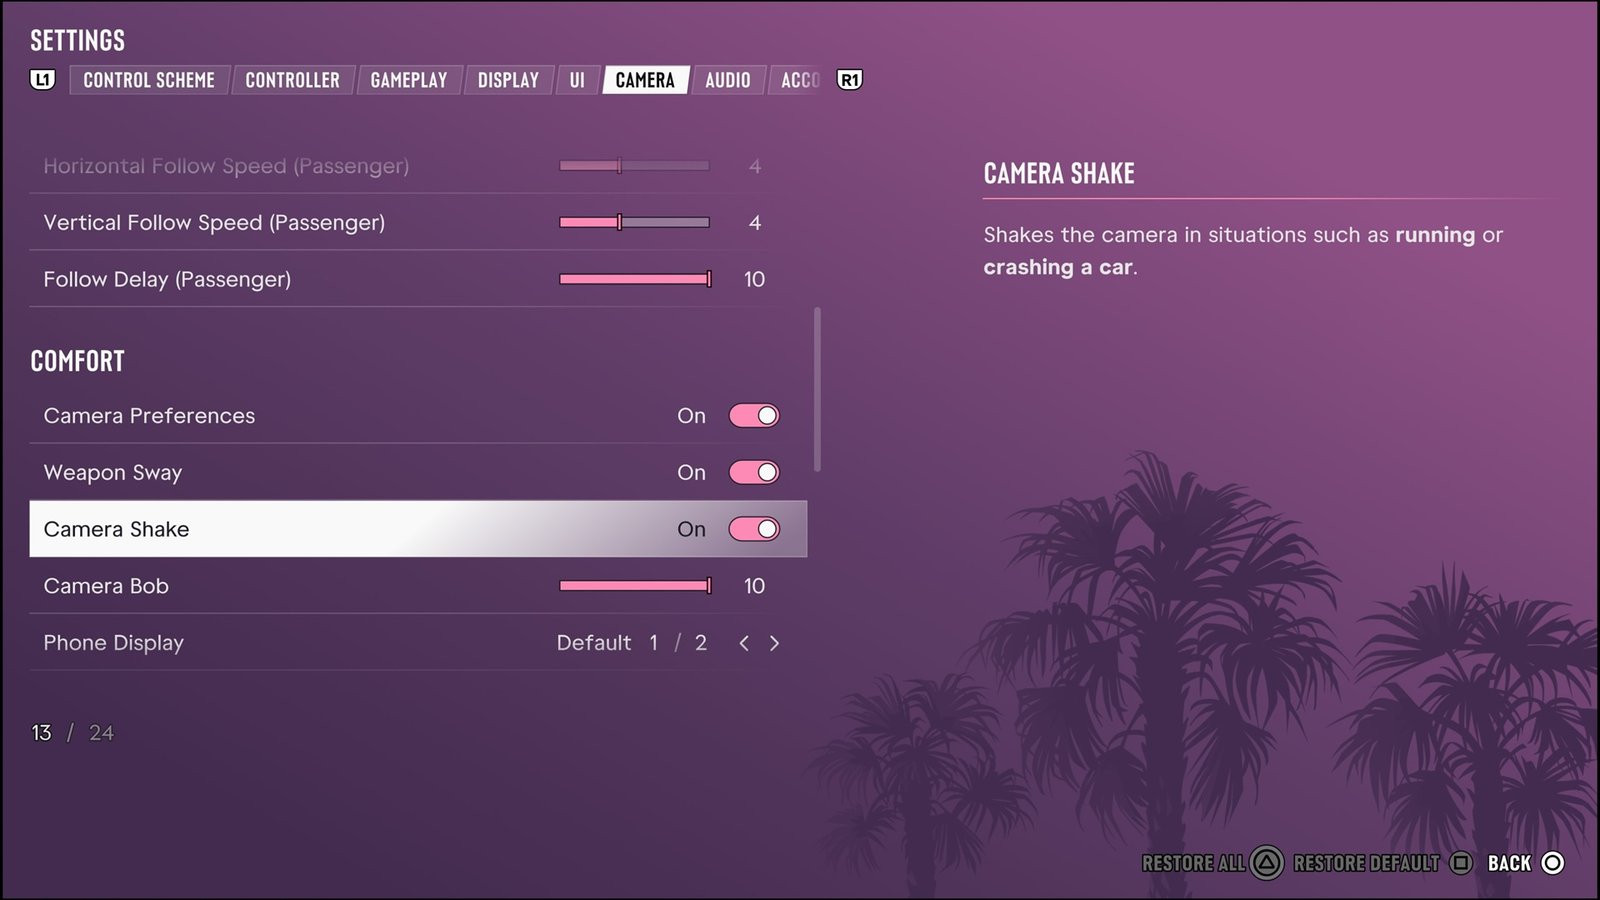
Camera Bob is particularly noticeable when sprinting because it causes the camera to move and shake along with your character. This can make the screen feel unstable and may even cause discomfort during longer play sessions.
Disabling all three makes the camera feel steadier and allows you to focus more easily on aiming and movement.
That is all for this guide. Additional GTA 6 guides are linked below:
- GTA 6 Cheats Guide – How to Use, Infinite Ammo, Money, Wanted Level, More
- GTA 6 Money Guide – How to Get Money Quick
- GTA 6 Fast Travel Guide – How to Travel Quickly Around the Map
- How to Complete Shirley’s Full Mission Chain in GTA 6
- GTA 6 Beginner’s Tips and Tricks You Should Know About
This concludes our GTA 6 guide on some of the best gameplay settings that you can use in the game. If you want to add anything to this guide, feel free to use the comment section below.