In this Sekiro: Shadows Die Twice Boss Guide, we will detail all the boss fights in the game, and how you can defeat all the enemies in the game. Though you can take on the enemy with your own way of combat, we have detailed the best tactics to win each boss fight.
We have covered all the other minibosses of the game in our Sekiro: Shadows Die Twice Miniboss Guide.
The bosses that appear in this guide are in order of the gameplay of Sekiro: Shadows Die Twice. Having said that, some bosses can be played in a different order depending on what area you visit first.
As with any boss in the game, its best to understand what pattern of attacks the enemy fights with. Going in without preparing will only get you killed in the most unimpressive way.
Preparations include upgrading your character to the best and collecting resources like health and armor items. This is why its best to look into all areas and collect such useful items and upgrades. However the only way you can level up your character is by beating bosses in the game. On that note, you should read this guide in order to defeat all the bosses in the game.
Sekiro Shadows Die Twice Boss Guide
Below we have listed all the bosses, where they are located, and how you can defeat each of the boss in the game.
Gyoubu Masataka Oniwa
Gyoubu Masataka Oniwa, can be found in the Ashina Outskirts, in the Ashina Castle Gate Fortress idol. The fight can be tough, but you can defeat this boss if you know when you strike the enemy.
The best way to deal damage to this boss is to wait, and block his attacks until he gets ready for his heavy strike. In the process of his heavy strike, he is rendered defenseless for about 2-3 seconds. This gives you enough time to strike him twice. Repeating this process makes the whole fight easier, and the best way to defeat Gyoubu Masataka Oniwa.
Though the previous method is the safest, you can also try a different method by grappling on to him when a green circle shows up on the boss. This stuns him for 2 seconds allowing you to strike twice again.
Beating this boss is pretty feasible if you can wait to strike at the best moment, and that is when he is either stunned, or preparing for a heavy strike. Repeat until you have taken his second life, and then grappled onto him to execute the General.
After you have defeated this boss, you will be rewarded with the Mechanical Barrel, and Memory: Gyounu Onia Strength Upgrade.
Great Owl Shinobi
This boss can be found in the Upper Tower Ashina Dojo in Ashina Castle. When you reach the rower rooftop, you get to choose multiple endings of the game. Go for the option that asks you to stay loyal to Kuro. This will begin the fight with the Owl.
The best way to take down the Owl, is to get behind him. you can do this by dodging his heavy attacks in the same direction they come from. Firstly, his heavy attacks leave him vulnerable for a brief period, and this is where you can attack him to deal damage.
When he goes for the sword attacks, dodge towards the same direction they come from. if he attacks from his left, dodge left. If he attacks from the right, dodge right. This will place you right behind him, leaving him vulnerable for a few Whirlwind Slash.
He also jumps high in the air, this is where you need to dodge forward twice to get behind him. It will give you enough opportunity to attack him.
If you do take any damage and want to heal up, you can use your Firecrackers to stun the Owl, and back up to heal. Though you should never keep a distance from the Owl otherwise, as he is very fast in following you around and slashing you with sword strikes.
In the second phase of the fight, he will throw poison and smoke. When he is about to use smoke, keep hitting him as it leaves him totally vulnerable. When he is using his poison, stay away and block his attacks until the poison clears away.
Other than the smoke and poison, his attacks are same, and the same dodging towards him and striking from behind will be enough to defeat the enemy. Once you have defeated the Owl, you will be rewarded with Memory: Great Shinobi attack upgrade, and Aromatic Branch.
Isshin Ashina
This fight happens in the Ashina Castle, Upper Tower, in the Ashina Dojo. It is triggered immediately after you defeat Emma.
Again, with this fight your first priority should be to use the same Shadowrush tactic that you used against Emma. From a distance, perform a Shadowrush and then jump backwards and away from the boss’ reach. This attack move is unblockable for the boss.
Isshin shoots a fire in a straight line that you can avoid by just going to the side, as this way they it will always miss. His most powerful move is when he summons fire in the whole arena. At this point, you should stand in an area where there are no flames, and then jump in his direction. This is because he will come rushing your with an attack chain that will kill you immediately.
Once defeated, you will be rewarded with the Memori: Isshin Ashina Attack Upgrade, One Mind Skill Combat Art, and Shura Ending.
Emma, the Gentle Blade
For this boss fight, Emma can be found in the Ashina Castle – Upper Tower in the Ashina Dojo. When you reach the rooftop, you get to choose a game ending. Pick the “Obey the Iron Code, Forsake Kuro” to start the Shura Ending and to begin the battle with Emma.
For this fight, you should have the Shadowrush Combat Art equipped. It is an overpowering move for the last two bosses in the game. the tactic you have to apply for this fight is to keep a distance from the boss, and use the Shadowrush and jump back to run away. Spam with the Shadowrush as Emma cannot block this attack. keeping a distance ensures Emma cannot reach you with her attacks.
Once defeated, you will now be able to fight the Isshin Ashina.
Folding Screen Monkeys
This boss fight will occur in the Senpou Temple – Main Hall, where from the Main Hall idol you need to interact with the altar. This is only available after you have defeated Genichiro Ashina in the Ashina Castle, then talk to the Divine Heir in Kuro’s Room at the top of the tower, and followed the smoke signals across the tower rooftops to find Ishin. It is only after this that you can interact with the altar, to take you to this location with the monkeys.
This battle is more of a catch and mouse combat where you need to locate the monkey and kill them. In total there are 4 monkeys that you need to defeat in this location. You are mostly on the rooftops of multiple buildings.
At the very start, you can take down the Invisible Monkey, who will be at the very start where you spawn. Take a few steps forward and then turn around to just attach the empty place where you spawned. This is where the Invisible Monkey will spawn. And you will be able to see it trip over some vases on the floor. Its best to just keep swinging until it shows up, and then go for the execution.
Next up is the Green Monkey who can be found straight across to the other side of the roofs. You can grapple to the tree in the middle to reach to the other side. In this direction, but not on the rooftops. Go to the ground level of this building, and then ring the huge bell with the note hanging next to it. when you spot the monkey sitting on the balcony straight ahead of the bell, ring the bell and it will stun him for a few seconds. This will give you ample time to grapple up to the balcony and execute him.
The third monkey is the Purple Monkey who can be found to the tower on the top left corner. The purple monkey is usually here but will run away when it sees you. Let him run away, as you need to turn the lights off to begin with. To do that, you need to open the door in the top left tower which will cause the lights to go out. Now you can chase the monkey around in the map by following the purple footprints until he goes back to the top left tower. Jump on him from the roof above for midair execution.
Lastly, the Red Monkey this is the monkey with the drum. You can chase him to a rooftop, then crouch and try to get behind him. sneak up to him and behind and go for an execution.
The rewards you get after completing this battle are Memory: Screen Monkeys, and Puppeteer Ninjutsu.
Guardian Ape
This boss is located at Sunken Valley – Bodhisattva Valley. The Guardian Ape is right behind the are where you fought the Gentipede Giraffe boss. The access to the big door where the boss is based is the Gun Fort Shrine Key that you find in Kuro’s Library in Kuro’s Room.
The Guardian Ape fights in two phases. The first is the normal phase, and the second is when he becomes headless and is more dangerous than before.
The first phase of battle with the Guardian Ape is pretty straightforward as it does not block any of your attacks and comes with one life only. However, he does go for some high damage grapple attacks that can take a huge chunk of your health away. Avoid them as soon as you see the red icon pop up.
In the first stage, your best strategy is to use the Firecrackers to stun him and then going behind him for several sword slashes. Stay away from using Combat Arts as they are very slow.
Another thing that the Guardian Ape does is that it staggers after the depletion of its health at certain numbers. This is at the 75% health, 50% health, and 25% health. When it staggers, you can continue the attack until it runs off.
In conclusion, for the first phase of this battle, you should block its attacks, use the Firecrackers to stun it, and then attacking. Also attacking when it staggers. When its posture depletes, go for the execution.
The second stage is when the Guardian Ape becomes headless, thanks to your Shinobi Execution. But also no thanks as the Guardian Ape becomes harder than before. In the second phase, the Guardian equips a sword that it now uses to slash at you in a flurry of attacks. In addition, it also has a blood curdling scream attack that is always something to make you run for cover. Look out for the red icon that indicates an incoming scream, and jump away to gain some distance.
There are only 2 moves that give you an opening to attack. the first is when he is about to finish a chain of sword slashes by holding the sword high up in the air. Now you have to deflect this attack instead of blocking it, as it will stagger it and place you right under its belly. This is where you can hit several of your attacks.
The second move is when he leaps forward and does a single strike. You can simple jump over him in that moment and then land a couple of sword attacks before blocking again. All the other moves are dangerous and best avoided by keeping your distance.
His red terror blast scream is another new additional move in this phase of fight. If your terror gauge fills up, you die instantly. Have a Pacifying Agent consumable ready in your quick items so you can cure from this status effect, and also its best to stay away from its wide area of blast.
Once you have defeat the Guardian Ape, you will be rewarded with Memory: Guardian Ape Strength Upgrade, and Slender Finger Prosthetic Tool.
Corrupted Monk
This boss is located at the Ashina Depths – Water Mill, where it will be immediately after the O’rin boss you area.
This is one of the main boss in the game, and comes dishing out a lot damage with long range, complimented with a variety of attacks in its arsenal. In addition, his attacks are unblockable sweeps and stabs, while deflecting and blocking his attacks only break your posture.
The best way to tackle all of this is to have the Mortal Draw Combat Art, which deals unblockable damage and staggers the enemy. To buy this Combat Art, you have to go to the merchant in the Ashina Castle – Old Grave region. The merchant will sell it for 1200 money.
In the battle, deflecting or blocking the boss’ attacks are pointless. Instead you should lure him into attacking you by getting close, then dodge backwards. When he finishes the attack, it leaves him vulnerable for a few seconds and you can go for a couple of hits.
Repeat this by taking advantage of his missed chain of attacks. his jumps leave him vulnerable for a long time, so you should look to out to attack during this period.
Genichiro Achina
This boss can be found in the Upper Tower Ashina Dojo, in Ashina Castle. This boss comes right after you defeat the previous boss. In the room where you fought Jinuske Saze, climb through the window and up to the rooftop.
This boss fights in two stages. The first stage has two lives, while the second stage has one life. After his first two lives are gone, he will begin his second stage.
Your focus on the attack is to deplete his posture than looking to bring his health down. You should also have your Loaded Axe Prosthetic Tool with you as it will deal heavy posture damage.
Control the fight and do not allow him to use his bow. You can do this by staying close to him and just hammer away with normal hits so he cant even use the bow. The basic tactic is to hit him twice, then block his incoming attack by countering it, and then following up with simple quick hits. Repeating this step is enough to cause him enough damage to not allow his posture to recharge.
Every time he charges for an attack, it leaves him open for a quick hit. When you have his health down to 60%, his posture will drain very fast. This is your indication that you should begin attacks with your Loaded Axe. Keep bashing him with this axe, while countering his attacks in return.
You should pay attention to his thrust attacks, though he will never use them if you are close enough. When he has both his lives gone, he will return with a stronger version of himself and use thunder attacks. when he jumps in the air for an attack, always dodge to the left. The rest of his attacks are identical to the previous stages, and you can repeat the counter and quick hit spam until his posture breaks.
Defeating this boss will reward you with Memory: Genichiro Strength Upgrade, Bloodsmoke Ninjutsu
Lady Butterfly
This enemy can be found in the Hirata Audience Chamber in Hirata Estate. You reach this place immediately after defeating the previous boss Juzou. He was guarding the entrance to this place.
Here an archer will be waiting, and behind him will be a floor pad that you can interact to. This is the path that you need to go to, but its locked. To open it you need the key you get when following the path after the Shinobi Hunter boss fight. On the path you will end up meeting a friend in a burning courtyard who gives you the key. With the key you can open the gate.
When you encounter Lady Butterfly, you should know that the battle commences in two stages. Though Lady Butterfly only has one life, she respawns after your first kill to come back again.
Her attacks have many various moves. You have to be very quick in dodging her attacks as she is very quick. You can practice a bit by dodging most of her attacks while dodging them as well. You should also have your Whirlwind Combat Art equipped before the fight to deal damage onto her. Now you should dodge and use the Whirlwind attack. Repeat this process until she dies for the first time.
Now you can actually deal a large amount of damage if you prepare before she respawns. Go back to the place where she first came from and stand behind her while she is respawning. This allows you to quickly attack her from behind straight away. with the same tactics as before, continue your attacks.
During the second phase, her attacks will include two more additional attacks. the first is that she will summon illusions to fight for her. You need to quickly run and jump behind the wooden pillars, and the ghosts will disappear. Her second attack variants are bright lights that she shoots towards you. You cannot block these, and are only avoidable by dodging.
She summons the illusions again, but you can run away until they disappear. Defeat the Lady Butterfly to be the victor in this battle.
After the fight you will be rewarded with Memory Lady Butterfly Strength Upgrade, and Sakura Droplet.
Guardian Ape Undying
This boss is located at the Ashina Depths Poison Pool, where it will be found after defeating the Corrupted Monk. It will be in the arena between the Poison Pool idol and the Hidden Forest idol.
This boss is just the same as the Headless Guardian Ape that you fought int eh second phase of the Guardian Ape boss battle. The only difference is that he is a lot slower, and has two health bars that deplete very quickly. That is mainly because you are more powerful than before.
His attacks are slow and does not attack much. This allows you to just block one of his consecutive attacks, then hit him with your sword slashes. He will call another ape for his help. This new ape is not that hard to defeat and dies off very quickly. He can be stunned with the Firecrackers and dealt with sword slashes.
When the second ape is gone, focus back on the headless ape. Repeat the same tactic by blocking then attacking. Once defeated, execute it another time by taking out the centipede from inside it, and executing it as well. This makes sure that the Guardian Ape truly dies this time.
Once this boss fight is complete, you will be rewarded with 2 Prayer Beads, Bestowal Ninjutsu.
Divine Dragon
This boss can be found at the Fountainhead Palace – Palace Grounds. Where from this idol or fast travel you need to head inside the next building to take the right turn to exit this building. From here you can grapple up some tree branches and follow the stairs until you reach a woman you can talk to begin the fight.
To defeat the boss, the first thing is to defeat all the white enemies. These enemies only use poison that you can easily dodge and does not deal a lot of damage. once you have killed all the white enemies, the Divine Dragon will spawn. Run sideways and get past its attacks and jump when you see its red icon of attack warning sign.
On the platform will be lightning that you have to grapple to when the boss is not attacking. this will give you a lightning strike that you can throw at a boss. repeat this step to deal a lot of damage to the Dragon.
When you are about to throw the last lightning spark, wait for the right moment when the dragon’s head is in front of you, and then release the lightning.
Once defeated, you will be rewarded with Divine Dragon attack power up, and Divine Tears.
Demon of Hatred
This main boss can be found in Ashina Outskirts – Outskirts Wall Gate Path. This boss can only be found after you have defeated the Divine Dragon in Fountainhead Palace. To get to the location where this boss is, you need to go to the Old Grave idol in Ashina Castle, and then take the stairs that lead you down until the bottom.
There will be a new bridge here that leads you back to Ashina Outskirts where you first fought the Chained Ogre. From here, backtrack to the direction of Dilapidated Temple, to the Outskirts Wall Gate Path idol. Here you can pray at a new idol, it will be blocked. Just pray at the idol and you will be teleported to this boss.
This boss is one of the toughest bosses in the game, as it has 3 health bars and can kill you with just two hits. In addition, it has many move sets in each phase of the fight. The most important thing is to fight aggressively and always stay close to the enemy. this is because it has a long range attacks that he can throw across towards you, even if you are spacing yourself to heal.
The trick in getting close and landing a few hits is to run to the right side and keep running while the enemy does an attack animation. It will swing its fire melee attack around but if you are really close to it and just run to the right it was always miss you. It usually take s a 2 to 3 second break after finished one of its attacks, giving you sometime to hit the Demon.
Here are the moves that the Demon of Hatred has:
Jump Blast: This is when the boss jumps high in the air and it will blast everything with a big radius. An indication when it is about to jump is when its body starts to burn all over. Run away when you see this happening. When the boss lands, grapple towards it and land a few hits.
Sprint Attack: this move is when the boss sprints towards you , with a red icon warning. You should always jump to the side. Its best to time your jump right when you see the red warning icon. This is an attack that the boss throws at you when you hit it more than three times. This attack can really throw you off if you spam too long with your hits.
Melee Attacks: all the boss’ melee attacks can be dodged easily, especially if you are sticking close and running to the right. It will miss all of its attacks. the fire arm spin is something that you need to stick really close, in order to avoid it. Though only its stomp attacks are something that you should keep your distance with.
Fireballs: in the first phase of the fight, the boss will use a sprint and then Fireballs attack whenever you are far away. when it does this, you should run towards the boss. this way you will remain under the trajectory of the fireballs as they fly over your head. Here you can also quickly get behind the boss to land a few hits.
Fire Floor: this move happens in the second phase of the fight where the boss casts a long line of fire on the floor. All you have to do to avoid it is to run to the side, and jump when it does this. This attack always follows after a sprint attack.
Ring of Fire: this move comes out in the third phase of the fight where it casts a big ring of fire that can trap you. Since you are running in circles anyway, this shouldn’t matter. If you are trapped in the ring, stay close to the boss instead as it always misses melee attacks when you are close to it.
Once you have defeated the Demon of Hatred you will be rewarded with Memory: Hatred Demon attack power up, 2x Lapis Lazuli upgrade material.
Owl Father – Great Shinobi Owl at Hirata Estate
This boss can be found in Hirata Estate – Hirata Audience chamber and is part of the Purification Ending. He is found in the same room that you fought Lady Butterfly in.
The best way to deal with this version of the Owl, you have to cleanly block until he goes for a heavy attack. which you can dodge. This will leave an opening for you to attack. keep attacking until he starts deflecting your attacks. Repeat this step until his posture breaks down.
You have to take advantage of his two slow attacks, which are the jump attack and the floor sweep attack. when you see him throw a black powder which are firecrackers, you need to didge forward and get behind the Owl as you miss the attack. Land a couple of hits quickly.
In the second phase of the fight, he will summon his Owl spirit animal where he also learns two new moves. These are the teleport and the fire owl. You can easily dodge the fire owl by jumping in the air when it comes flying towards you.
If you want to heal, stay out his sight by standing behind a pillar, or wait for him to miss an attack. Once you have defeated this boss, you will be rewarded with Memory: Foster Father, Aromatic Flower.
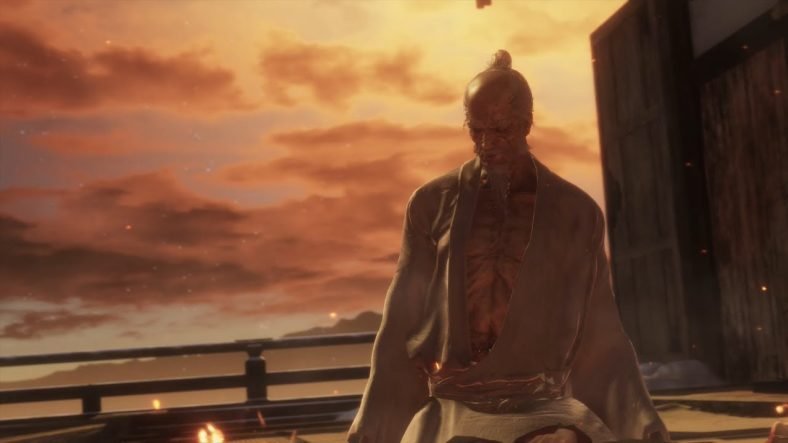
Isshin, the Sword Saint
This boss can be found at the Ashina Castle – Ashina Reservoir where he is the endgame boss. this is the final boss in the game, if you haven’t pick the Shura ending of the game. to get to this boss, go to the Ashina Reservoir and backtrack to the location where you fought Genichiro Ashina in the prologue. This is where you will find Isshin.
This boss fights in 4 phases, and you should go with 10 healing gourds, 3 pellets and 1 divine grass.
In the first phase you have to fight Genichiro in Tomoe form. He is easy to kill, and you have to run behind and attack from behind while he does his mortal blade move. This will break his guard quickly and you can go for an elimination once his posture is broken.
In the second phase of the fight is where you will fight Isshin. In this fight, you have to break his posture quickly, so always attack twice and then deflect his attacks. repeat this step. Once he deflects your attacks, he will eight do a 3 to 5 sword strikes or does a sweep attack. all you have to do then is run away to the left to get our of reach and then quickly get behind him. if he pushes you away, he is about to stab you, which you can counter by using the Mikiri counter when he does that to break his posture faster.
The third phase of the fight is all about running right and behind him to hit him once and then running away. this is the only way to deal damage safely, as any other will bombard with you long combo attacks. when you attack and run away, he will throw two ranged moves where he will shoot at you or jump at you. He misses most of this if you keep running.
Phase 4 of the fight is the same as the previous phase, and you should run in big circled and attack with a stab from behind after he jumps. Do not engage him from close range. Once he is defeated, you will be rewarded with Memory: Saint Isshin, Dragon Flash.
For more Sekiro: Shadows Die Twice guides, check out the links below.
- Sekiro: Shadows Die Twice Beginner’s Guide
- Sekiro: Shadows Die Twice Prosthetic Tool Upgrade Guide
- Sekiro: Shadows Die Twice Prosthetic Tool Locations Guide
- Sekiro: Shadows Die Twice Gourd Seed Locations Guide
- Sekiro: Shadows Die Twice Prayer Bead Locations Guide
- Sekiro: Shadows Die Twice Treasure Carp Scales Guide
This concludes our Sekiro Shadows Die Twice Boss Guide. Post your comments below.