Prince of Persia: The Last Crown features plenty of amazing yet challenging boss fights. As you progress in Mount Qaf, you will encounter various bosses and you will need to defeat them in order to progress in the main story. Each boss in the game comes with their own unique strengths and weaknesses however one thing is common for all battles i:e. they are tough as nails to beat. This Prince of Persia: The Last Crown Boss Battles Guide lists all bosses with tips and tricks on how you can easily defeat them all.
Boss Battles Guide – Prince of Persia: The Last Crown
This guide details all the main and mini-bosses found in Prince of Persia: The Lost Crown so if you are stuck at a mini-boss as well, this guide will help you defeat it easily.
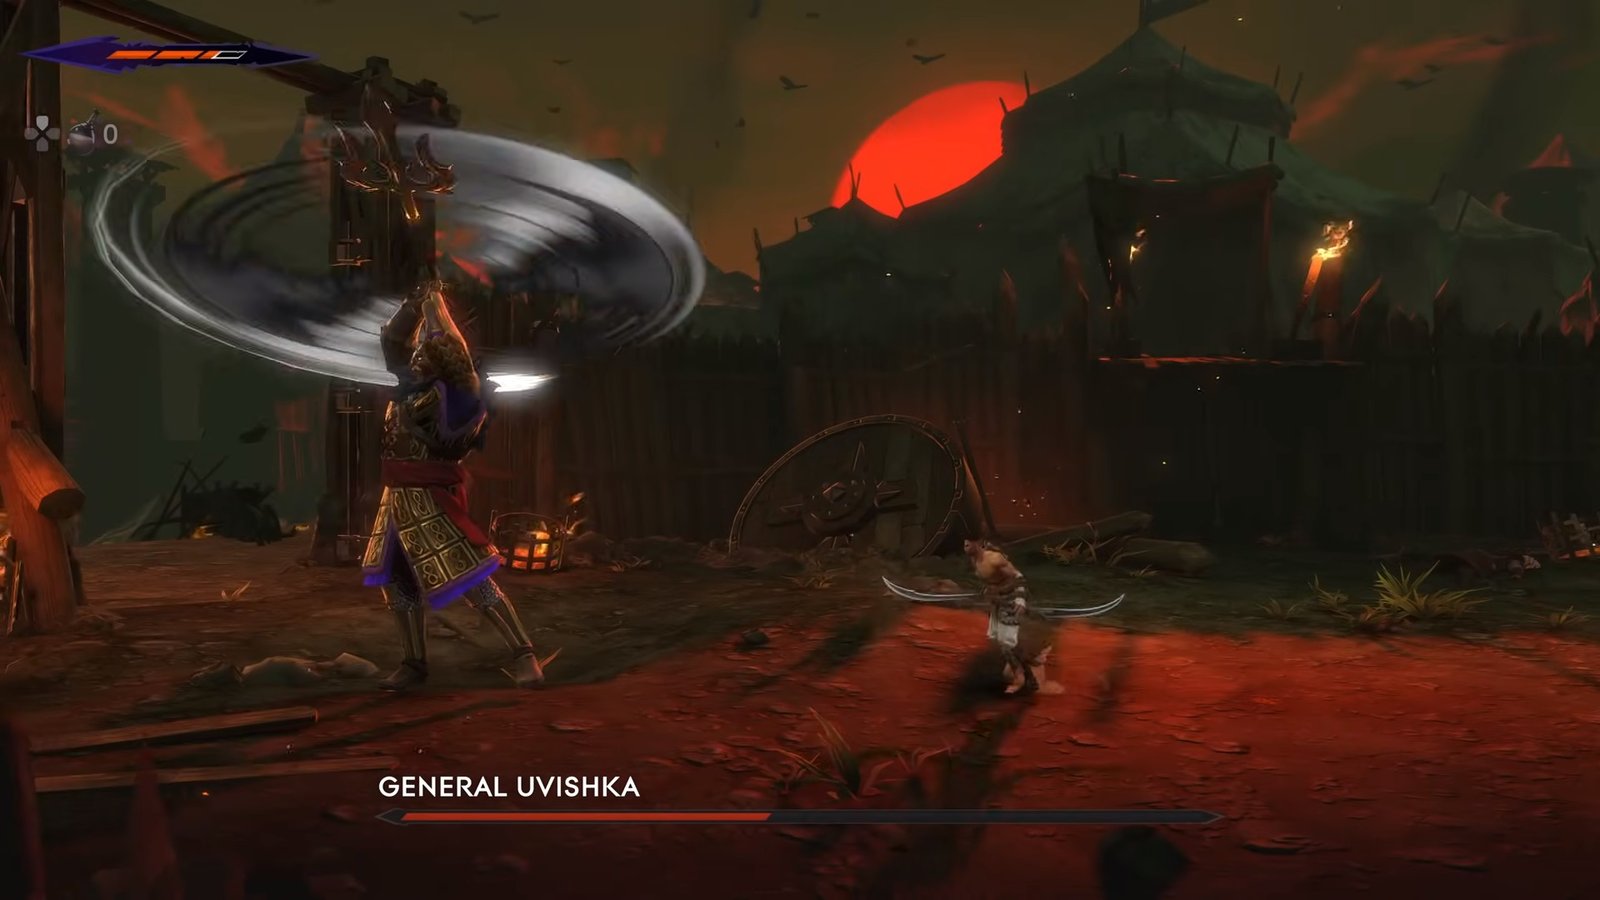
General Uvishka Boss Guide

When you start playing The Lost Crown for the first time, you are inside the first level which acts as a prologue. However, the prologue is a complete picture of the main game, and it comes with its own boss battle in the form of General Uvishka. Naturally, this boss is not that hard when compared with other bosses in the game because you have just started playing the game and you do not really have upgraded anything yet. Still, depending on your difficulty settings, General Uvishka can become a pretty solid boss battle.
Your fight with General Uvishka will take place in two forms. During his first form, General Uvishka is riding his horse, and he will move around on it. During this stage, his mobility is high, but his attacks are predictable. During this phase, you can block most of his attacks with a well-placed parry but watch out when General Uvishka jumps high from his horse and his eyes sparkle red because you cannot parry or block this attack. When he jumps up, dodge, or run away from the horse because a powerful slam attack is incoming.

His other attacks during this phase include a spear lunge which can be predicted when he lifts his spear and a forward slash attack for which he will pull on his horse’s reigns. If you are close to the horse, the horse will stamp its front feet or kick using its back feet so make sure you are ready to dodge these attacks. Both of these attacks are easily predictable because the horse will first lift its feet up and then attack. Keep landing attacks in the mix and when you have managed to get him to half of his health, General Uvishka will start running inside the arena on his horse. Soon, his eyes will spark gold and he will come in for an attack. Parry this attack and you will initiate a cutscene which will kill off the horse and make Uvishka come on his feet for the next phase.
During this phase of the battle, you need to watch out for the powerful slam attack which cannot be blocked or parried so make sure that you run away from the center of the attack when he goes high into the air and is ready to come slamming down. Apart from this attack, you can parry and block all of his attacks in this phase. Stick close to him, land an attack combo, and then go back to the other side to repeat. You can easily dodge the attacks or parry them so keep at it and soon, you will defeat him.
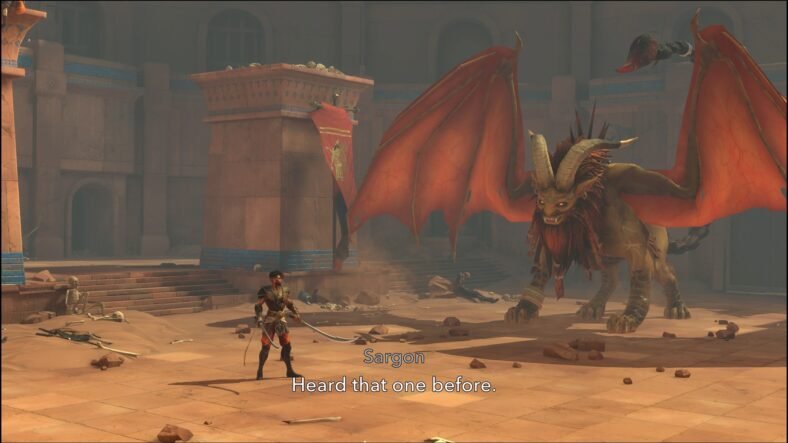
Jahandar (Manticore) Boss Guide
At the end of Lost in Mount Qaf Main Quest, you will have to face the dreaded Manticore or Jahandar boss which is a huge animal with the face of a lion, wings, razor-sharp claws, and a stinger filled with poison. After the previous bosses, this one starts to test your mettle in the game. Before tackling this boss, you must get some upgrades for yourself including the Potion Efficiency Upgrade as well as an additional Potion Charge from the Mage in the Haven. Equipping certain Amulets will also greatly aid in this boss battle including Horned Viper which reduces poison damage, Shield of Mithra, and Blessing which increases your base health.

Once you are ready to face the boss, head inside the arena and watch the cutscene where the boss arrives inside the arena. This boss battle is also a battle of your patience and quickness because while Manticore looks intimidating, you can still parry most of his attacks. For parrying his attacks, you have to be quick with your inputs as the window is rather low for them. You will also see that landing a full combo on the Manticore takes a lucky shot because it is quick on its feet and while it is not jumping around, it pushes through your attacks to land its attacks. Similar to all bosses in the game, you will get signs to judge incoming attacks.
When Jahandar raises its tail and it starts glowing green, a poison attack is coming at your location so make sure that you are quick to leave and remain on the move until the attack has landed. Do not touch the poison trail left behind by this attack or else you will be poisoned and will continue to take damage for some time. Another powerful attack comes from the sky when Jahandar takes off and goes out of the viewable screen. When this happens, look for the boss’s shadow and remain on the move until it comes crashing down with a powerful slam attack. Once it lands, it will take some time to recover so make sure that you use this window to land a combo or an Athra Charge at the boss.

The easiest-to-parry attacks are frontal paw attacks, but you need good timing for these as well. If you have Shield of Mithra equipped, parry the first paw attack which will slow down the boss and give you an excellent window to get back and land even more attacks before the boss recovers. One attack that gives you the opportunity for massive damage output is when Jahandar flies in the air and comes in for an attack with his eyes glowing gold. When it happens, parry the attack and watch the sequence for a powerful attack on the boss. When his health reaches half, Jahandar will go back to the top of the arena and return to the arena to kick off the second phase of the boss battle.
When he comes back, he will attack the ground with a powerful sting attack that can now pierce the ground and follow you around until the attack comes out of the ground beneath you. You can dodge the attack easily, but you have to be on the move. Avoid the poison left behind by this attack as well. Jahandar will also shoot multiple poison projectiles in your direction so make sure to parry them with good timing or jump/dodge out of their way. When you see it release a black orb in your direction, and unleash your arrows at it to destroy it quickly because it will make your boss fight a nightmare.

Keep at it and you will defeat the Manticore. Keep your Athra Surges stored and use them when you are cornered or want to break an incoming attack. Make sure that you parry attacks, and you should be fine. Avoiding the poison and the black orb are key elements of this boss fight because they will easily nip away your health no matter your difficulty. Look for good attack windows and use them fully to deal damage to the boss when you can, and you should have no problem defeating the Manticore.
Vahram (The First Encounter)
After certain story progression, you will encounter Vahram as a boss however this first encounter is always going to end up in a loss because this is how the main story progresses further. Continue to fight Vahram until you can, and you will eventually be defeated and progress in the main story.
Kiana the Forest Queen Boss Guide
Your next proper boss fight is Kiana the Forest Queen, and this is yet another challenging boss battle. Before you start this boss battle, make sure that you have upgraded your Weapons to +2, Potion Capacity and Efficiency to +2, and can equip the Rukhsana’s Gift, Gleaming Lion, Mount Damavand, or Will of Rostam Amulets. Having these amulets and upgrades will make this boss battle much more manageable for you. You come across Kiana the Forest Queen during The Path to the Sand Prison main quest after you have explored the Sunken Harbor and are making it into the heart of the Soma Tree.

Kiana is yet another boss that has a mount so you can expect that this boss battle is going to be a multiple phase one. Kiana’s mount is extremely agile, and you will notice fairly early in the fight when it starts attacking you from different angles. While it is in the background, notice the bright red eyes in the dark and when they appear, quickly dash to the side and once it appears into the foreground, quickly go back to it, and start attacking it. Land as many attacks as you can before it goes back into the shadows. Similarly, if you notice red eyes in the ground, the next attack is coming from that point in the ground so you must quickly move aside to avoid it.
When it comes out, it will shoot purple explosives at you so make sure that you quickly use your bow and arrow to destroy them. Avoid going directly under the boss from where it came out because it has to go back there, and it will use the same path. Another attack happens when the mount appears on one side of the map and a reticule appears over your body. This is an indication that Kiana is about to throw a spear at you with a powerful attack. This attack cannot be blocked so make sure that you are at your A game to dodge it when it lands.

Similarly, instead of gliding around, if the boss appears at one side of the screen and starts spinning her staff, get ready for another ranged attack. Kiana will throw her staff at you and depending on your skills, you can either parry this attack or just jump over it to avoid it. This is a two-way attack because the staff will go back toward Kiana as well, so you need to make sure that you dodge or block both times. During these attacks, keep landing attacks every time you get a chance to whittle down the boss’s health. When her health bar reaches the one-third limit, the mount will jump high in the air and let out a powerful howl which will turn the whole arena red.
When this happens, Kiana will appear on the ground, only to create more copies of her. When she does it, you must switch to defensive mode and try to block the incoming attacks. The copies are yellow, and they will attack you from either side so your best bet is to keep blocking and parrying the incoming attacks to your best. If you get a slow attack window, try to jump, or duck under the attacks depending on where they are coming from. As all of this happens, Kiana will appear at the top of the arena to land an unblockable attack from the air so make sure to dodge completely out of the way when this happens and quickly go back to her to land a few attacks before she can vanish again.

Keep at it for some time and pretty soon, you will return to the normal arena and the boss attacks will resume in a similar old pattern but this time around, the attacks are more powerful and varied. During this second phase of the boss battle, you will notice that sometimes the mount will come up empty for attacks and when it happens, Kiana will later come for her attack accompanied by her clones. Make sure to dodge out of the way and then quickly dodge again because when you attack Kiana, her mount will return to protect her. Her mount also supports her spinning staff attack by going to the opposite side and throwing it back with increased force and speed.
The worst addition to the boss at this point is the spear toss attack because during this attack, after throwing her spear, she will send her mount to the other side, go to it, and then make it charge at you while still spinning her spear in the air. This is a really difficult attack to dodge during the fight. In some situations, instead of going to the other side, the mount will remain on Kiana’s side and fire an energy beam from its mount while Kiana sends her spinning spear at you. To avoid this attack, you will need to jump and dash before going back to the ground. You may need to create a shadow as well to ensure that you remain in the air long enough.

During this phase, Kiana will also land a powerful attack with a golden sparkle in her eyes so make absolutely sure that you do not miss this chance and land a parry because it will allow you to deal a large amount of damage to the boss. Apart from dealing damage, a parry at this point will also stun the boss and you can quickly close the distance and attack them. Land as many attacks as you can and then get back. After this, you will once again find yourself in the red realm where even more savage clones will be waiting for you this time around. Make sure to turn to the side where the attack is coming from and block/parry it. Survival is important at this stage.
After this section is complete, you will return to the normal world and this time around, you will find the extreme variations of each attack. The mount will fire his energy beam even more this time around after all of the attacks, so you have to be at your best when it comes to dodging and jumping around. To stop this attack, you will either need an Athra Surge or attack the mount while being in the air. The spinning staff attack also features a continuous beam attack so you will need to be on the move continuously. This is the final phase of this battle and one that will really test your mettle, but patience will be rewarded in the end. Do not get greedy with your attacks, play it safe and you will soon defeat Kiana.
Azhdaha Boss Battle Guide
During The Darkest Soul main quest, you will come across another formidable boss called Azhdaha. Just like all other bosses in the game, it is important that you first prepare yourself for the upcoming fight. After breaking both seals in the region, make sure that you have purchased Weapons +2, Potion Capacity +4, and Potion Efficiency +3. The best Athra Surges against this boss are the Shahbaz’s Spirit and Arash’s Ray and if you have Gleaming Lion, Rukhsana’s Gif, Four Royal Stars, and Verethragna’s Wrath, use these Amulets for the fight. Once you are ready for the fight, head to the pit where you must face and defeat the Azhdaha boss.

Azhdaha is a god in the form of a giant serpent, and this means that despite the boss being huge in size, you will need to be tactful since the boss does not give you a lot of damage-dealing opportunities. After facing the boss, you will quickly notice that a lot of incoming attacks cannot be parried or blocked so you will need to dodge all of these attacks. Look for the red sparkle and when an attack comes after it, be ready to dodge or run away from your location. Shadow of the Simurgh comes helpful in this boss battle so make sure that you always leave a shadow in a far-off place so that you can quickly use the ability and reach a safe spot. In the beginning, the Azhdaha will attack with its fangs and tail so avoid all of these attacks.
After the initial flurry of attacks, the Azhdaha will stop for some time to get its bearings right and this will be your proper window to jump in and land some combos. Once this phase has passed, the Azhdaha will have its head high in the air which is where you will need to hit in order to land some damage. At this spot, the Four Royal Stars amulet and Shabaz’s Spirit will come in handy because both of them allow you to deal extra damage to enemies in the air and above you. Make sure to keep hitting the boss and avoid incoming attacks. In between the tail and fang attacks, the Azhdaha will open its mouth and sweep the entire area with a powerful energy beam attack. Use Shadow of the Simurgh to avoid this attack.

When Azhdaha screams and summons large pink orbs, they will start homing at you. There is no other way to avoid these orbs other than using Dimensional Claw on them as soon as you come in contact with them. This will cause them to explore without damaging you and you can also throw it at the Azhdaha’s head for some damage. Keep at it and soon the health will drop enough for you to trigger the second phase of the battle. You will notice it when Azhdaha becomes enraged and switches up its attack to more powerful versions. The most noticeable is the energy beam attack which will still sweep across the entire arena, but the beam creates crystals in its path which damage you if you land on them. Use Shadow of the Simurgh to create a point and then run to the opposite side in front of the beam and then jump, dash, and return to the clone as the crystals will break until then.
The boss’s tail will start throwing projectiles at you as well so make sure that you are avoiding them. Among them, the more annoying ones are the giant spikes that are faster, and they hit harder. During one attack, the boss will slam and burst its tail out of the ground and spin it quickly to shoot spikes in all directions. You can parry these spikes, so these are not that hard to avoid if you are good at parrying. Azhdaha’s Reckless Attack comes from the ground first and then from the head so you have to be very careful when you see those eyes glow golden because they are faking another attack.

When you see its eyes go golden, watch out for its tail because it will attack first with its tail with an attack that cannot be blocked or parried so you will have to jump to avoid this and then parry the fangs. Failing to dodge the tail will result in you getting hit by both the tail and the head attack which results in a powerful combo that takes away a lot of your health. After jumping over the tail, you must be ready to parry the incoming attack mid-air and this will result in a powerful attack that takes a good amount of Azhdaha’s life. Keep at it and you will eventually complete the boss encounter.
Orod Boss Battle Guide
Moving on with the story, you will come across Orod as another boss battle. Orod is your formal friend however the story has led to the point that Orod now considers you as a traitor and hence this battle commences. Since Orod is also an Immortal, it means that he has Athra attacks as well so need to be careful of those because they will deal a lot of damage to you. You will come across him during The Four Celestial Guardians Main Quest. Orod is also one of the few bosses in the game that do not come with a Reckless Attack which means that there will not be any opportunities in this battle to deal massive damage to the boss after just one attack.

Right at the start of the battle, Orod yells at Sargon and dashes towards him. His eyes will glow red during this attack which means that you cannot block or parry this attack. Simply jump over Orod and you can avoid this attack. The next red attack from Orod comes in the form of a ground smash where he will slide his weapon through the ground, jump up, and then smash back to the ground in a powerful AoE slam. At the point of contact, a wave is formed, and it will sweep across the entire arena. You must dash away from the slam as well as jump over the wave to avoid this attack. Next, Orod can also spin his weapon and throw it at the ground in your direction from the air. After reaching a certain distance, it will come back to Orod and if you are caught in either direction, you will get damaged.
This is also a red sparkle attack so you cannot really do anything about it but get out of the way and if you manage to get behind Orod, you will safely avoid this attack. In Orod’s combo list, his basic attack is the only one that you can parry, and this is a two-hit combo. Easily noticeable because he does not jump up during this attack and his eyes remain normal. Capitalize on this opportunity and make sure that you parry the attack and land as many attacks as possible. Since most of the attacks are unblockable, you will have to resort to dodging and avoiding the incoming attacks a lot. After every attack, you will get a small window of landing blows and combos so use them and you will eventually deal enough damage to push the battle into its second phase.

During the second phase, most of the attacks will remain the same as the first phase but they will have added moves in them. The ground smash from the first phase will now be buffed as Orod can pull himself toward your location while coming toward the ground to smash it. One new attack in the second phase is the spinning attack where Orod will dig his weapons into the ground and then perform a spinning attack. This attack has a large area of damage so your best bet to avoid is getting away from the main location as possible. In certain instances, Orod will also pull himself towards the weapon and if you are caught in it, you will be damaged.
Apart from this, Orod will stand on the spot and begin to spin his arms and weapons above his head to charge a powerful AoE attack. This is a multi-hit attack as Orod continues to spin his weapons for some time. If you are caught in the attack, you will continue to take damage while the attack lasts. You should maintain your distance during this attack. Another powerful attack from Orod comes when he randomly dodges your attack and goes to the middle of the arena and delivers a two-wave attack on the ground. To avoid this attack, you must remain airborne until the attack finishes because you will get damaged if you land while the attack is continuing. His final attack comes in the form of a cyclone where he spins on the spot and then splits into two and runs on the battlefield on both sides.

When it starts to happen, run to one edge, create a shadow, and then quickly run to the other side and then transform back to the clone to avoid the attack. There is no other way to avoid this attack. Keep at it and you will soon deplete Orod’s health enough that he will often attack while engulfed with his Athra. When this happens, avoid the attack because if you do get hit with such an attack, you will be unable to use your Athra Surges. Take every opportunity and window after attacks to land damage to Orod and you will soon defeat him.
Menolias Boss Battle Guide
Another former friend-turned-enemy, Menolias is another formidable boss that you will encounter during The Celestial Guardians Quest. Depending on your chosen path, you will either face Orod first or Menolias first, but you will need to fight both of them. Menolias is one of the toughest bosses in the game because of his speed. While most of the bosses hit hard, you can manage them just fine, but Menolias takes the cake because he not only hits hard but his attacks come blisteringly fast. He uses his bow in two ways just like you, one is for shooting arrows and the other is like a chakram. His attacks will combine both of them in the mix, so you have to be prepared for both attack types.

Menolias will often shoot a large red arrow which may have two variations. It will either come straight at you if while shooting a reticule appears on Sargon but if Menolias shoots the arrow in the air, it will go to the ground, sweep the arena, and then come back to the air. You can dodge this easily by seeing what type of arrow is coming and going out of its way. Next, Menolias can jump and shoot a few star-shaped projectiles towards you. You can dodge them or even better, parry them and use Dimensional Claw ability to send them back at Menolias. This is one of the strategies of fighting him where you must use his attacks against him.
Another projectile attack comes in the form of simple arrows. Menolias will jump in the air and shoot arrows at you which can be easily parried and if you are lucky, sent back at the boss to deal damage to him. Once you have dealt enough damage to the boss, you will witness a powerful attack incoming which initiates from a cutscene, and after it, a barrage of arrows will start falling from the sky. This marks the start of the second phase of the battle, and you will need to avoid as many of these arrows as possible to reduce the damage you take from the attack. You can rush, dodge, run, and do whatever it takes to avoid the incoming barrage.

For the second phase of the battle, Menolias will use his Chakram attack where he will throw it out at you and then it will go back at the boss as well. You can dodge or jump over the Chakram, but you cannot parry it. In this phase, Menolias will start actively counterattacking you during your combos. This will happen randomly, but you must avoid getting too close to him during his Chakram attack and while he is charging his attacks with a yellow aura around him. Apart from this, another change will be during his arrow attack as this time around, he will fire two separate volleys of arrows which you will need to parry or block in succession. Never attack Menolias by going close to him during this phase because his counterattack is pretty deadly, so your best bet is to stick to a distance and use his attacks against him as much as possible. Keep at it and you will gradually defeat this difficult foe.
Mini-Bosses
In this section of our Prince of Persia: The Lost Crown Boss Battles Guide, you will find tips and tricks on how you can defeat the mini-bosses in Prince of Persia. These are smaller bosses and do not pose much of a threat, but they are still tougher than normal enemies and you will need to be good around them to defeat them.
We are adding more boss battles to this Prince of Persia: The Last Crown Boss Battles Guide soon so make sure to check back soon!
That is all for this guide. If you need additional help with the game, check out the guides linked below:
This concludes our Prince of Persia: The Last Crown Boss Battles Guide. If you want to add anything to this guide, feel free to use the comments section below.