Testing Facility is the first chapter in Code Voilet and it begins with Violet finding herself inside a damaged testing facility lab, confused but alive. Your main focus throughout this chapter is simple: survive, gather essentials, fight off threats, and gradually unlock new areas until you finally escape outside. Crafting, exploration, and combat all play a role here, so take things easy and don’t rush. This Code Violet Testing Facility Walkthrough Guide will show you how to escape the Testing Facility successfully.
Testing Facility Walkthrough Guide – Code Violet
At the very start, you are beside your Cryo pod inside a rundown lab. Inspect the nearby pod and trolley to pick up healing pills and a datapad. Open Violet’s inventory and combine the Red and Blue Pills to craft a stronger healing item right away. This is a good habit to build early, as crafting is important for survival later on.
Before leaving the room, grab the flashlight lying near the exit. It will help you in the areas where there is no light.
Reaching the Waiting Room
Once outside the lab, you will notice a circular hallway. You can make a short trip here to gather basic resources, but do not stress about picking up everything, as there is limited inventory space. Focus on healing items, ammo, and currency.
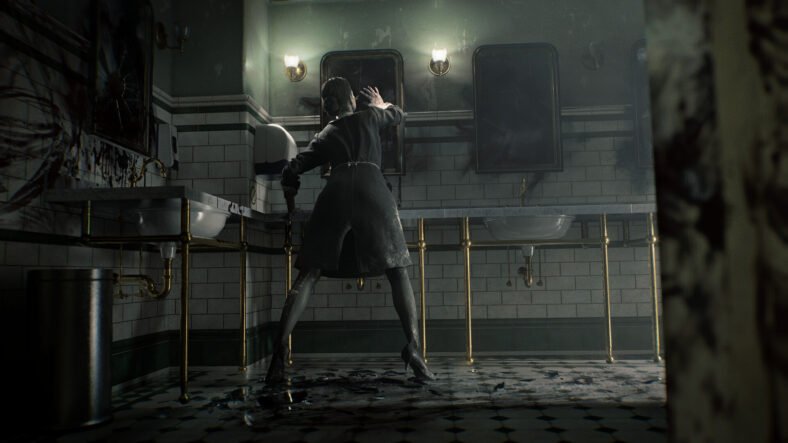
Go through the door named the Waiting Room. When you enter this room, the camera angle changes, and you are forced to run forward while Raptor enemies chase from behind. Keep moving until a scene triggers.
After the cutscene, Violet obtains a knife, a pistol, and a phone. Look around the room for ammo and supplies on desks and near walls. Smash breakable objects, such as urns/pots, with the knife when you see them, as they often hide useful items.
Exploring Connected Rooms
From the Waiting Room, several paths open up. Radiation Suppression room leads back toward the starting area, while others take you into Storage and Observation rooms. The Observation room is guarded by aggressive Raptor enemies that attack you on sight, so use your pistol to take them down before looting.
These rooms have stronger Raptor enemies that can cause Violet to bleed, making healing items even more important. Clear each room strategically, collect what you need, and avoid unnecessary backtracking.
Southern Corridor and Security Room
To continue progressing, head into the Southern Corridor from the Waiting Room. As you move through, you will notice blocked passages by blue lasers and security cameras. Some paths are not accessible yet here.
In the nearby Security Room, which is on the northeast corner, Raptor enemies will ambush you quickly. Eliminate them, shoot the security camera, and push forward until you reach a wider area. Again, a Raptor will appear here, so kill it. There you will see three more rooms. One of these contains a key required to unlock a previously sealed locker. After grabbing the key, backtrack to the Southern corridor and go to the room which is under the Security Camera to open the locker and claim a powerful new weapon. Be prepared because taking it triggers another enemy encounter.
From this point onward, combat becomes more frequent, so keep your stronger weapons equipped.
Maternity Wards – Level 1 and Level 2
Return to the main corridor and enter Maternity Ward Level 1. This section has six rooms: two on the left, three on the right, and the last one on the west, with narrow hallways on the left side of the Ward.
Upon entering the second right room, smaller Compsognathus enemies attack in groups here, rushing in and retreating repeatedly. Clear them carefully before looting. In the narrow hallways, you will again face these Compsognathus, but now in two groups, one fighting you from the front and the other from behind. Finish them off carefully.
Once you obtain the key from this ward, move on to Maternity Ward Level 2. This has five small rooms with three on the right and two on the left, and a locked door also. On your left, there is also a room that takes you to the Kitchen.
This Kitchen area introduces puzzle-based progression where you must complete a memory puzzle by copying symbol patterns shown on-screen. Finish all rounds to unlock the door and continue exploring.
While searching the kitchen, stay alert, Raptor enemies will drop in unexpectedly.
R&D Wing and Equipment Upgrades
From Maternity Ward Level 2, squeeze through a collapsed section at the southwest corner to reach R&D. Here, you will finally find an inventory upgrade that allows you to carry more items, making exploration much easier.
Nearby is an Armory where you can upgrade weapons using currency. Upgrade at least one weapon to move forward. Be mindful that spending too much now may delay future goals, so do not overdo it.
Now proceed through the laser-filled hallway using the Black Light tool. This will allow you to see the laser, which you can’t see with the naked eye. Time your movement carefully to avoid damage from lasers. At the end, you will see a laser wall that you cannot pass through. Disable the laser system by shooting the green glass pipe above, which clears the way forward and triggers a short scene.
Dressing Room and Lobby
After the scene, enter a Dressing Room with a portrait over it, which acts as a safe zone. Here you can save, store items, and customize Violet. Take advantage of this break before continuing.
Leave the R&D area and move into the opposite door, which leads you to the Lobby. This room connects to multiple future paths, but not all are open yet. Head through the Central Corridor, where you will immediately face another Compsognathus enemy group. Defeat them. From there, you have three exits. One which is locked, and the others which take you to the Greenhouse and Specimen Receiving Bay.
Greenhouse and Specimen Receiving Bay
Entering the Greenhouse is optional but useful for gathering supplies. Clear out hidden enemies among the plants before moving on. There, you will need to solve a keypad puzzle to get items.
The Specimen Receiving Bay is more dangerous, with Raptor enemies attacking as soon as you enter. After clearing them, explore the connected Emergency Monitoring room. Use the control console here to unlock access back in the Lobby for the Cargo Wing.
Rather than going out of the room, go to the nearby hallway on your left. You will encounter a flooded stairwell puzzle. On the left of this door, you will find four rooms with gauges and valves. Adjust valves in surrounding rooms until the gauges settle correctly and rest at green color, which drains the water and opens the lower level.
Below in the hallway, you will find a room and much loot. Move crates to reach new corridors and a high amount of loot. Make your way back to the Specimen Bay, where you will see that the Raptor, which was imprisoned, is now free. Go to the Lobby and kill him.
Cargo Wing and Final Rooms
Back in the Lobby, head through the newly unlocked Cargo Wing. You will find another Dressing Room and Armory, giving you one last chance to prepare.
Outside of this area, you will find two new rooms. One that takes you to the Laundry and the exit, which is on the northeast, and the other, which is on the south take you to the Large Specimen Extraction. On entering this specimen extraction room, you will see that it contains a large dinosaur corpse, which triggers enemies if you loot too much, so approach cautiously.
Come out of this specimen room and enter the Laundry room. Continue forward in the hallway and take the right before you hit the wall. After passing through, a short scene will play.
Final Objective – Finding the Truth
After the cutscene, it will allow you to loot the room and then take the exit door to leave the building. This will reward you with a trophy – Breakout.
At this point, Violet has successfully escaped the Testing Facility, marking the end of this chapter.
That is all for this guide. Additional Code Violet guides are linked below:
- Code Violet Outfits Guide – How to Unlock All Outfits
- Code Violet Earrings Guide – Where to Find All Earrings
- Code Violet Silencers Guide – Where to Find All Silencers
- Code Violet Preservation Facility Walkthrough Guide – How to Complete
This concludes our Code Violet Testing Facility Walkthrough Guide. If you want to add anything to this guide, feel free to use the comments section below.