This Resident Evil Requiem The Final Puzzle Guide details all the steps that you need to know to solve the most challenging puzzle in the game. The Final Puzzle in Resident Evil Requiem is a challenge that stretches across almost the entire story. It is not something you solve in one room. Instead, it requires patience, specific actions, and even a second playthrough. If done correctly, you reunite Emily and Marie’s Doll, the “sweet pair” mentioned in the challenge, and unlock a huge 20,000 Completion Point reward.
The Final Puzzle Guide – Resident Evil Requiem
The first step toward getting Marie’s Doll begins in the Care Center Basement, inside the Processing Room. When you enter, you will see bodies falling into a large pool in the center of the room.
Before progressing, you must wait there for 15 real-world minutes. Do not leave. During this time, more bodies will drop into the pool. This waiting period is required. If you skip it, the doll will not appear later.
After the 15 minutes pass, continue through the level until the pool is drained and you are forced to drop onto the conveyor belt that leads to a massive grinder. This part becomes a survival section where zombies start standing up around you.
During this entire sequence, you must not kill any zombies yourself. Avoid attacking them. Instead, let the grinder machine pull them in and destroy them. Every single reanimated zombie must die this way. If even one survives or if you kill one by hand, the hidden condition fails, and Marie’s Doll will not spawn later. Make sure none remain alive before the sequence ends.
Finding the Severed Hand
After finishing the meat grinder sequence in Resident Evil Requiem, make sure to pick up the Joint Plug before leaving the area. Once you have it, head through the nearby shaft that takes you to a smaller secondary pool.
This is the same pool that you can drain later in the level. After lowering the liquid level, you will be able to collect a large amount of Infected Blood from the area.
After the grinder section, the puzzle shifts focus. To understand the “voice” that the sweet pair needs to hear, you must continue the main story until rescuing Emily from the basement.
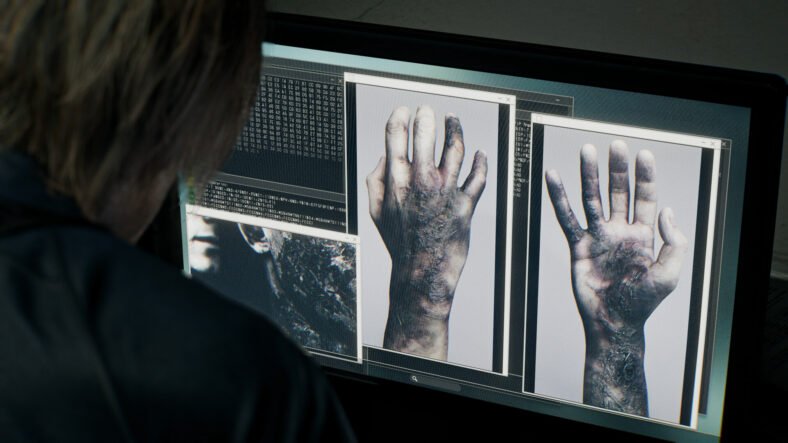
During the elevator escape scene, the Shadow Ghost loses its arm. Once the scene finishes, pick up the severed hand lying near the elevator entrance.
Before heading to the lab, stop by the Guard Office and place Emily down safely. If you carry her, you won’t be able to fight properly. Then take the hand to the Blood Lab on the first floor of the Care Center.
Place the hand into the laser microscope. To solve the small interaction puzzle, press the center black square first, then press the black squares on the far left and far right sides of the 3D image.
After solving it, a dark screen appears displaying the message: “Let’s play. GGC-AAG-AUA-ACG-UGU-CAU.”
This phrase connects directly to the mysterious voice mentioned in the challenge. After this moment, the Sun symbol puzzle in the Lead Researcher’s Office becomes active again, even if you solved it before.
The strange letter code clearly links to the Sun, Moon, and Star symbols. You now need to discover what each letter means.
Discovering the Meaning of G
The first and easiest clue is still in the Blood Lab. Examine the same microscope again and look carefully at the side. A note says: “G = 150000000.”
This number matches the distance from Earth to the Sun in kilometers. From that clue, you can understand that G represents the Sun.
After doing this, there is also a strange, small step that must be done: go to the restroom on Care Center 1F and flush the toilet eight times. This does not explain itself, but it is required before moving forward to get Marie’s doll.
Moving to the Courtyard and Finding Marie’s Doll
Next, progress the story until you reach the Care Center Courtyard while escorting Emily. There, you meet the helicopter pilot, Harry. He asks Grace to retrieve the helicopter keys.
After the cutscene, enter the VIP Suite in the Courtyard’s surface area and solve its internal puzzle. This makes the room descend into the hidden facility level below the Care Center.
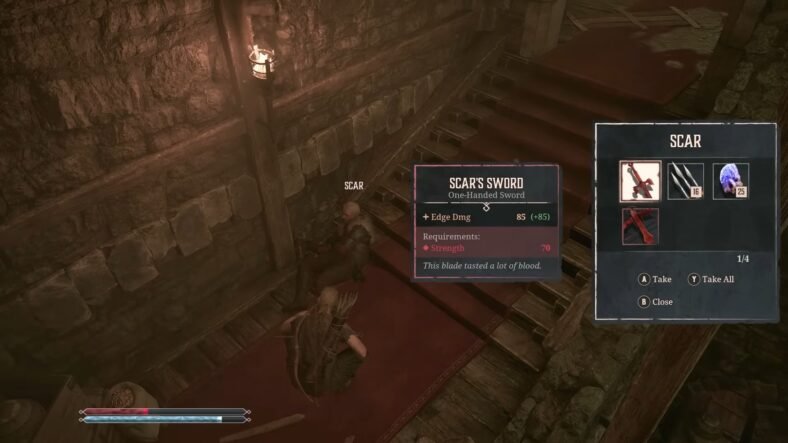
At the facility level, you continue through the story normally. Inside Collection and Testing, after the cutscene involving Victor Gideon, Marie’s Doll will appear at the bottom of the stairs if you completed the earlier grinder and waiting steps correctly. Pick it up.
Once you can access storage, place Marie’s Doll inside Grace’s Item Box. This is extremely important because you must carry it into a new playthrough later. Do not forget this step.
You can also find a doll by this method. Move forward with the story until you reach the Research Facility beneath the Courtyard in Resident Evil Requiem. After the self-destruct countdown begins, make your way toward the Collection & Testing section.
When the core blows up, several infected enemies will mutate into Blister Heads. As you rush toward the metal stairs on the left side, look down, and you will spot Marie’s Doll lying on the blood-covered floor, partly submerged in the liquid.
Finding the Clue for U
While still in the VIP Suite earlier, you may find an hourglass sitting on a large desk. It seems useless at first, but it contains the clue for the letter U.
Examine the hourglass carefully. Remove the small screws from its base and separate it. Flip it upside down so the sand starts flowing. After enough sand drains, tilt it slightly. You will reveal the hidden message: “U = 380,000.”
This number is the approximate distance between Earth and the Moon. That tells you U represents the Moon.
Finding the Clue for C
Later, inside the Private Lab at the facility level, locate a document titled Grace Ashcroft Blood Analysis Report. It sits on a desk near a monitor. Read it carefully to the end.
At the bottom, you will see: “C = 4.2 ly.” “ly” stands for light-years, which refers to stars. So, C represents the Star symbol.
Make sure to take this file since you pass through this room during the main story.
Optional Clue for A
The last letter, A, can be solved later when playing as Leon in Raccoon City Center. After exiting the R.P.D. north entrance, you will find the ruined Gun Shop Kendo. Inside a nearby small building is a headless doll. The doll’s head lies at a nearby basketball court.
You cannot pick up the head normally. Instead, push it by walking into it repeatedly. Slowly guide it toward a collapsed basketball hoop and push it through the rim.
After doing this, inspect the hoop when prompted. You will read: “There’s no time for playing around.”
Then return to the headless doll and inspect it. A message appears saying: “Just ignore A.” This confirms that A should be removed entirely from the RNA sequence that we got from hand.
Finishing the Game and Starting Again
At this stage, you cannot complete the Final Puzzle in your current playthrough. You must finish the full game first while making sure Marie’s Doll is stored safely in the Item Box.
After beating the game, start a New Game Plus. Progress again until rescuing Emily from the basement.
Pick up the severed hand once more and reanalyze it in the Blood Lab microscope. This resets the Sun puzzle again so you can input a new sequence.
Decoding the Sequence
The original code was: GGC-AAG-AUA-ACG-UGU-CAU
Since you learned to ignore A, remove all A letters. The sequence becomes:
GGC-GUC-GUG-UCU
Now translate each letter using your discovered meanings:
G = Sun
U = Moon
C = Star
This converts the sections into the following symbol groups:
GGC -> Sun, Sun, Star
GUC -> Sun, Moon, Star
GUG -> Sun, Moon, Sun
UCU -> Moon, Star, Moon
Entering the Final Code
Return to the Lead Researcher’s Office on Care Center 2F. Before using the Sun puzzle, make sure of three conditions:
- Grace must be carrying Emily.
- Marie’s Doll must be in your inventory (not in storage).
- You must have triggered the “Let’s Play” message in this playthrough.
Input the symbols in this exact order:
Sun, Sun, Star
Sun, Moon, Star
Sun, Moon, Sun
Moon, Star, Moon
If everything was done correctly, you will hear the sound of a baby laughing. That sound confirms the sweet pair has heard the voice, and the Final Puzzle is complete.
Final Reward
Completing this long and hidden challenge gives you 20,000 Completion Points. This is one of the highest CP rewards in the game. You can use these points to unlock bonus weapons, extra modes, and cheats like Infinite Ammo.
That is all for this guide. Additional Resident Evil Requiem guides are linked below:
- Resident Evil Requiem Hip Pouches Locations Guide – All Hip Pouches, Where to Find
- Resident Evil Requiem Beginner’s Guide – Essential Tips and Tricks to Survive
- Resident Evil Requiem Combat Guide – Tips and Tricks to Kill Enemies Easily
- Resident Evil Requiem Endings Guide – How to Unlock All Endings, Endings Explained
This concludes our Resident Evil Requiem The Final Puzzle Guide. If you want to add anything to this guide, feel free to use the comments section below.