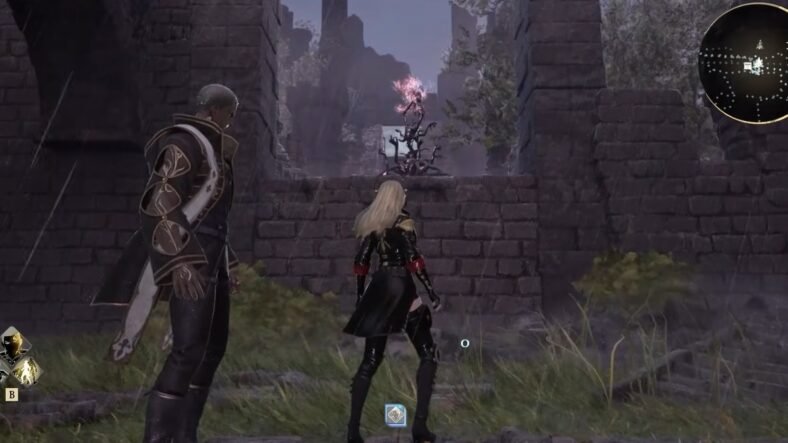
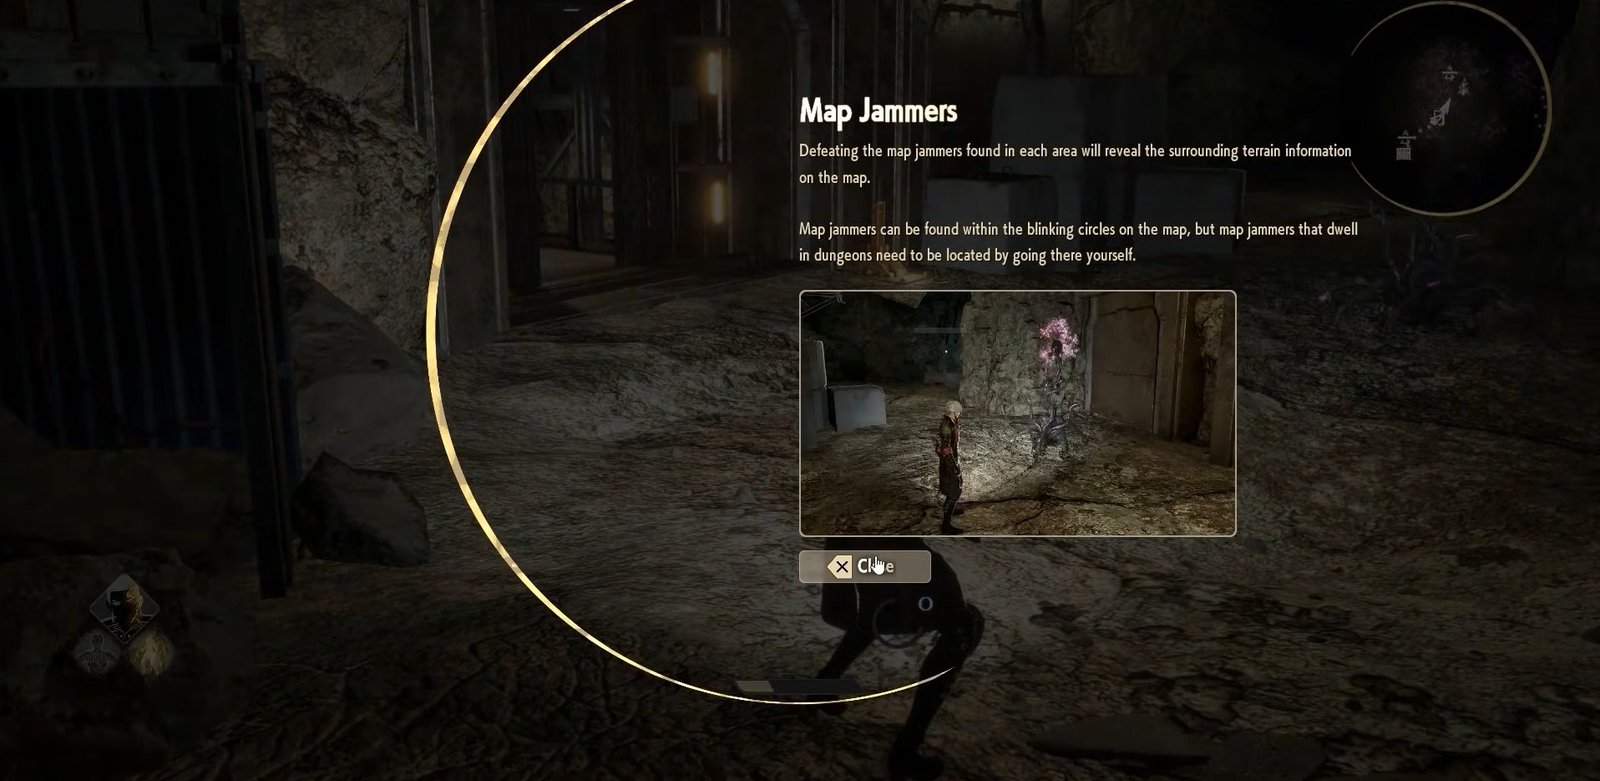
Map Jammers are strange purple tree-like objects scattered all over Code Vein 2. Breaking them open allows you to fully uncover the world map. You will find the location of these Map Jammers by following the red circles on your map. This Code Vein 2 Map Jammer Locations Guide shows all the locations of the Map Jammers in Code Vein 2.
Map Jammer Locations Guide – Code Vein 2
There are 63 Map Jammers total, but for the “Touring the Frontier” trophy or achievement, you only need to destroy the ones found in the Overworld. Dungeon Map Jammers are optional for the trophy, though we still include them for players who want full completion.
Starting Area: MagMell
MagMell is the very first region of the game. Here, you move through two timelines: 2277: The Present and 2177: Assault on MagMell Era. Large portions of this area stay locked until you finish the Assault on MagMell section, so don’t worry if paths seem blocked early on.
- Overall Map
The first Map Jammer is tied to the Overall Map and is unlocked automatically as part of the story. You don’t need to search for it, as the game gives it to you by default.
- Clifftop Cavern
Not long after, inside Clifftop Cavern, you will run into your first dungeon-based Jammer. This one appears naturally during the tutorial, so it is impossible to miss if you’re following the tutorial.
- Water Treatment Plant
In the Water Treatment Plant, the Jammer is located below the main room. Look for a large chamber filled with collapsed pillars. A hole in one of the walls lets you drop down to a lower platform, where the Jammer is waiting for you to destroy.
- Ruins
The Ruins dungeon has its Jammer right in front of the entrance area. If you spot it but can’t reach it, you can either shoot it using the bow formae found in a nearby chest or climb up to the upper level to destroy it directly.
- Cliff Underground Ruins
For the Cliff Underground Ruins, the Map Jammer sits next to the elevator leading to the boss fight.
- East Bay Underground Ruins
The last MagMell Jammer is found in the East Bay Underground Ruins. Near the boss room, there is a ladder that acts as a shortcut. From that point, head to the cliff’s edge, where the Jammer is present.
Second Region: Sunken City
The Sunken City is the next major area you will explore. Like MagMell, it spans two different eras: 2277: The Present and 2179: The Hero Josee’s Era. While the main Overworld is accessible immediately, certain dungeons only open during Josee’s era, so timing matters here.
- Overall Map Section #1 – Damaged Bridge
As soon as you enter the Sunken City from MagMell, you will spot the first overworld Jammer sitting on a damaged bridge directly in front of you. This unlocks the first section of the area map.
- Overall Map Section #2 – Josee’s Outpost: Front Gate Mistle
The second overworld Jammer can be found near Josee’s Outpost: Front Gate Mistle. From the mistle, take the stairs on the right and move northwest. You will notice the Jammer beside the road, close to an enemy near a statue.
- Overall Map Section #3 – Checkpoint Ruins Mistle
To get to the location of this jammer, start from the Checkpoint Ruins Mistle. This jammer can be reached by following the road west. When the roads split in the path, take the right turn. Continue forward, and you will see the Jammer positioned on the right side of the road.
- Overall Map Section #4 – West Coast Pier Mistle
Next, head to the West Coast Pier Mistle. Walk along the western road and stay on the main path as it curves south. Before long, you will find the Jammer sitting to the left of the road.
- Overall Map Section #5 – Cliffside Ruins Mistle
The fifth overworld Jammer in this area is near the Cliffside Ruins Mistle. Take the left road and continue northwest. Watch for a path branching off to the left. Follow it into the trees, where the Jammer stands in the center of the wooded area.
- Josee’s Outpost
Inside Josee’s Outpost dungeon, enter from the West Gate Mistle and move along the left side of the station. Cross through the area, and the Jammer will be straight ahead in your path.
- Seized Substation
The Seized Substation dungeon hides its Jammer after the first elevator ride. Once you reach the lobby, check the corner of the room to find it.
- Sunken Pylon 1
During 2179: The Hero Josee’s Era, you can access Sunken Pylon 1. In this dungeon, the Jammer appears near the end of the first section, positioned along the left-side walkway.
- Sunken Pylon 2
Sunken Pylon 2, also accessible during Josee’s era, contains its Jammer in a large open chamber before the boss fight. Climb one of the ladders on either side of the room and follow the catwalk. An enemy firing at you marks the right spot, and the Jammer is hidden in a small hallway behind them.
- Arcade Ruins
Inside the Arcade Ruins, you will eventually step outside onto balconies. When you do, stay to the left side as you move forward. On a nearby platform, you will notice the Map Jammer locked inside a small cage.
- Mountain Underground Facility
The Mountain Underground Facility places its Jammer very close to a key checkpoint. Look in the room that sits directly next to the one containing the Underground Storage Mistle.
- Cliffside Ruins
In the Cliffside Ruins dungeon, the Jammer appears right at the end of the area. As you move toward the exit, check near the ladder; it is placed right beside it.
- Western Gatehouse Ruins
The Western Gatehouse Ruins can only be entered during 2179: The Hero Josee’s Era. After you beat the Mutated Sentinel, climb the stairs that open up ahead of you. At the top, you will find the Map Jammer waiting.
Third Region: Corroded Scar
Corroded Scar is located in the north-eastern part of the world map and becomes accessible by traveling through the Checkpoint Ruins in the Sunken City.
This region spans several timelines, including 2277: The Present and 2178: The Hero Lyle’s Era. When you first arrive, the game forces you into Lyle’s era, which is necessary to unlock full access to the region. Once you reach Forward Base Two during that era, you can freely explore Corroded Scar in later timelines, including the Free Exploration era.
- Supply Fort
Within the Supply Fort, start from the Upper Level Mistle and follow the path until it leads you back outside on the rooftop. Turn to the right, and you will find the Jammer tucked into a corner near the edge.
- Overall Map #1 – Plateau Ruins
The first overworld Jammer in this area is found in the Plateau Ruins. Make your way toward the center rear of the area. An enemy is guarding the Jammer, so defeating them will clear the map section.
- Overall Map #2 – Miners’ Abandoned Village Mistle
For the next overworld Jammer, begin at the Miners’ Abandoned Village Mistle. Step out onto the main road and head north, crossing the massive bridge ahead. Continue forward, and you will encounter the Jammer alongside several enemies.
- Overall Map #3 – Mine Elevator Entrance Mistle
Another overworld section can be unlocked from the Mine Elevator Entrance Mistle. Climb the stairs and follow the uphill road as it winds along the mountain. At the road split, turn left and continue onward until you spot the Jammer near a bulldozer.
There is an alternate route from Forward Base Two that involves gliding across from a cliff using the motorcycle, but this approach is much riskier.
- Overall Map #4 – Abandoned Land Mistle
Head downhill toward the north-east from Abandoned Land Mistle. You will come across a fenced area packed with enemies. The Jammer is held by one positioned back inside, so you will need to push through and defeat it to unlock this map segment.
- Crystal Grotto
The Crystal Grotto, also known as the Limestone Cave, can be reached by taking the South Bridge Elevator down from Forward Base Two. Enter the cave on the right and follow the tunnel system until you reach the Military Camp in the Spacious Cavern. Just beyond that point, you will find the Jammer.
- Abandoned Land
In the Abandoned Land dungeon, the Map Jammer is placed almost immediately after entering. Look straight ahead near a broken van to spot it.
- Pioneer Castle #1
The first Pioneer Castle dungeon places its Jammer right beside the West Wing Residential Block Mistle, making it hard to overlook.
- Pioneer Castle #2
For Pioneer Castle 2, start at the Central Stairwell Mistle. Take the path descending to the right and keep going until you reach a wide-open space. The Jammer appears near the far end, positioned on the left side close to the stairs.
- Underground Shelter on the Outskirts
The Underground Shelter on the Outskirts keeps things simple, with the Jammer located directly next to the elevator.
- Riverport Watch Fort
In the Riverport Watch Fort, climb down the first ladder that leads you back toward the central section. Between the two ladders, pass through the door and enter the room on the right, where the Jammer is placed.
- North Watch Fort
The North Watch Fort dungeon hides its Map Jammer close to a useful shortcut. As you move through the area, look for the room just before the ladder that can be kicked down to create a faster path back to the Mistle. The Jammer is located inside that room.
- Sealed Great Mine
The Sealed Great Mine becomes available during 2182: The Hero Lyle’s Era 2. Once inside, you don’t need to explore much as the Map Jammer is positioned right beside the Resurrection Monument.
Fourth Area: Undead Forest
The Undead Forest occupies the north-western portion of the world map and is reached by passing through the Collapsed Tunnel dungeon from the Sunken City.
This area spans 2277: The Present and 2177: The Hero Holly’s Era. Early exploration is limited, and only a small portion is accessible at first. After encountering Lycoris, full access to the region opens up, allowing you to properly explore the Undead Forest in the Present timeline.
- Collapsed Tunnel
Inside the Collapsed Tunnel dungeon, start from the Mistle and follow the main route forward. After a short walk, the Map Jammer will appear directly in front of you.
- Overall Map #1 – Pathway Entrance Mistle
The first overworld Jammer in this region can be found starting from the Pathway Entrance Mistle. Move through the collapsed building to reach the main road. Once outside, check to your right, the Jammer is positioned near the cliff edge.
- Overall Map #2 – Pathway Entrance Mistle
Another overworld section can be revealed by taking a similar route from the Pathway Entrance Mistle. Exit through the damaged structure and follow the road east. When the road leads you down across a broken bridge, look down the hill to the right, where the Jammer is clearly visible.
- Plagued Village
In the Plagued Village dungeon, the Jammer sits near the outer edge of the village. Head toward the ruined church at the end of the area, and you will find it nearby.
- Gorge Cave
The Gorge Cave dungeon places its Jammer behind obstacles. Starting from the Mistle, follow the cave path until you reach the second gated doorway. Open it, and the Jammer will be waiting just beyond the gate.
- Overall Map #3 – Abandoned Farm Mistle
To find the jammer there, make your way down the road leading south-west from the Abandoned Farm Mistle. It will appear on the left side of the path.
- Overall Map #4 – Abandoned Farm Mistle
Continuing from the same Mistle, take the northbound road that climbs the hill. Stay on this route, and you will soon see the Jammer placed straight ahead near a cluster of cargo containers.
- Overall Map #5 – Bureau’s Castle Mistle
Another overworld Jammer can be reached from the Bureau’s Castle Mistle. Follow the road heading southeast and pass underneath the overpass. As you continue forward, look to your right among the trees to spot the Jammer hidden in the woods.
- Overall Map #6 – Abandoned Hilltop Church Mistle
From the Abandoned Hilltop Church Mistle, move south and climb the hill past the damaged buildings. The Jammer is located along this route and becomes visible as you reach the higher ground.
- Ruined Town
Inside the Ruined Town dungeon, the Map Jammer is found near a fountain close to the western exit.
- Snowy Mountain Amusement Park
The Snowy Mountain Amusement Park dungeon places its Jammer along the main path. From the Resurrection Monument, keep moving forward until you reach the large Ferris wheel. Take the stairs beside it, and the Jammer will be directly in front of you at the bottom.
- Mountain Hamlet
In the Mountain Hamlet dungeon, enter from the Mistle and immediately stay close to the left cliff wall. Following this edge will eventually bring you face-to-face with an enemy guarding the Jammer.
- Forest Complex
The Forest Complex dungeon keeps things simple. The Map Jammer is placed directly in front of the Resurrection Monument, making it one of the easiest to locate in the Undead Forest region.
- Abandoned Hilltop Church
In the Abandoned Hilltop Church dungeon, start from the Resurrection Monument and activate the stair mechanism using the nearby levers. Once the stairs rise, head upward, and you will see the Map Jammer straight ahead.
- Sanatorium #1
The first Sanatorium dungeon is only accessible in 2277: The Present. From the Sanatorium Mistle, enter the building and move through it until you can exit via the rear door on the left side. Outside, look toward the ledge near the stairs that lead down to the fountain; this is where the Jammer is placed.
- Sanatorium #2
The second Sanatorium dungeon opens during 2183: The Hero Holly’s Era 2. After riding the elevator back up from the underground section to the main building, carefully circle the hole you previously fell through. The Jammer can be found positioned in front of the fountain in this area.
- Sanatorium #3
For Sanatorium 3, which is also tied to Holly’s second era, the Jammer is located late in the dungeon. When you reach the Memory Realm, continue forward until you approach a wooden rope bridge. The Jammer is just before that bridge.
- Riverside Church Ruins
Inside the Riverside Church Ruins, navigate through the maze until you approach the Resurrection Monument. Just before reaching it, check to your right. The Map Jammer is placed there.
- Grotto Military Site
The Grotto Military Site dungeon places its Jammer immediately after a climb. Once you ascend the ladder leading to the balcony area, the Jammer will be directly in front of you.
- Plagued Village: Underground Facility
In the Plagued Village: Underground Facility, the Map Jammer is positioned beside an important point. Look for the ladder you must climb down to continue through the parkour section, and the Jammer sits right next to it.
- Frontier Observation Post
The Frontier Observation Post can only be visited during 2277: The Present. Inside, locate the ladder that must be kicked down to unlock a shortcut back to the Mistle. The Jammer is placed right beside that ladder.
Final Region: Insula Carcere
Insula Carcere becomes available only after defeating Josee, Lyle, and Holly. This location functions mostly as a massive dungeon, with only a small exterior section.
Exploration here takes place across 2277: The Present and 2197: The Hero Zenon’s Era. While in Zenon’s era, you also gain access to additional hidden dungeons in other regions, excluding MagMell, all of which are required to fully clear map jammers.
- Overall Map
The Insula Carcere overworld Jammer is found almost immediately. After stepping off the ferry, head straight up the stairs in front of you to unlock the map.
- Insula Carcere #1
Inside Insula Carcere Dungeon 1, proceed through the Cell Block area. After exiting it, look near the shortcut door that leads back toward Processing; the Jammer is located right beside it.
- Insula Carcere #2
For Insula Carcere Dungeon 2, begin at the Upper Prison Area Mistle. Climb the stairs on the right-hand side, and you will find the Jammer positioned close to the nearby door.
- Hidden Lab in the Sunken City
The Hidden Lab in the Sunken City places its Jammer as you climb upward. After ascending the stairs in the flooded portion of the lab, the Jammer appears immediately next to you.
- Hidden Lab within Corroded Scar
In the Hidden Lab within Corroded Scar, the Jammer is easy to locate. It sits directly next to the Inner Lab in Corroded Scar Mistle.
- Hidden Lab in the Undead Forest
The Hidden Lab in the Undead Forest requires you to cross two catwalks first. After finishing the second one, look beside the door that leads to the Inner Lab in Undead Forest Mistle, where the Jammer is placed.
Sealing Ground Jammers
- Luna Rapacis
The Luna Rapacis Jammer becomes available in 2277: The Present. Once you break the seal within the area, move forward; the Jammer will be directly in front of you.
- Sealing Spire #1
The first Sealing Spire Jammer appears during the 2207: Upheaval Era. You will find it in the center of the room, which you will reach by taking the first door in the large chamber.
- Sealing Spire #2
This Map Jammer can only be collected during the 2207: Upheaval Era. For Sealing Spire 2, continue through the middle floor until you reach its second major section. Carefully move across the beams until you find the stairs that lead toward the enemy holding the key.
Before going up those stairs, check to the right side. There is a doorway that lets you drop down onto a lower platform. From there, ride the elevator upward. As soon as you arrive, look below the platform. You will spot the Map Jammer there.
- Sealing Spire #3
The final Jammer, found in Sealing Spire 3, is also tied to the Upheaval Era. Near the ladder used to unlock a shortcut, enter the adjacent room. An enemy stands inside, and the Map Jammer is positioned just behind them.
That is all for this guide. Additional Code Vein 2 guides are linked below:
- Code Vein 2 Blood Codes Guide – All Blood Codes, How to Unlock
- Code Vein 2 Partner Affinity Guide – How to Increase, Gifts
- Code Vein 2 Boosters Guide – All Boosters, Trait Effects
This concludes our Code Vein 2 Map Jammer Locations Guide. If you want to add anything to this guide, feel free to use the comments section below.