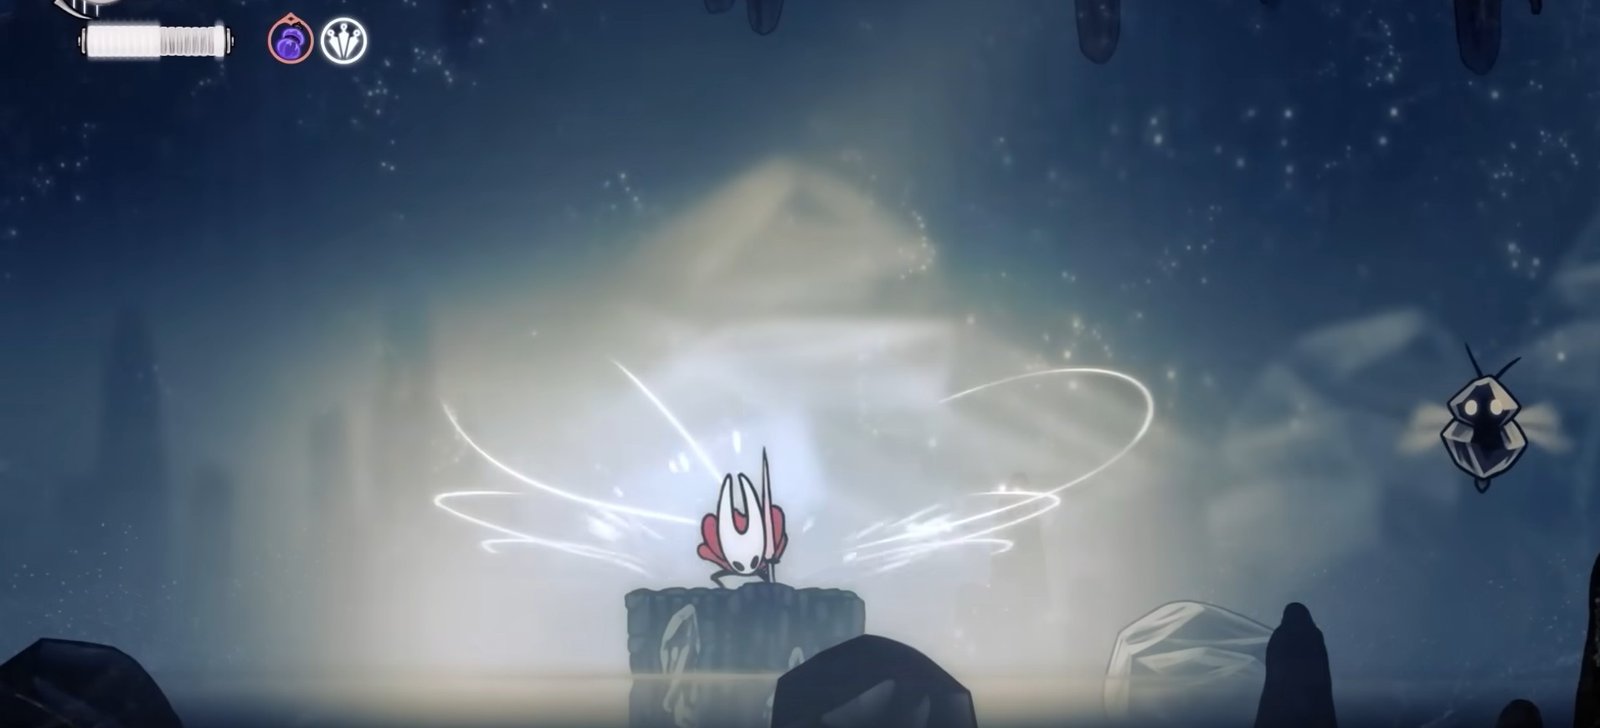
Hollow Knight: Silksong is in no way an easy game, and some people are even calling it harder than Elden Ring. With that said, at the beginning of the game, you start with a measly amount of health, and with some enemies dealing as high as two-crown damage with a single hit, you must look for ways to survive longer in the game. One such way is getting Mask Shards, which increase the amount of crowns you have, and in return, you can take more damage before dying. This Hollow Knight: Silksong Mask Shard Locations Guide will help you find all of the Mask Shards in the game, scattered all over Pharloom.
Mask Shark Locations Guide – Hollow Knight: Silksong
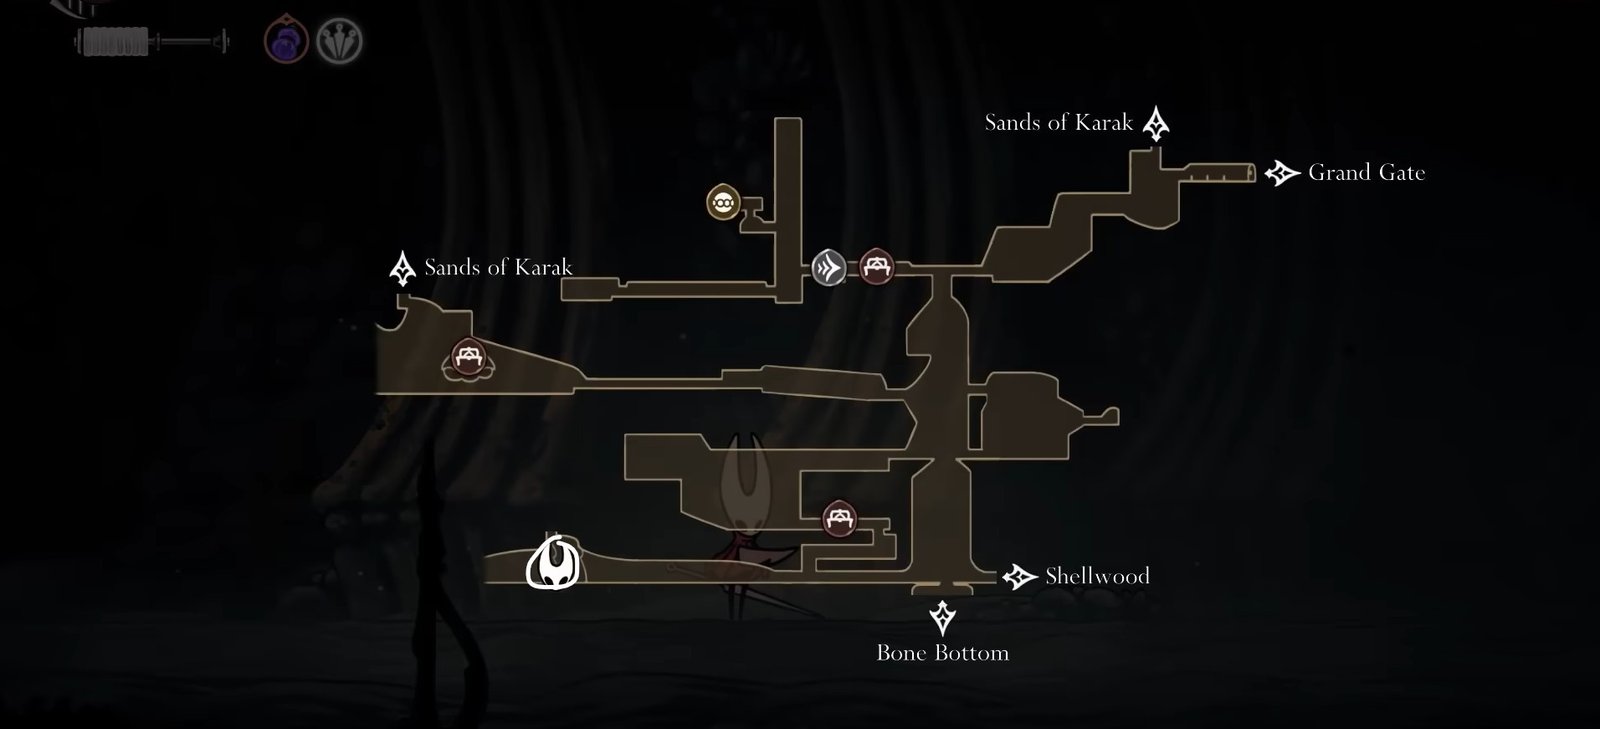
There are 20 Mask Shards that you can collect in the game, and you will gain a new crown after collecting every 4 Mask Shards. This means that you gain 5 new Crowns in the game. We have detailed their locations below:
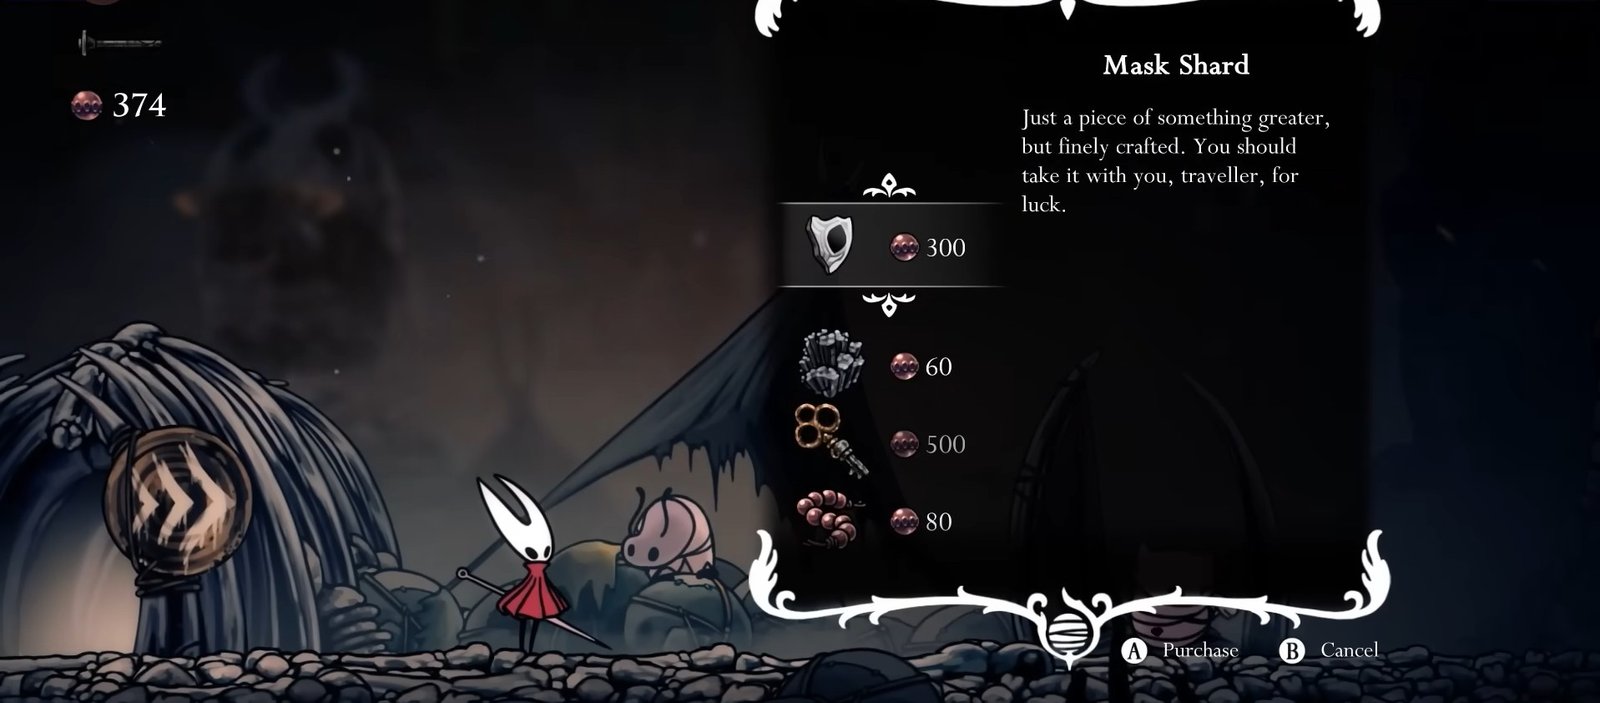
Mask Shard #1:
Probably the very first Mask Shard in the game can be purchased from Pebb, the merchant in Bone Bottom. You will need a little bit of game progression and 300 Rosary Beads to buy it.
There is an early Rosary Beads farming location up in Mosshome, where you can farm early in the game and purchase them right away.
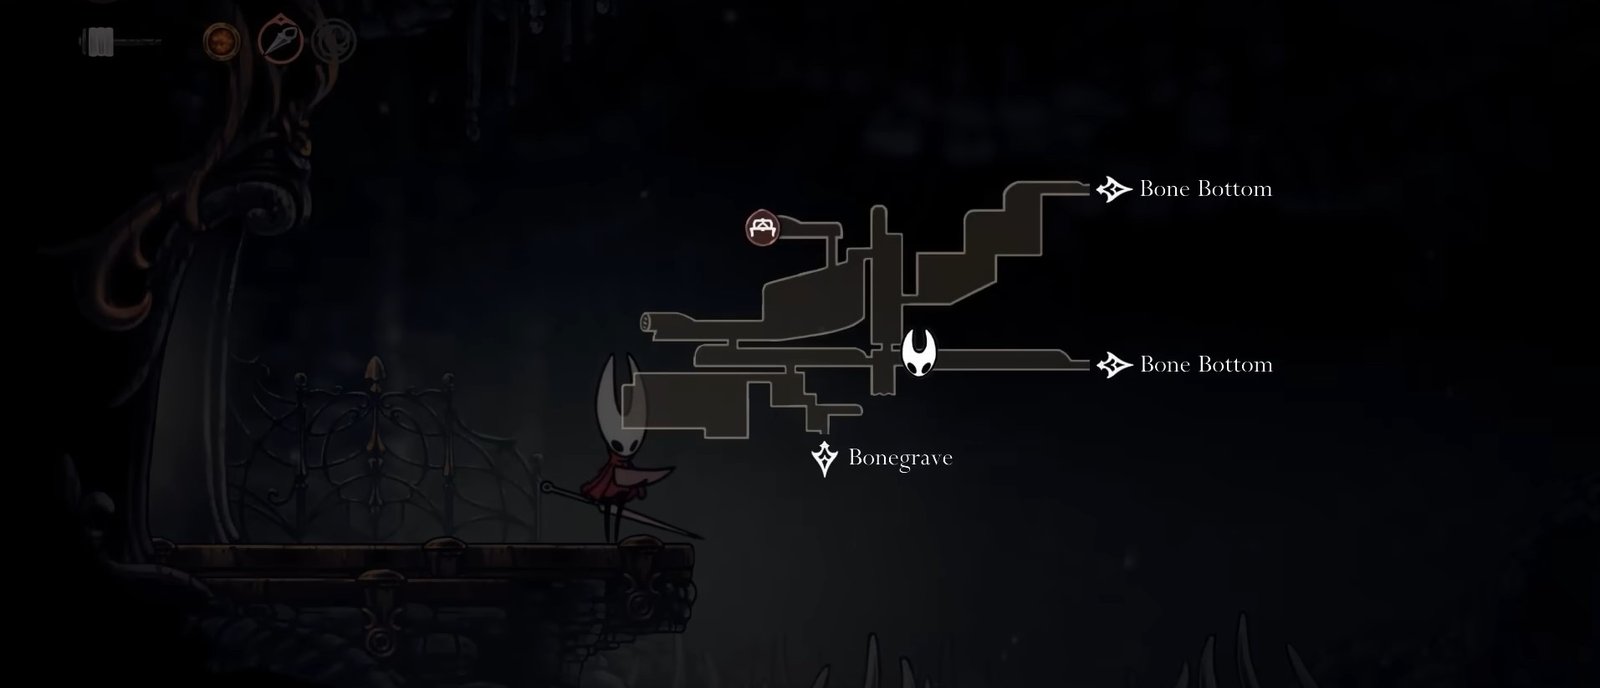
Mask Shard #2:
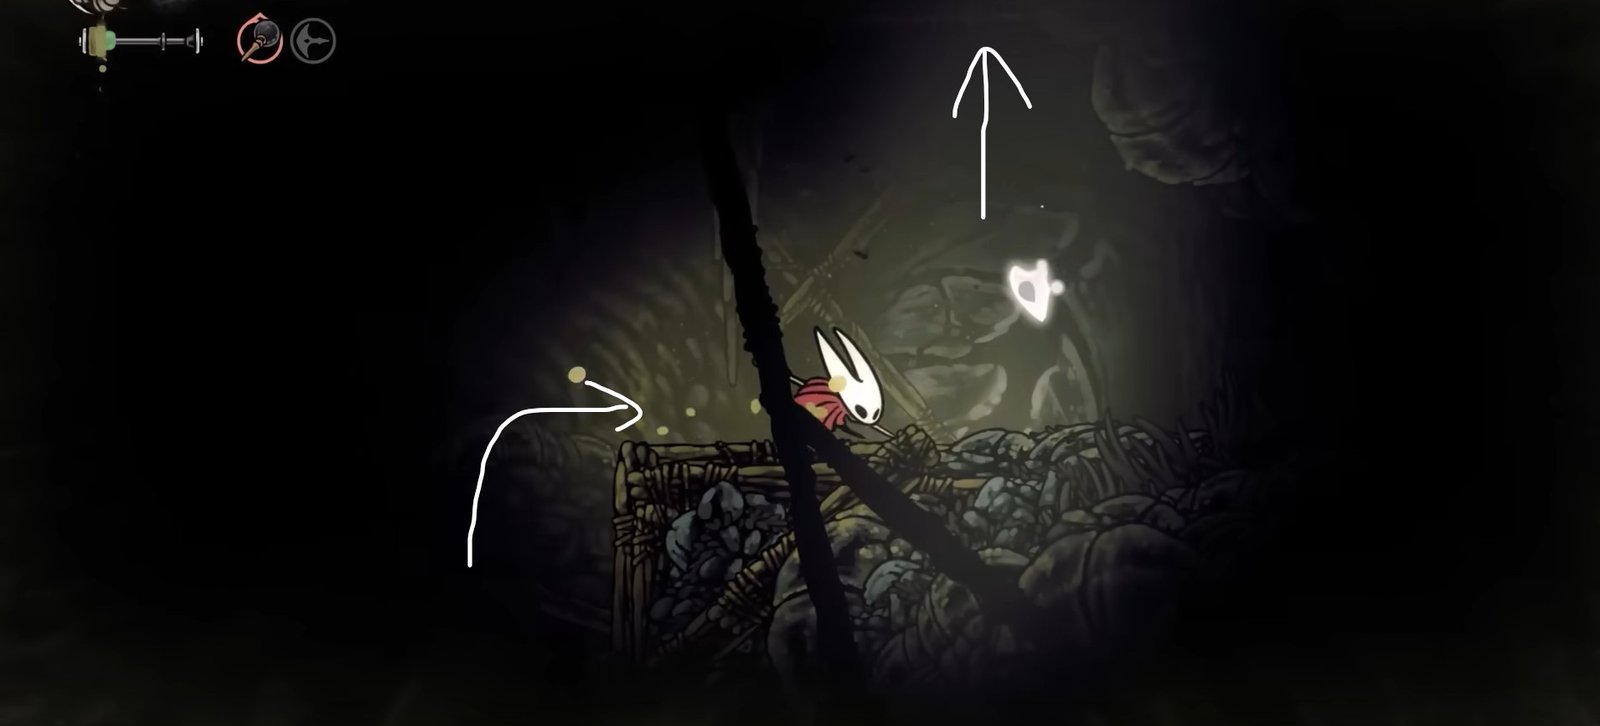
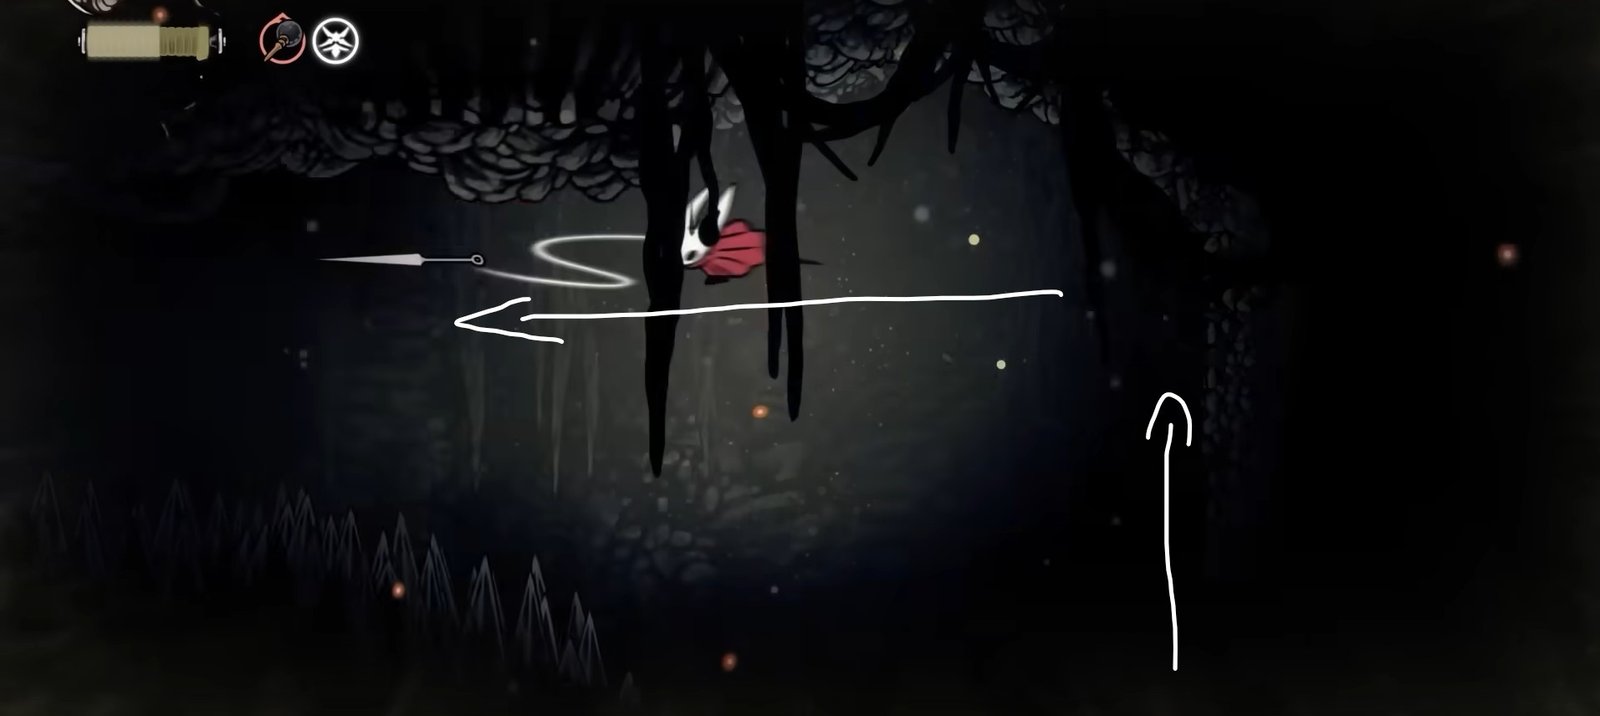
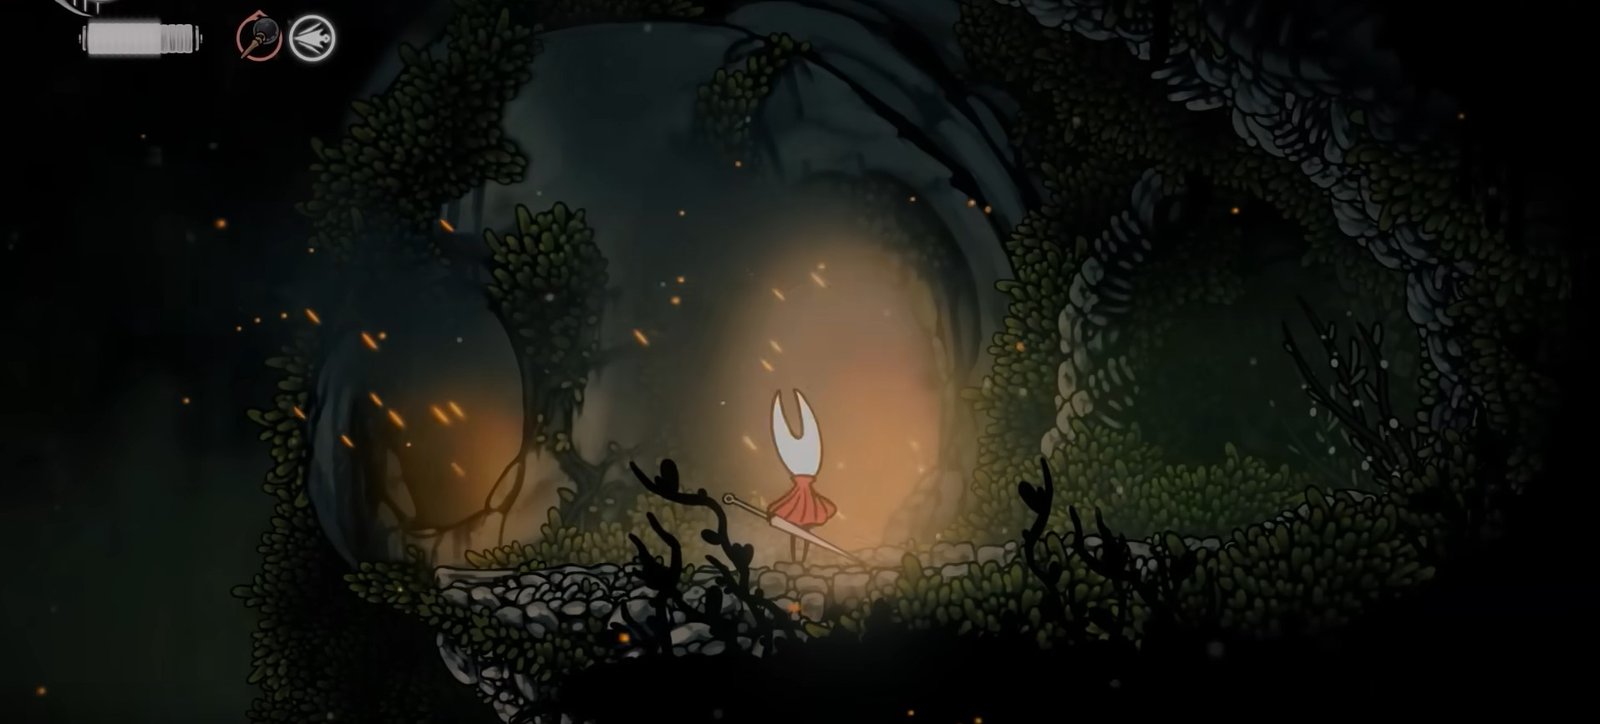
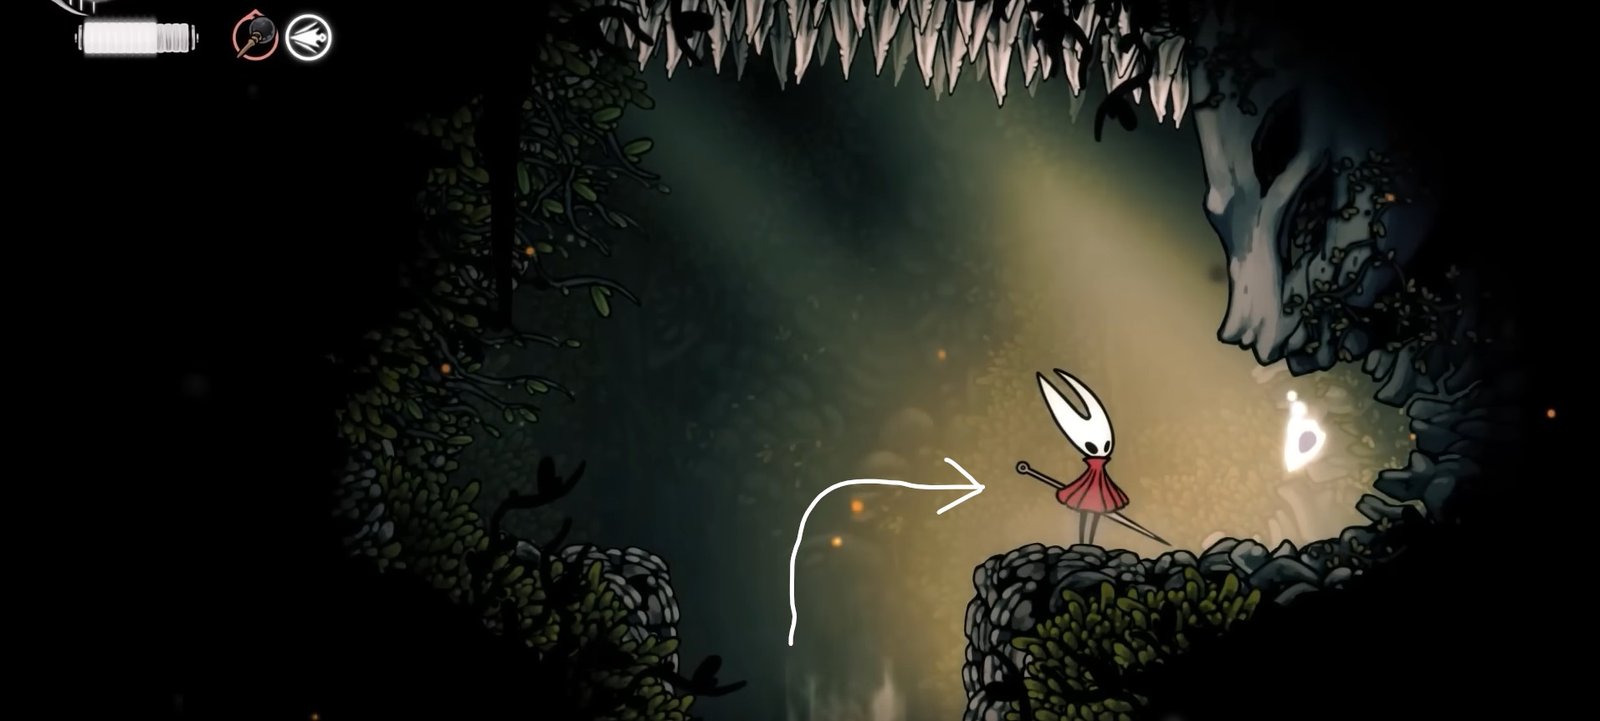
We will start in Wormways for the first Mask Shark that we can find in the wild. Head to the location marked below to find the first one:
From the starting location, we will be heading left into the next area. In the next area, head left and drop down through the floor via the first gap you come across. Keep going down, and you will find the Mask Shard next to a small water pond in an alcove.

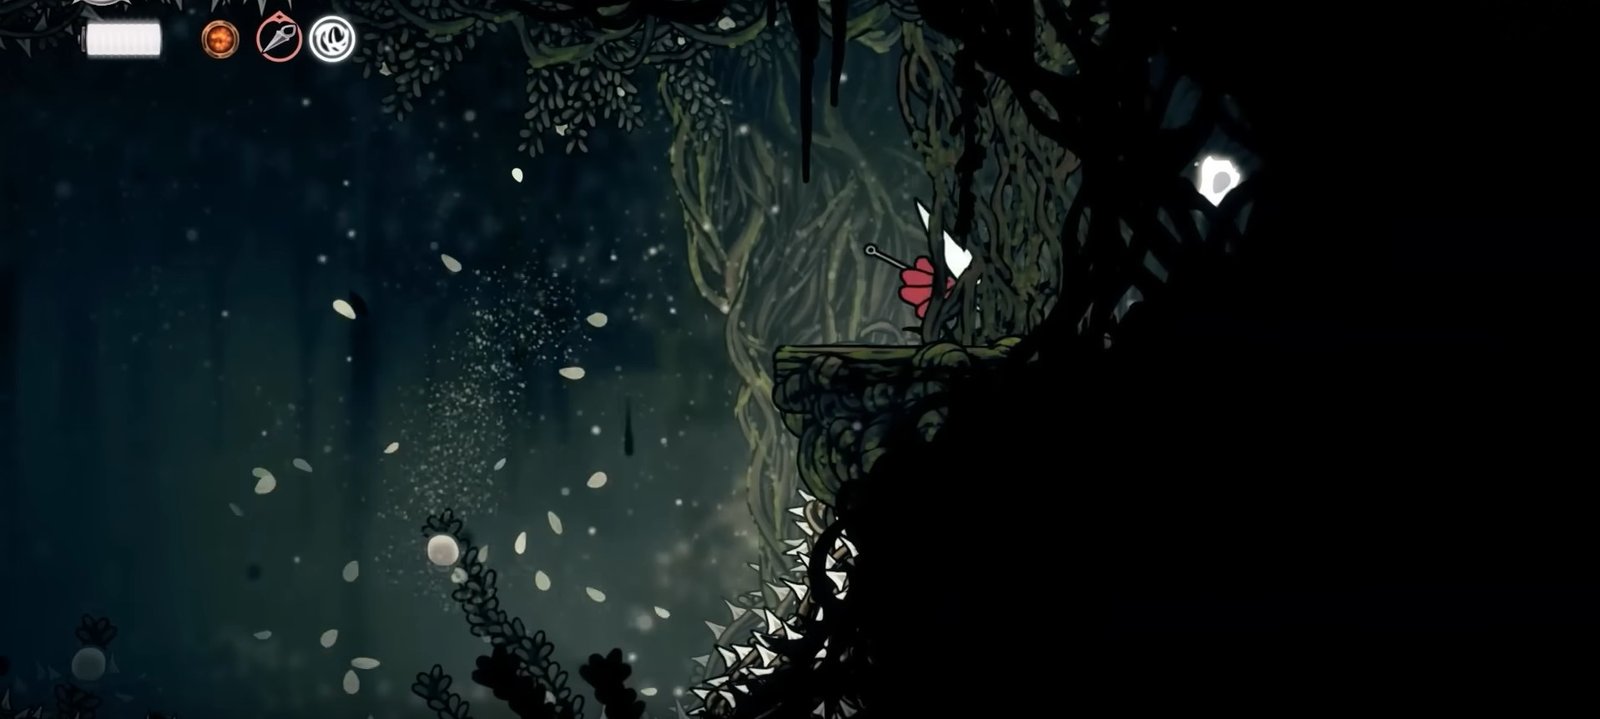
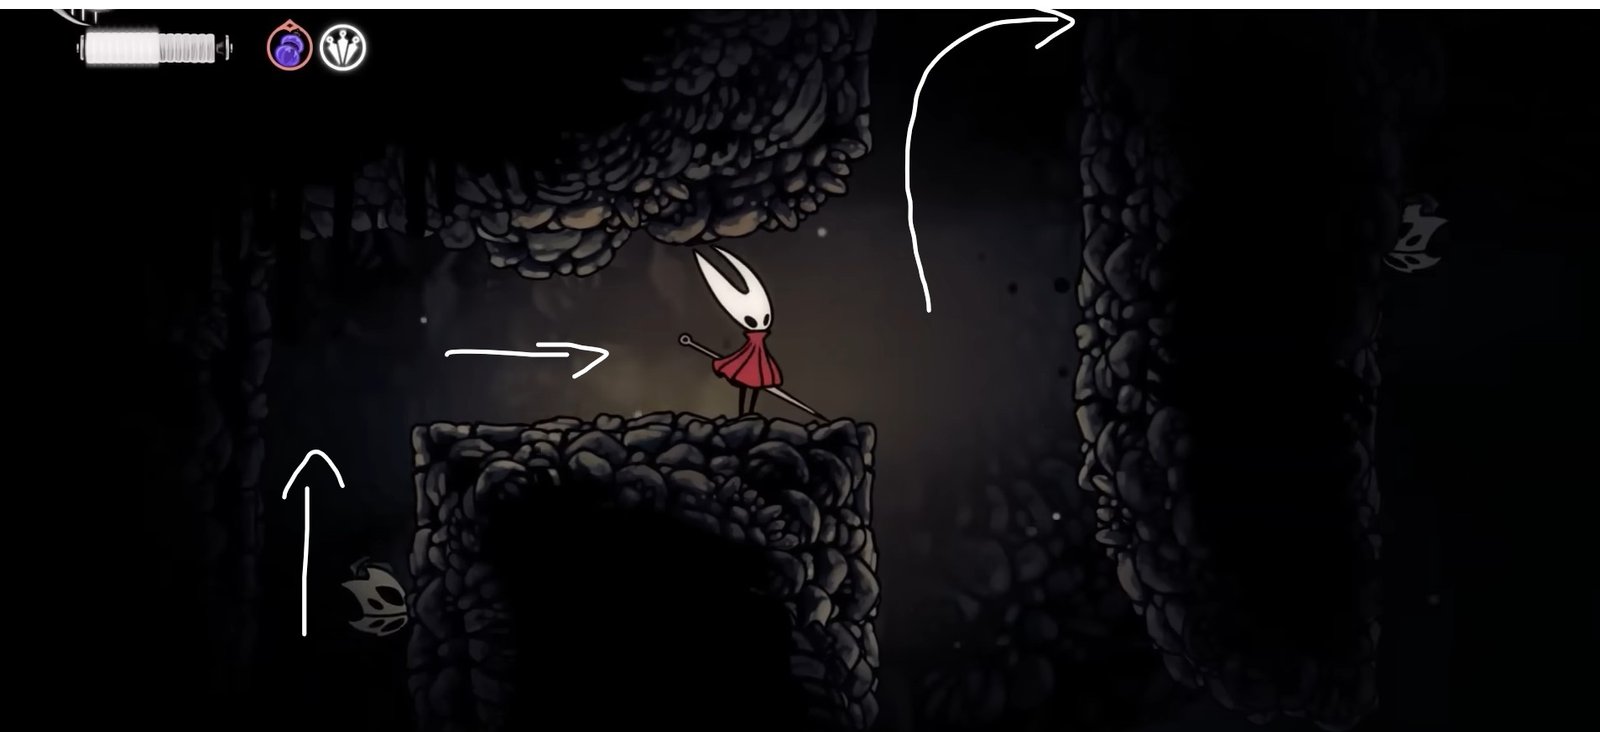
Mask Shard #3:
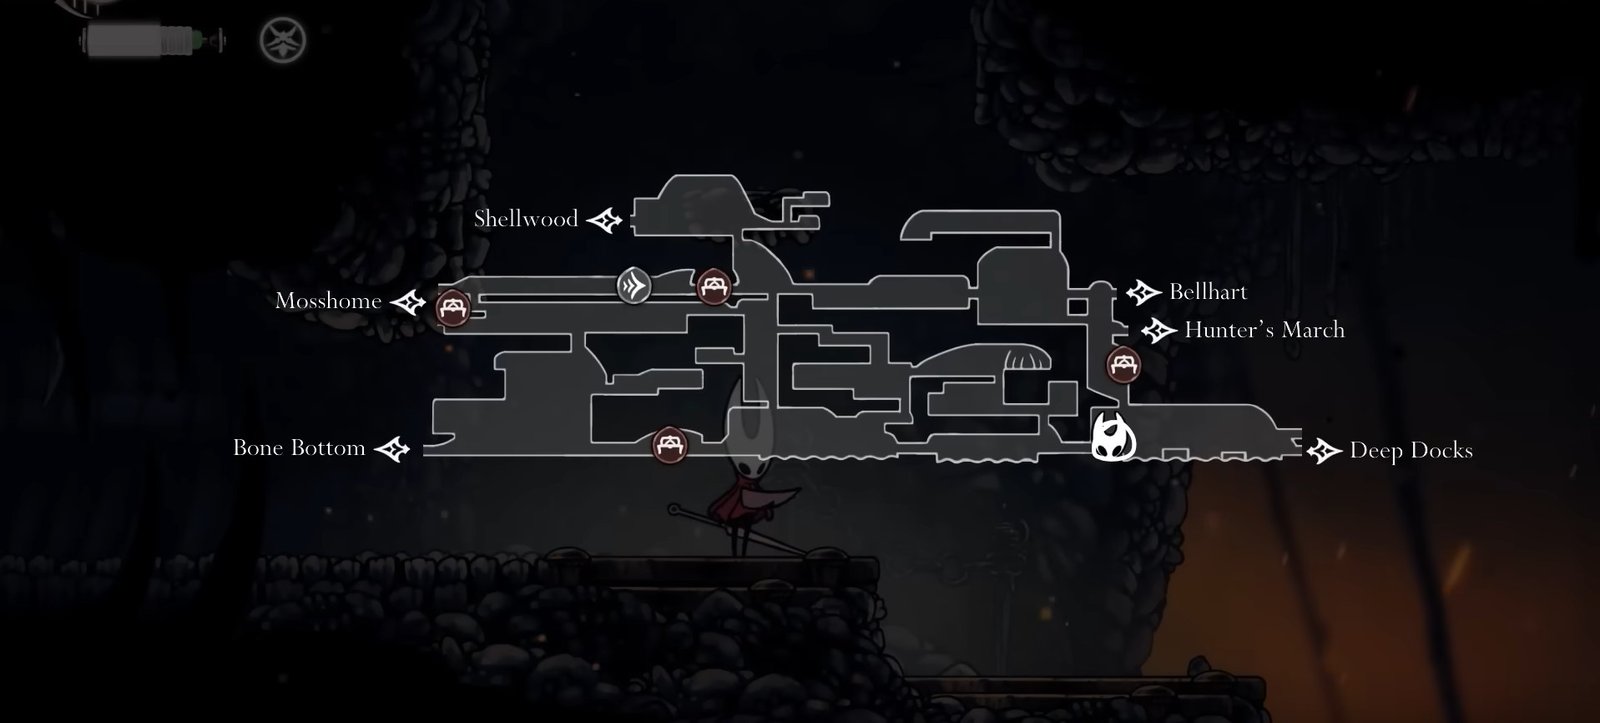
A Mask Shard is located in Weavenest Atla, and you can acquire it after gaining the Needolin. Once you have access to Weavenest Atla, head to the location marked on the map below:
At the starting location, take the elevator to the bottom, and then head left. Do not enter the next area, but you need to start climbing up here.
Climb left to the platform and then start going up through the tunnel where you came down through the elevator.
Keep going up until you come to a path on the right side. Enter this path and then the next area at the end.
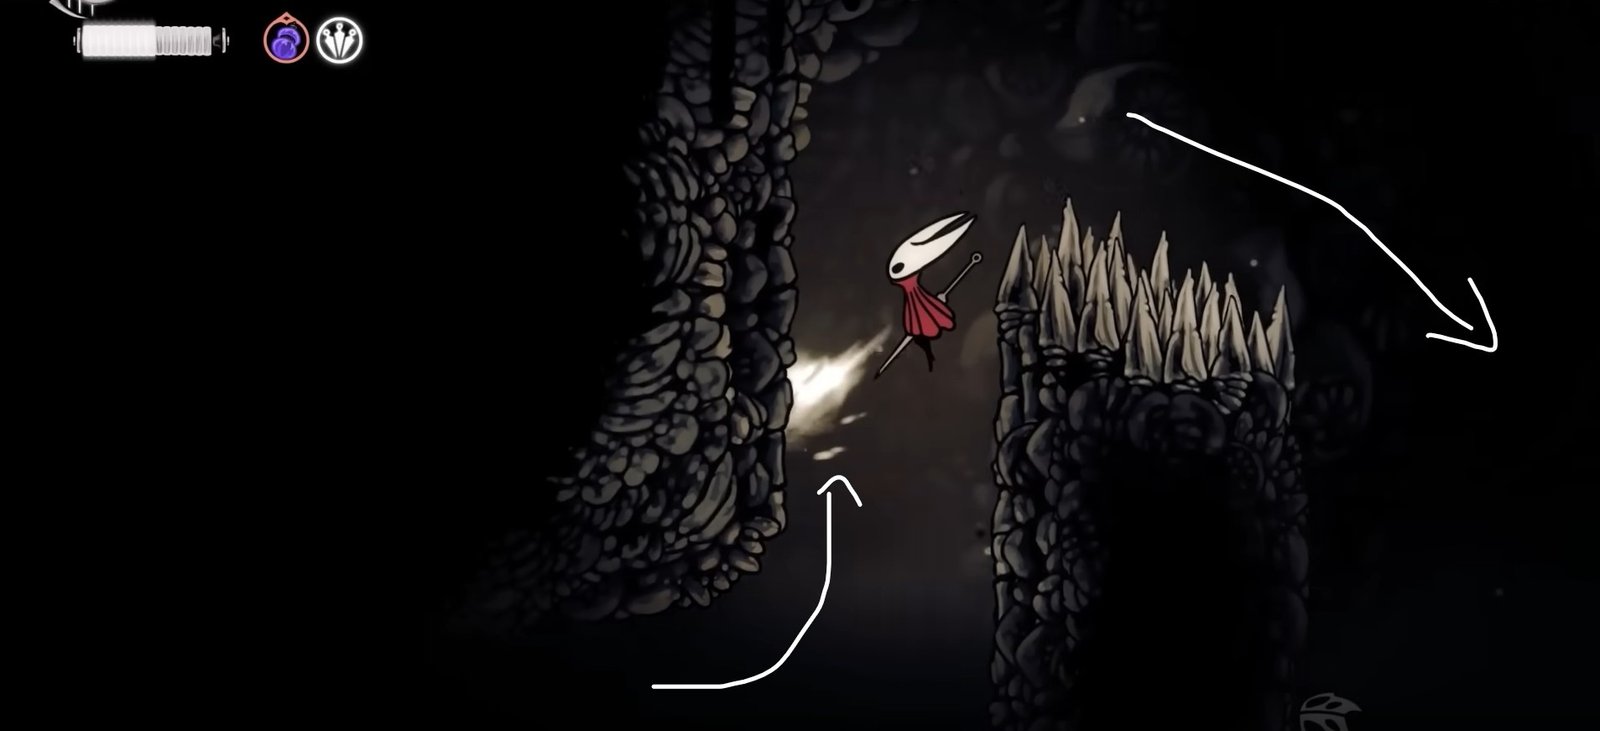
Cross the next area, drop down the platform, and then again up to enter the next area. In the next area, drop further down, and then head to the right section of the area to gain access to an area that is not easily visible.
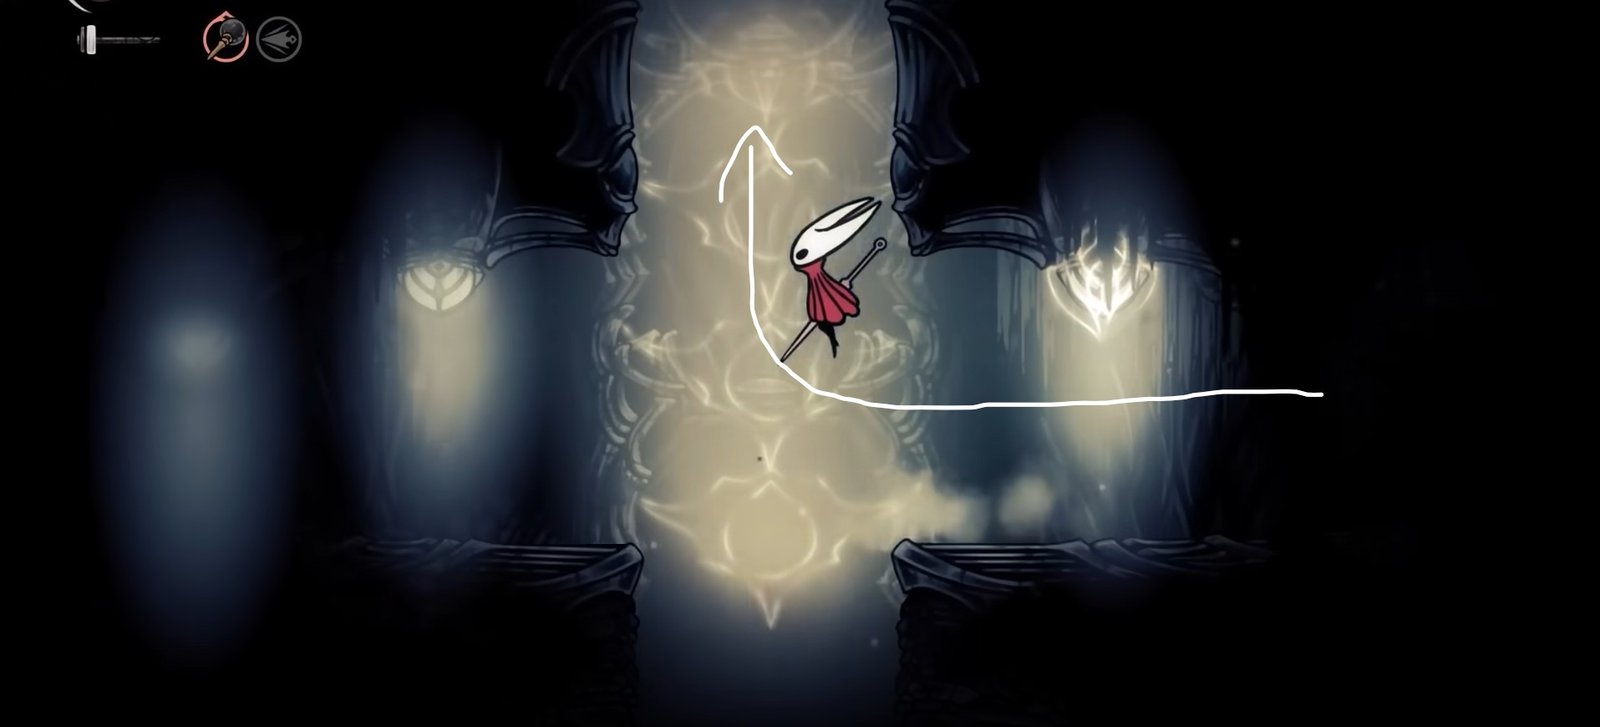
Drop down here, watch out for the spikes at the bottom, and go right to reach the area with the lava. Continue heading right until you come to the area with the platforms that disappear when you step on them. Use them to avoid the burning lava and go further right. Go all he way to the end, use the wall to climb up, and then buckle up for some platforming through the lava.
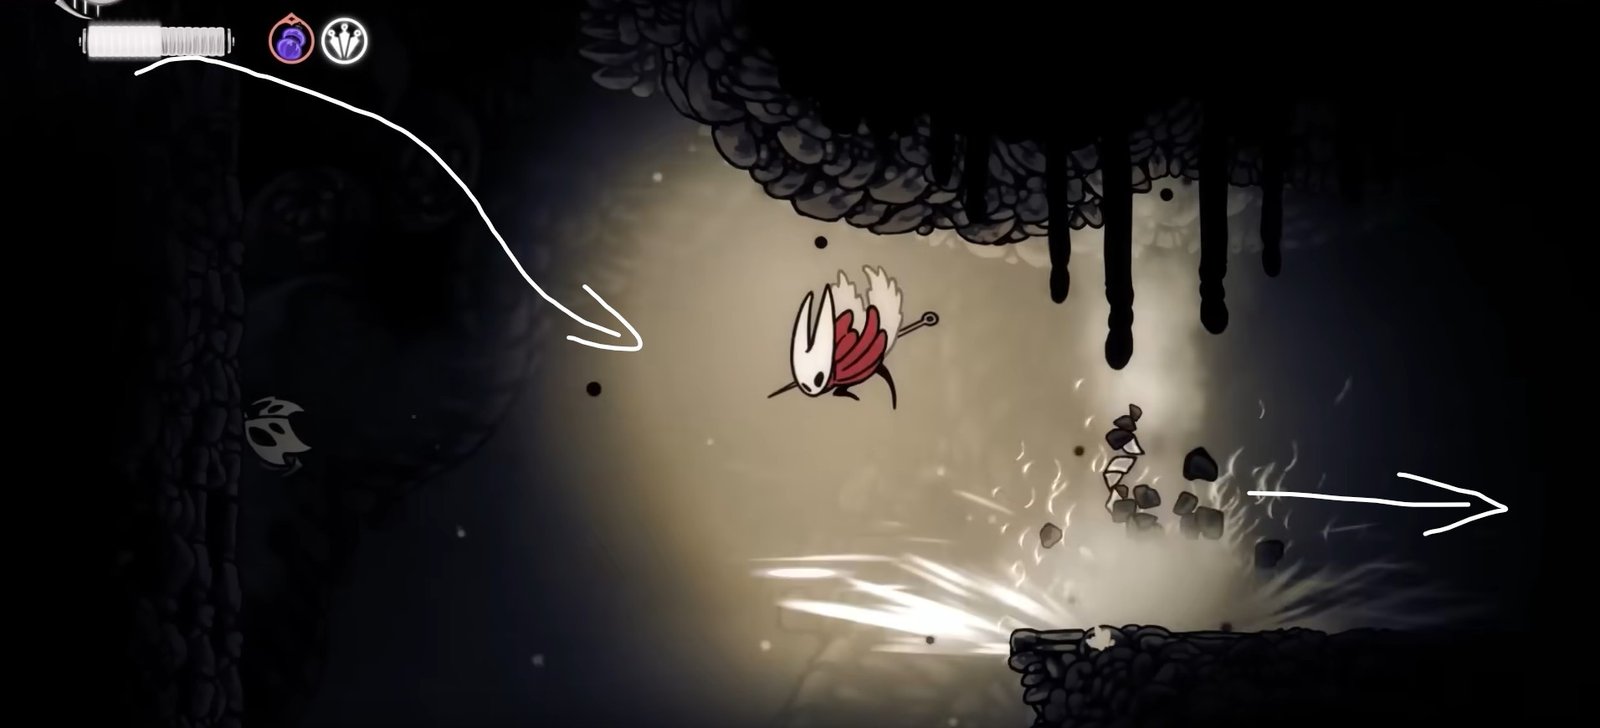
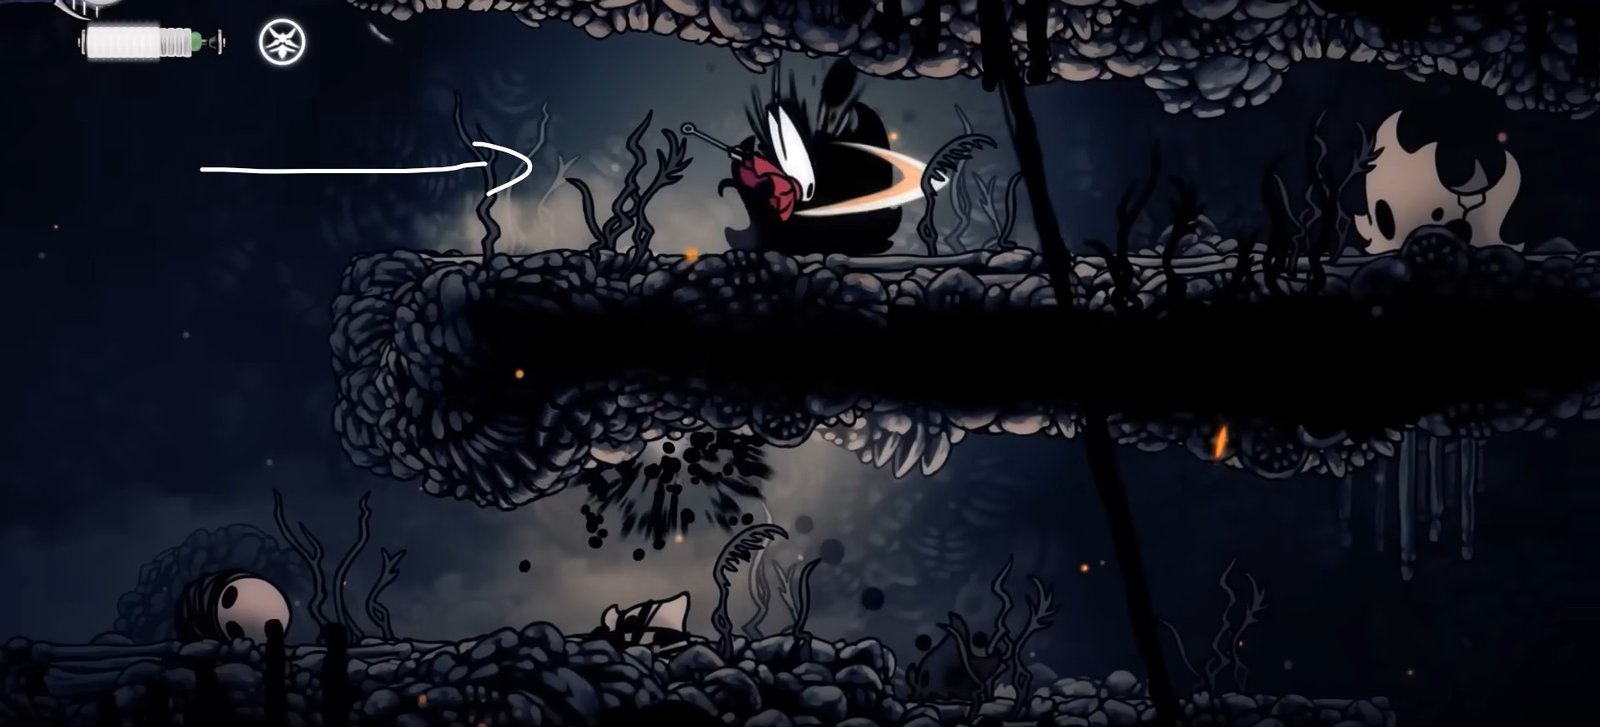
The next section has red flowers and flying enemies. You will need to use them to jump to the left, and then up and right eventually.
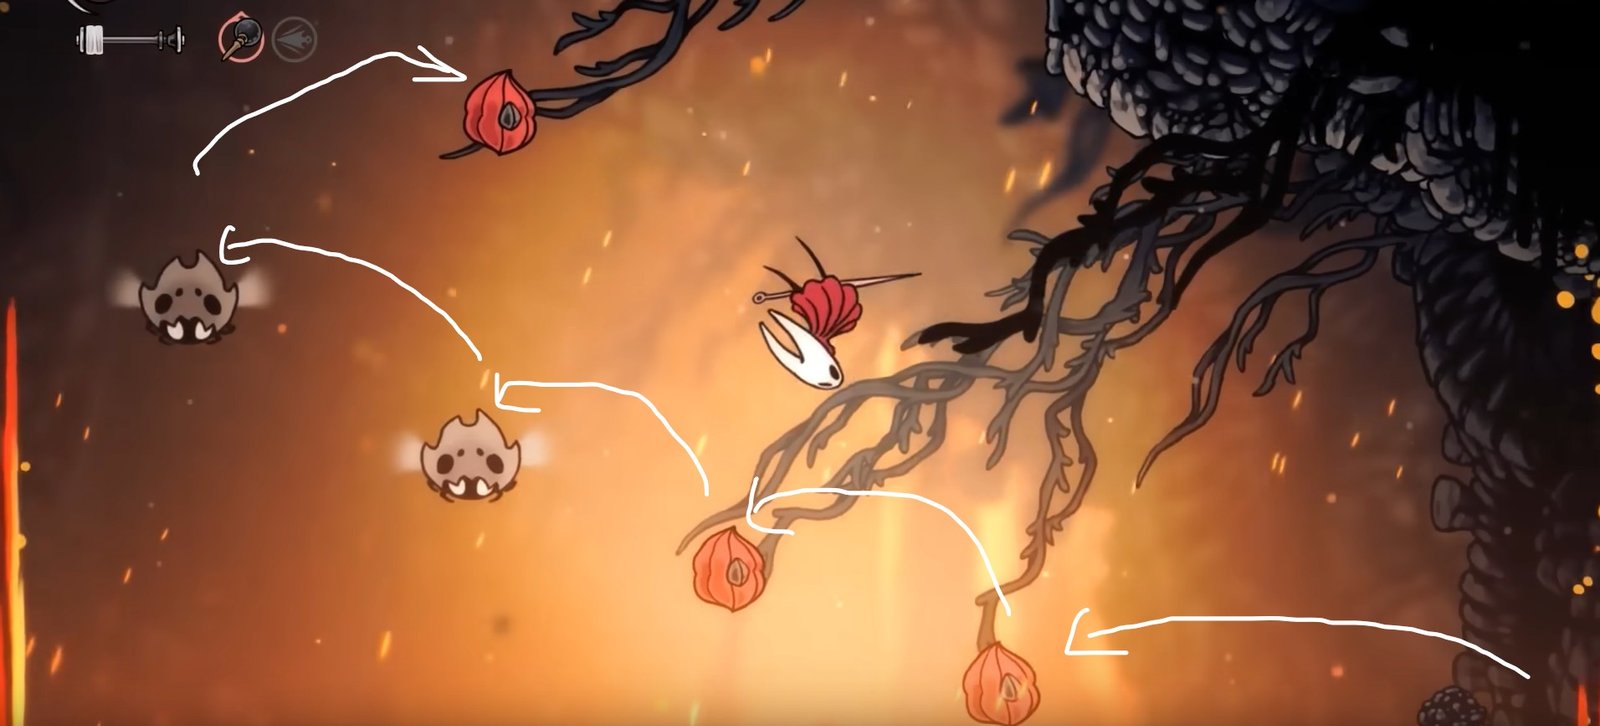
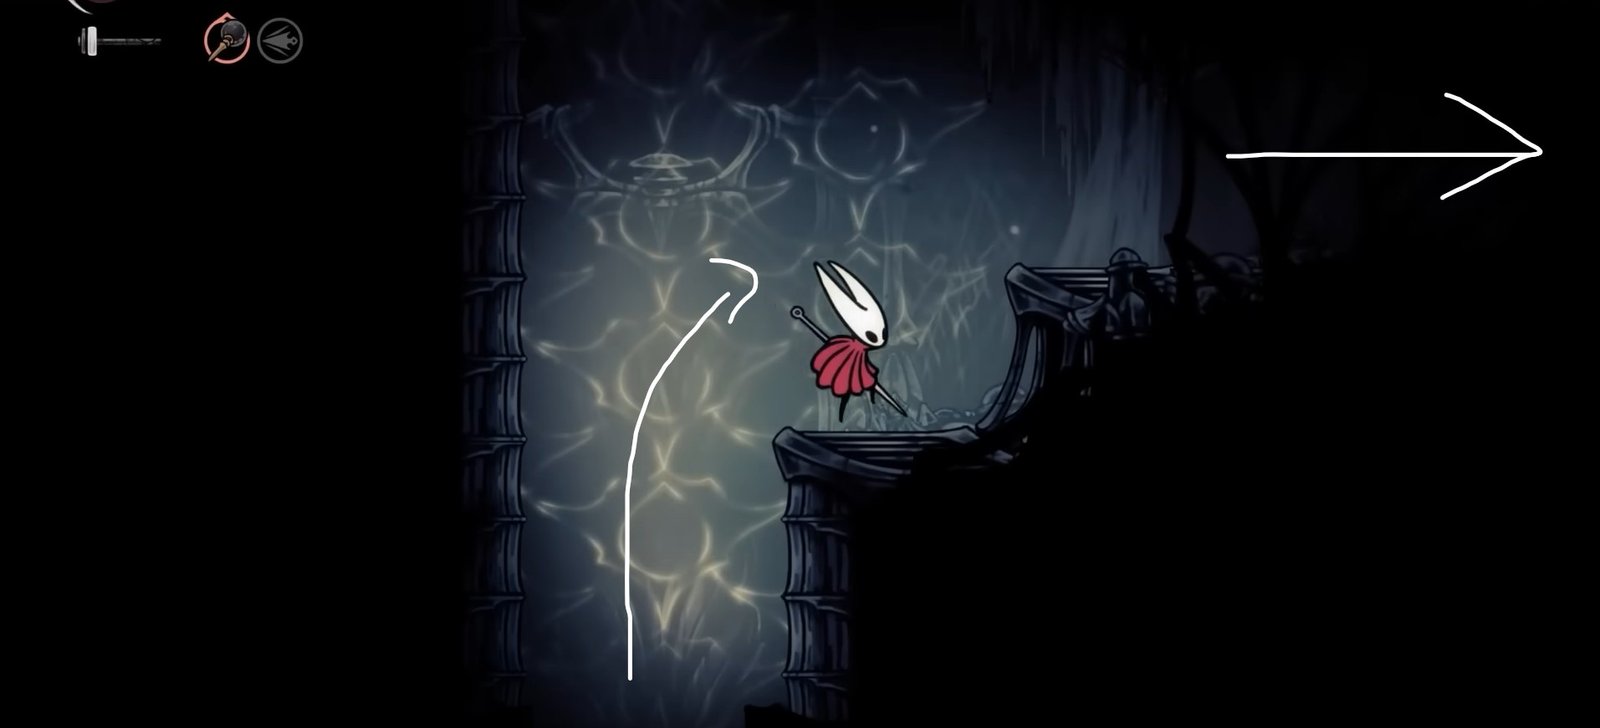
Use the platform here to take a breather. Time your next time after the lava stream and then use the enemy to reach the red flower up ahead. From the flower, glide to the wall on the right, climb, then turn left and use the two enemies to bounce ahead. 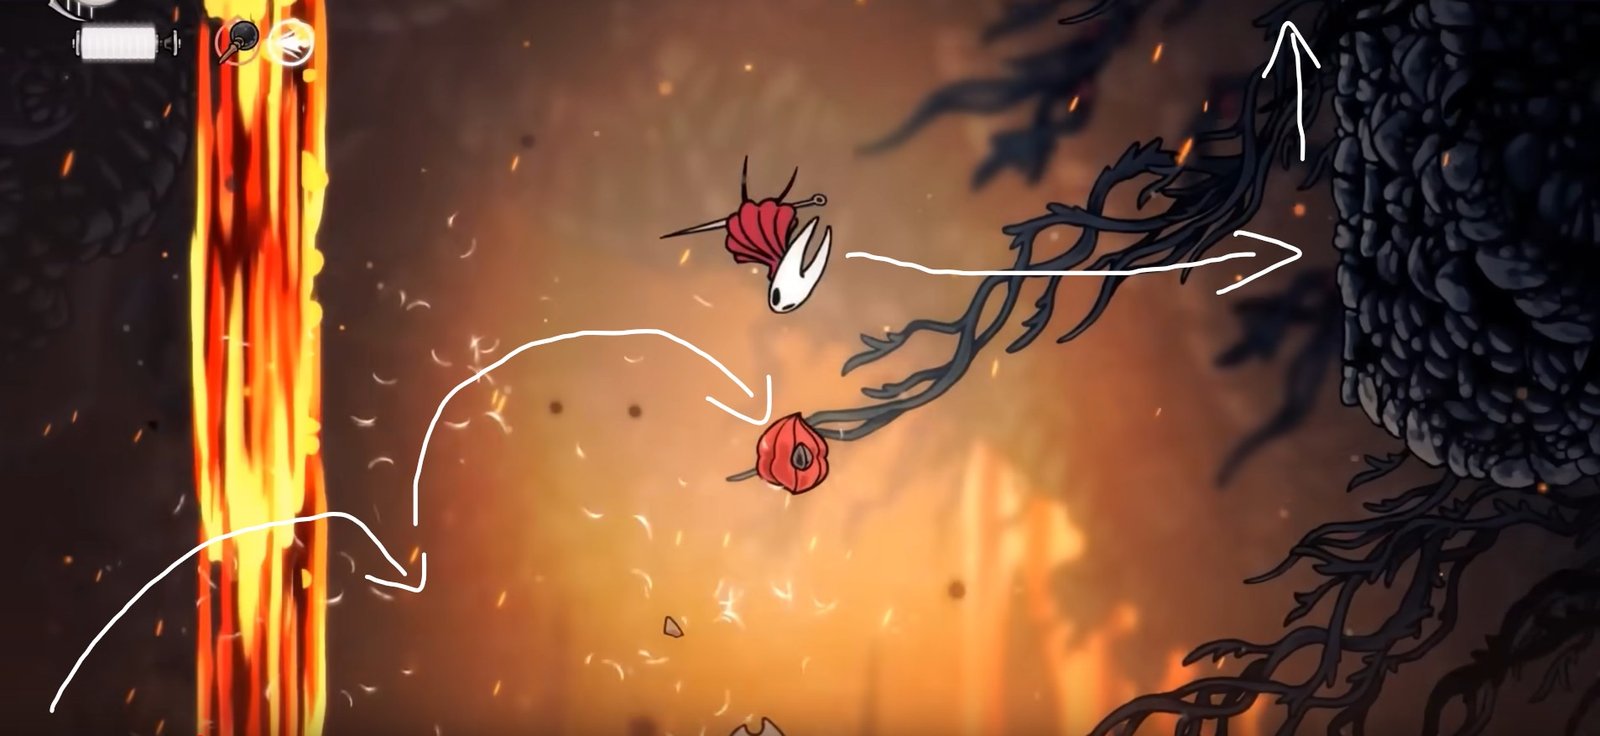 Time your last bounce according to lava stream, and then glide to the Mask Shard further ahead on the left side.
Mask Shard #4:
We can find another Mask Shard in Shellwood. Head to the following starting location:
Head right from the starting location into the next room. This chamber is filled with spikes on the floor, and you will need to use the platforms and white flowers to move further right inside this area. Complete this platforming sequence all the way to the end, and you will be rewarded with a Mask Shard, hiding on a platform on the top-right section, visible through some vines. You will need to break through the vines to get it.
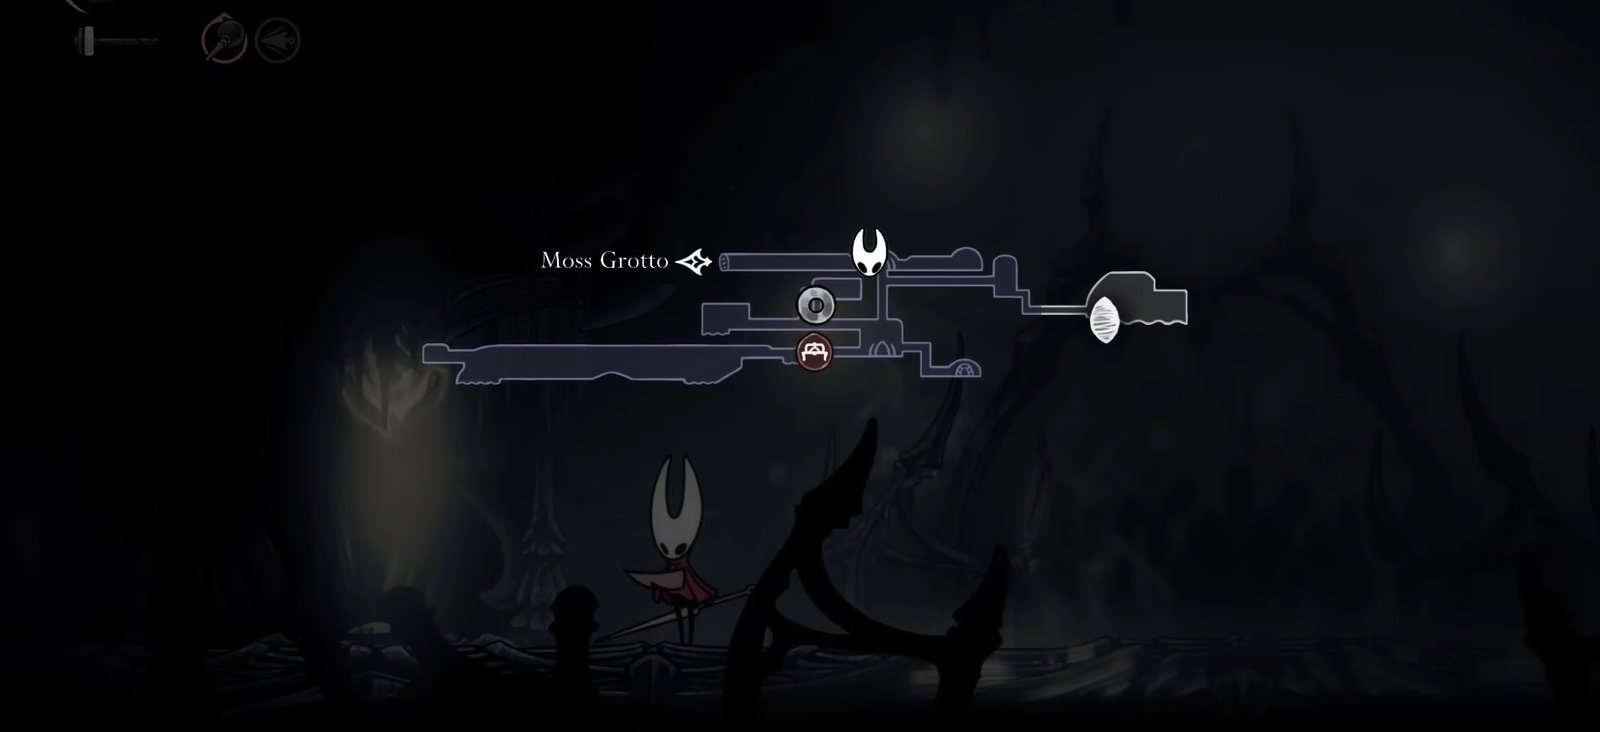
Mask Shard #5:
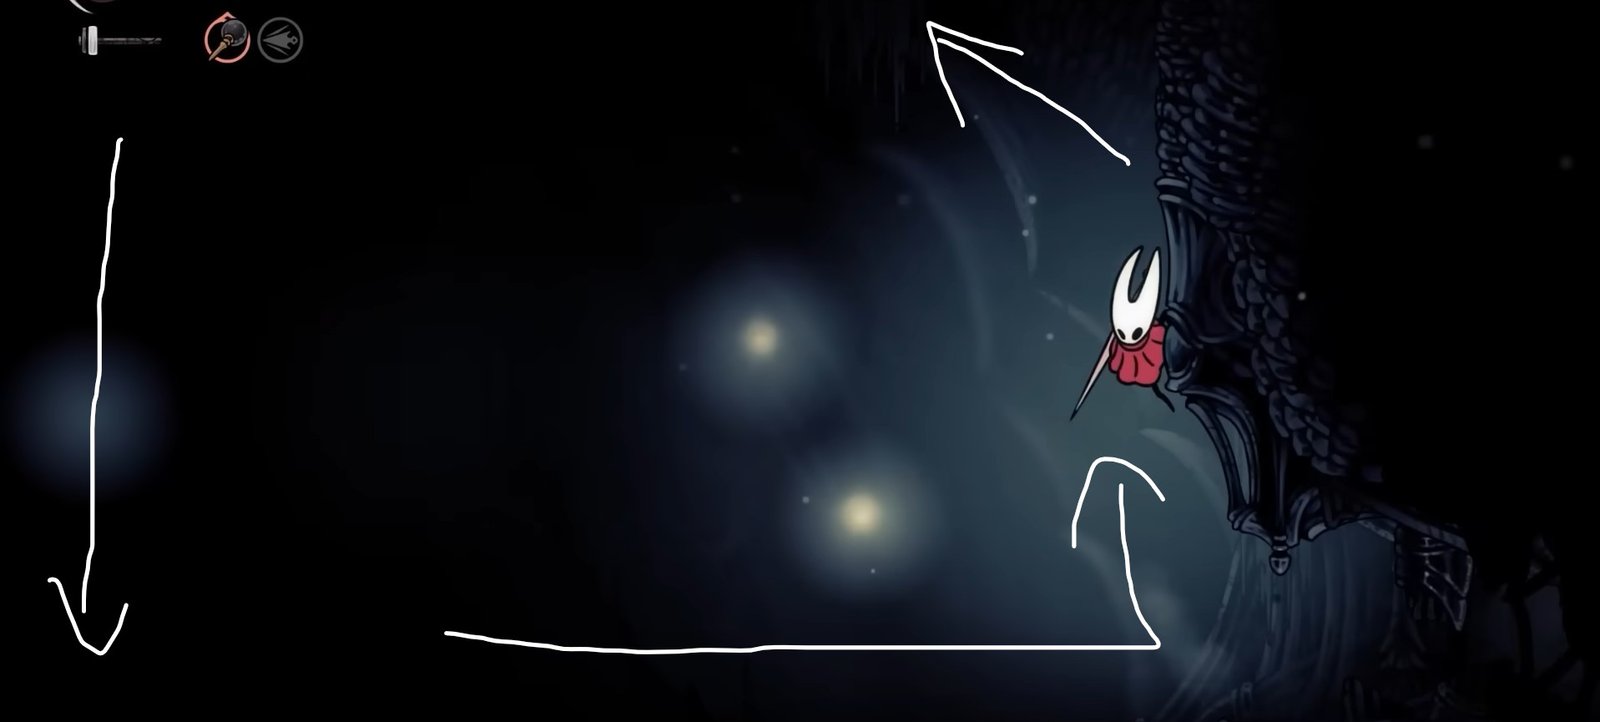
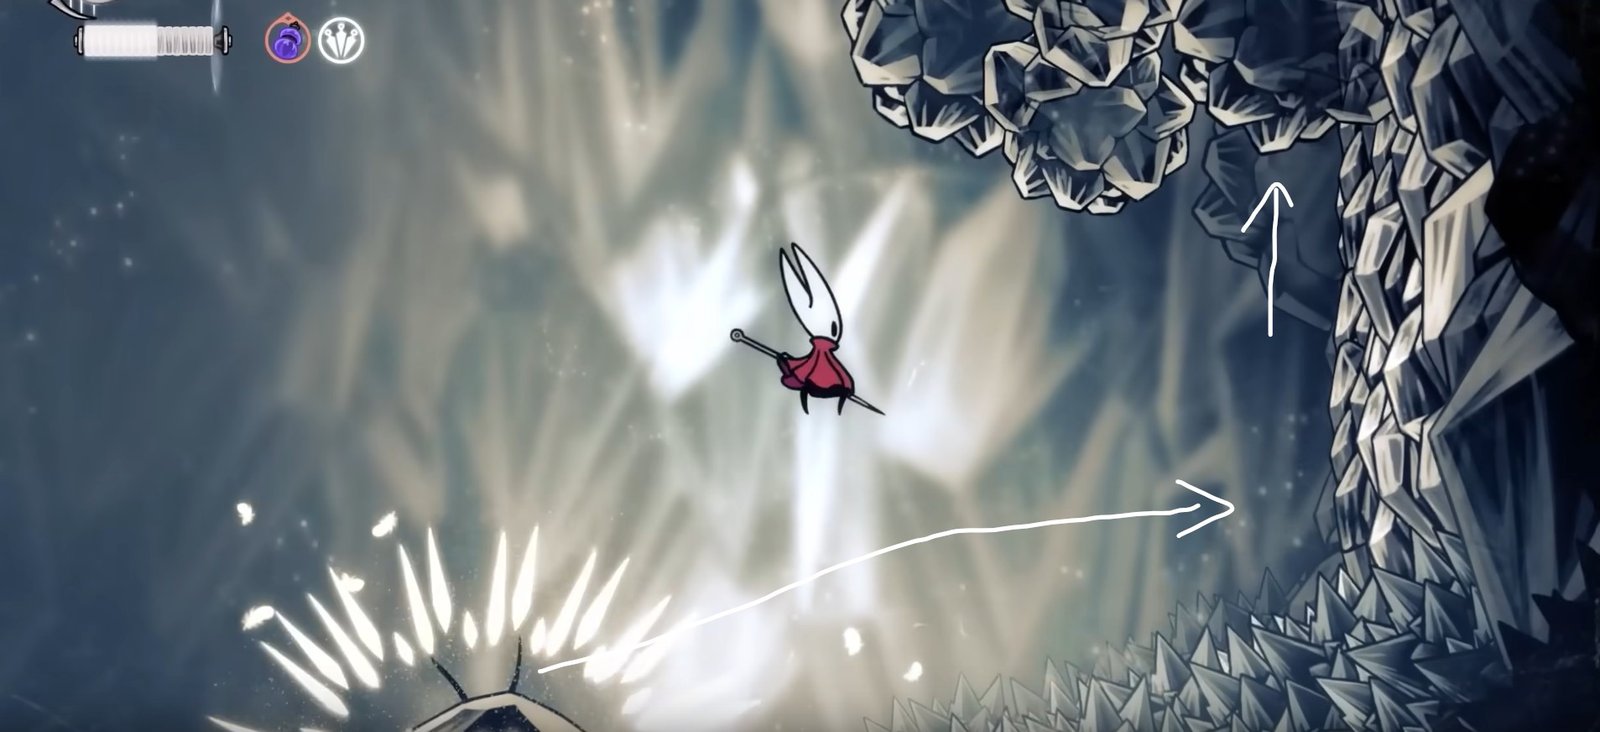
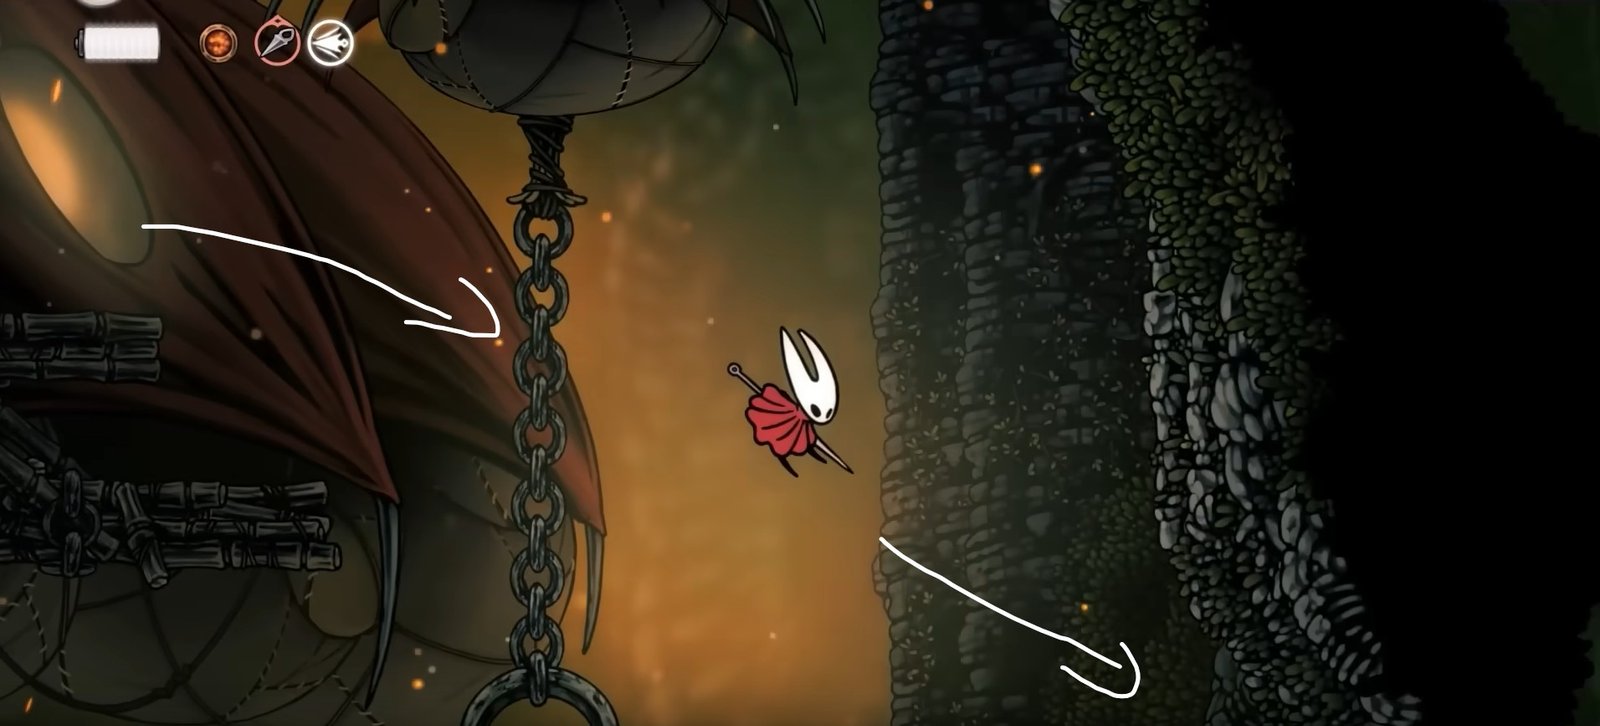
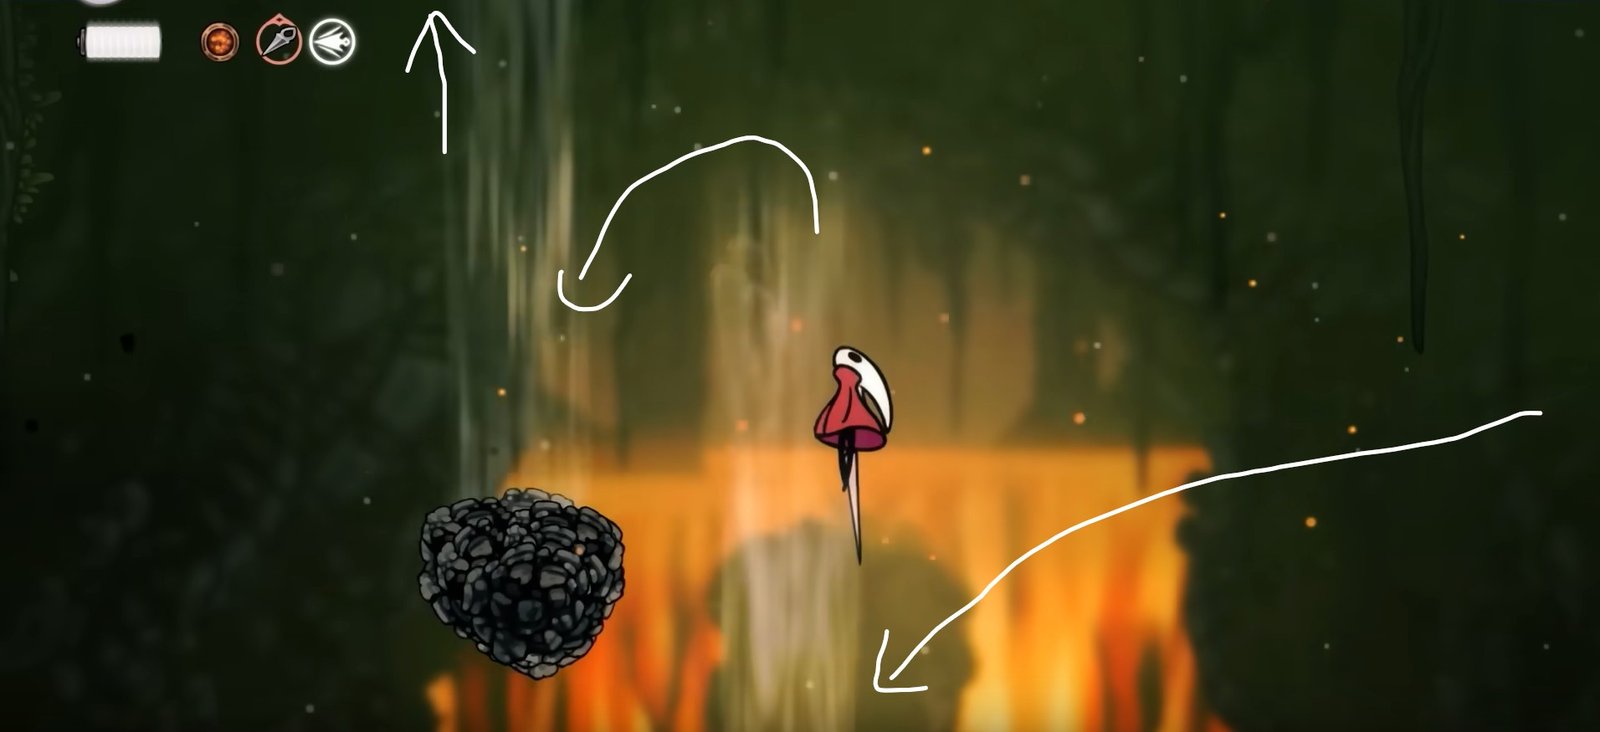
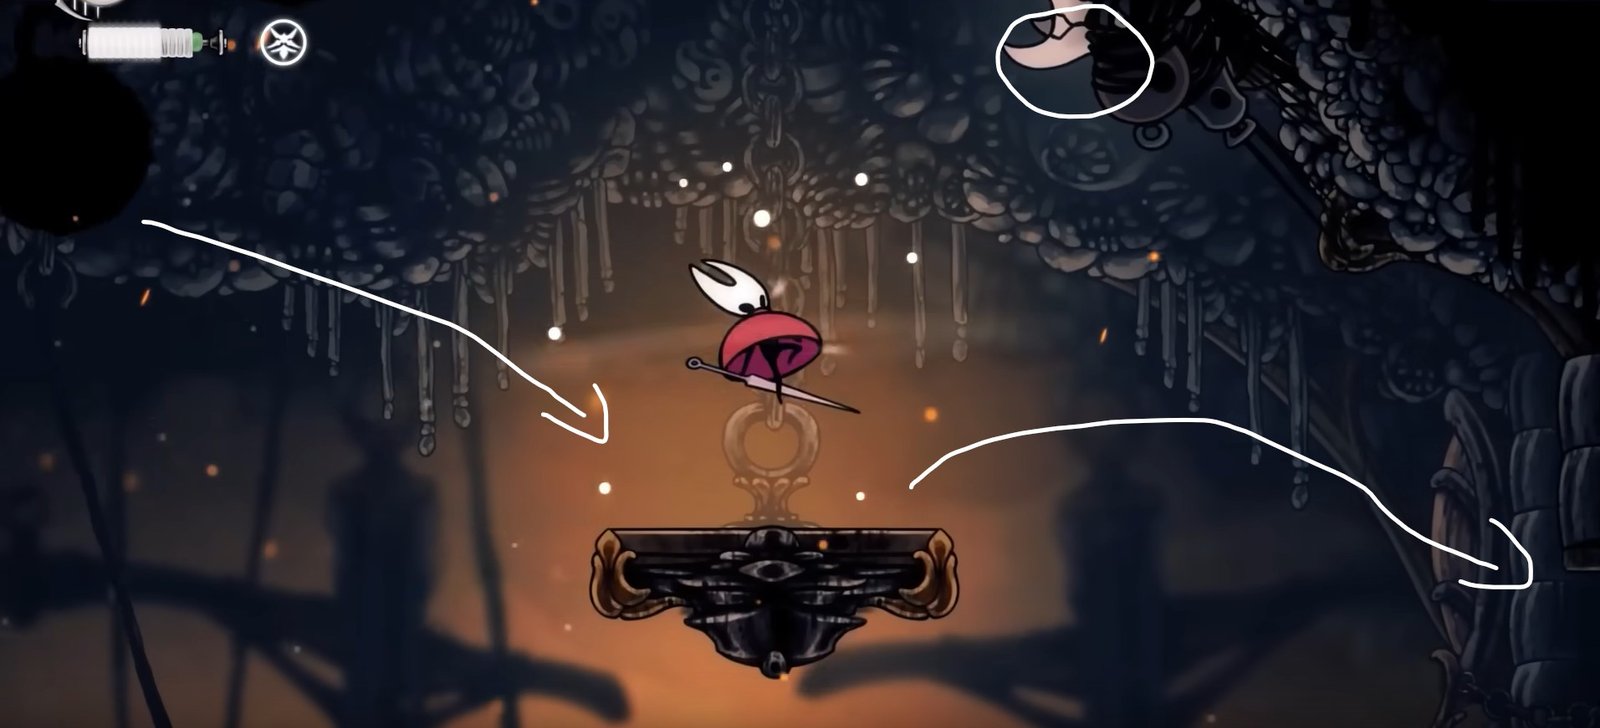
You will need the Silk Soar ability for this one. In Blasted Steps, you will find another Mask Shard. Head to the location marked below to begin this hunt:
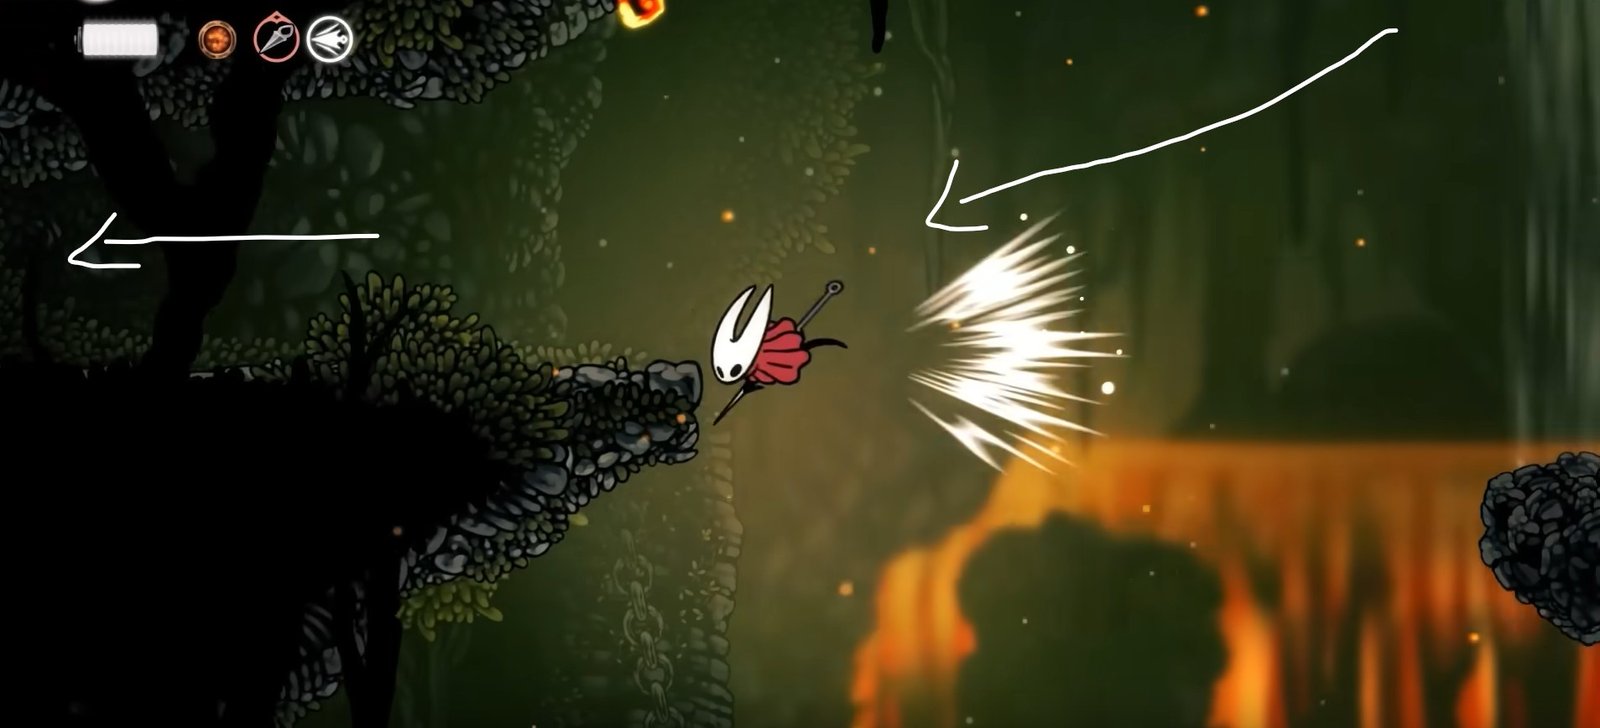
From here, you will need to use the Silk Soar ability to reach the wall high up. The exact location where you need to use the ability is in the picture below. It is a little to the left of the small rock mound.
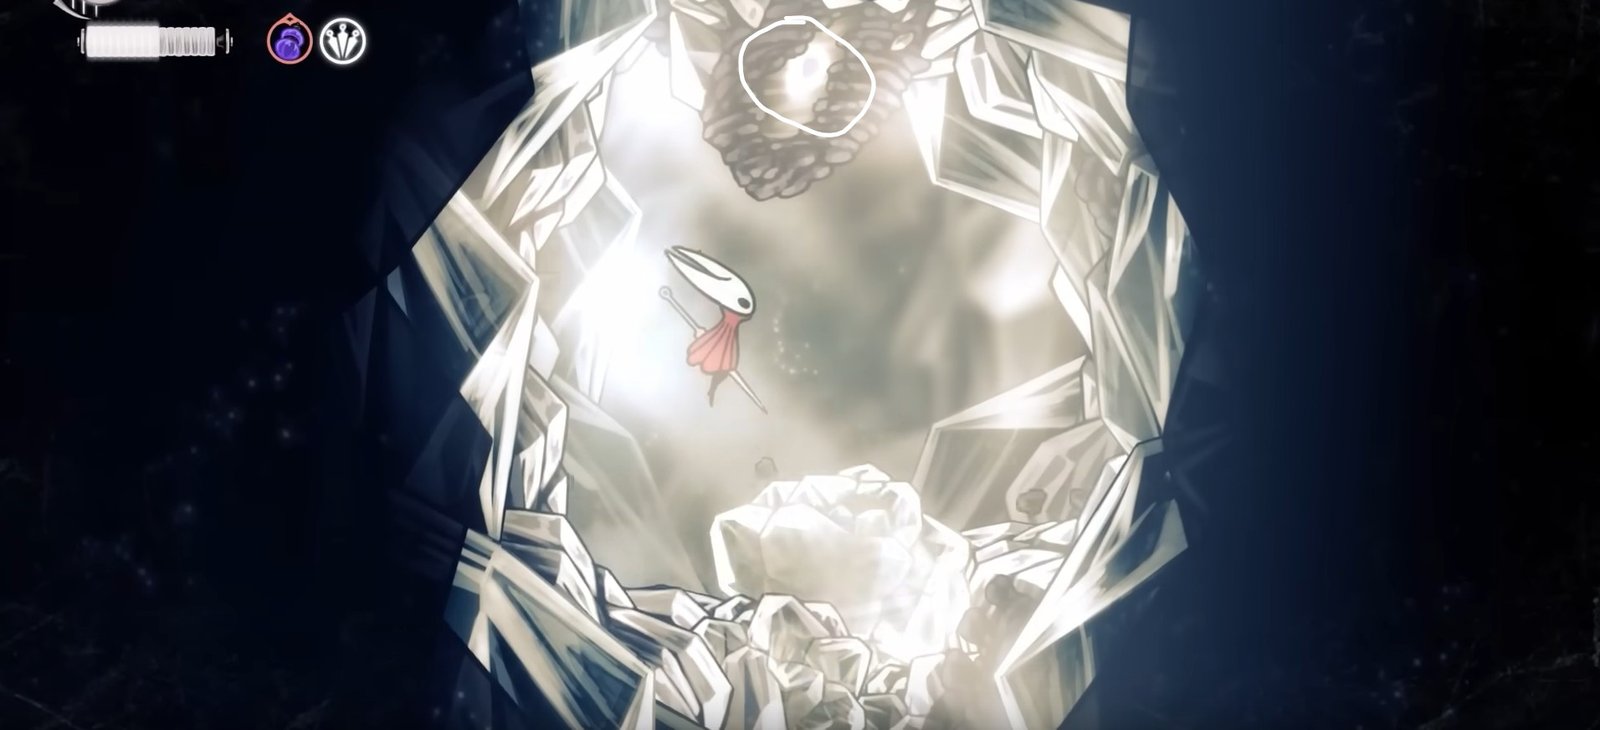
After clinging to the wall above, land on the small platform on the left, then jump up to enter the next area. The next area is a climb to the top with spikes and spikey enemies. Use the available walls here to cling and climb up. Watch out for the smaller enemies on the walls, as they will hit you with spikes if you get too close to them.
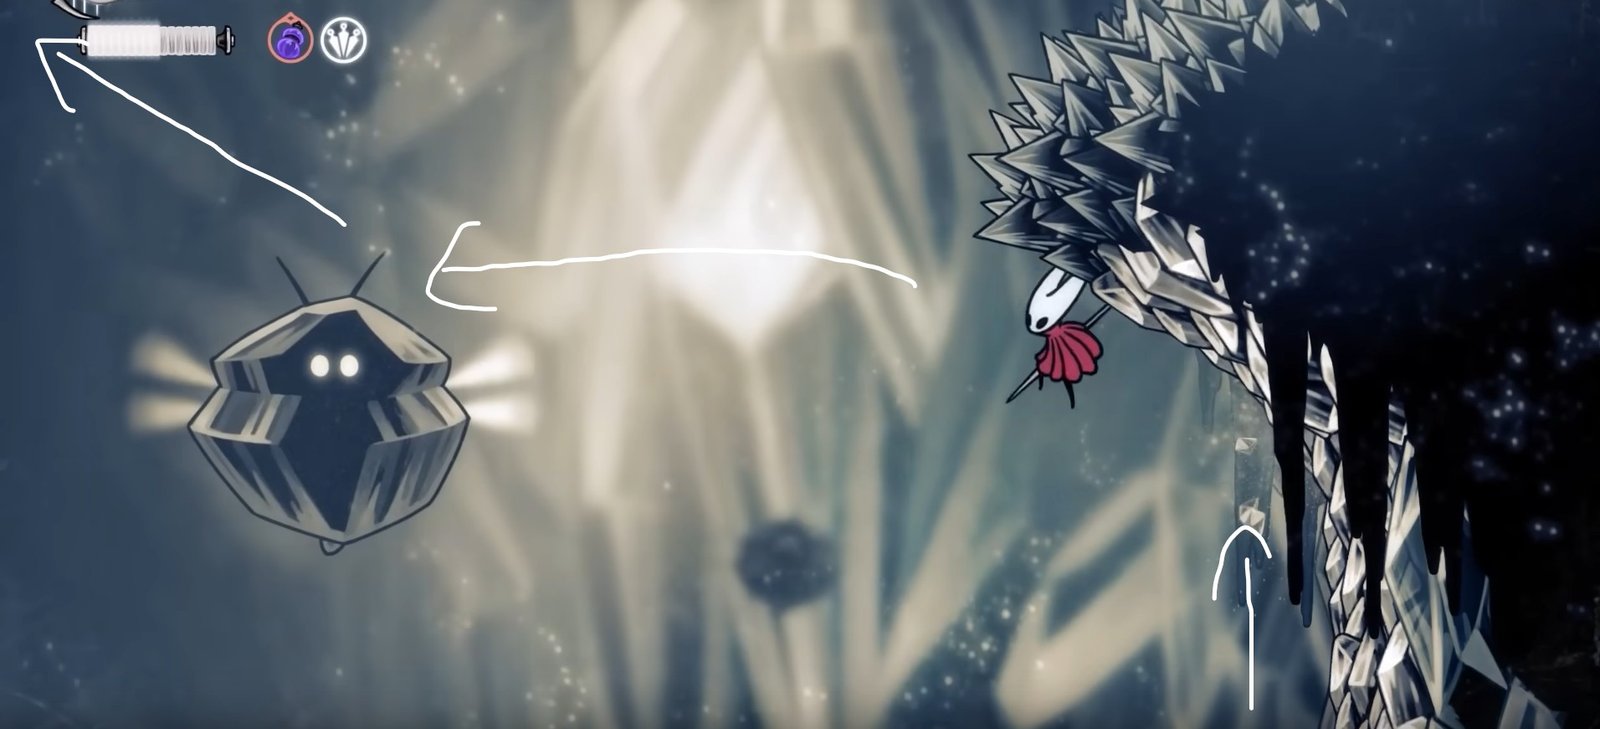
At the top of this initial climb, you will find yourself in a bigger chamber with plenty of paths going up and down. Go left and climb the wall on the right side.
It will have spikes at its top, and a boulder will fall on your head from above, so watch out for it. Climb up, avoid the spikes, jump up from it, and then glide to the right side.
On the right side, you need to land on the next platform you see. There is another white-skull enemy here, and if you time it right, you can land, trigger the falling boulder, and kill it with it.
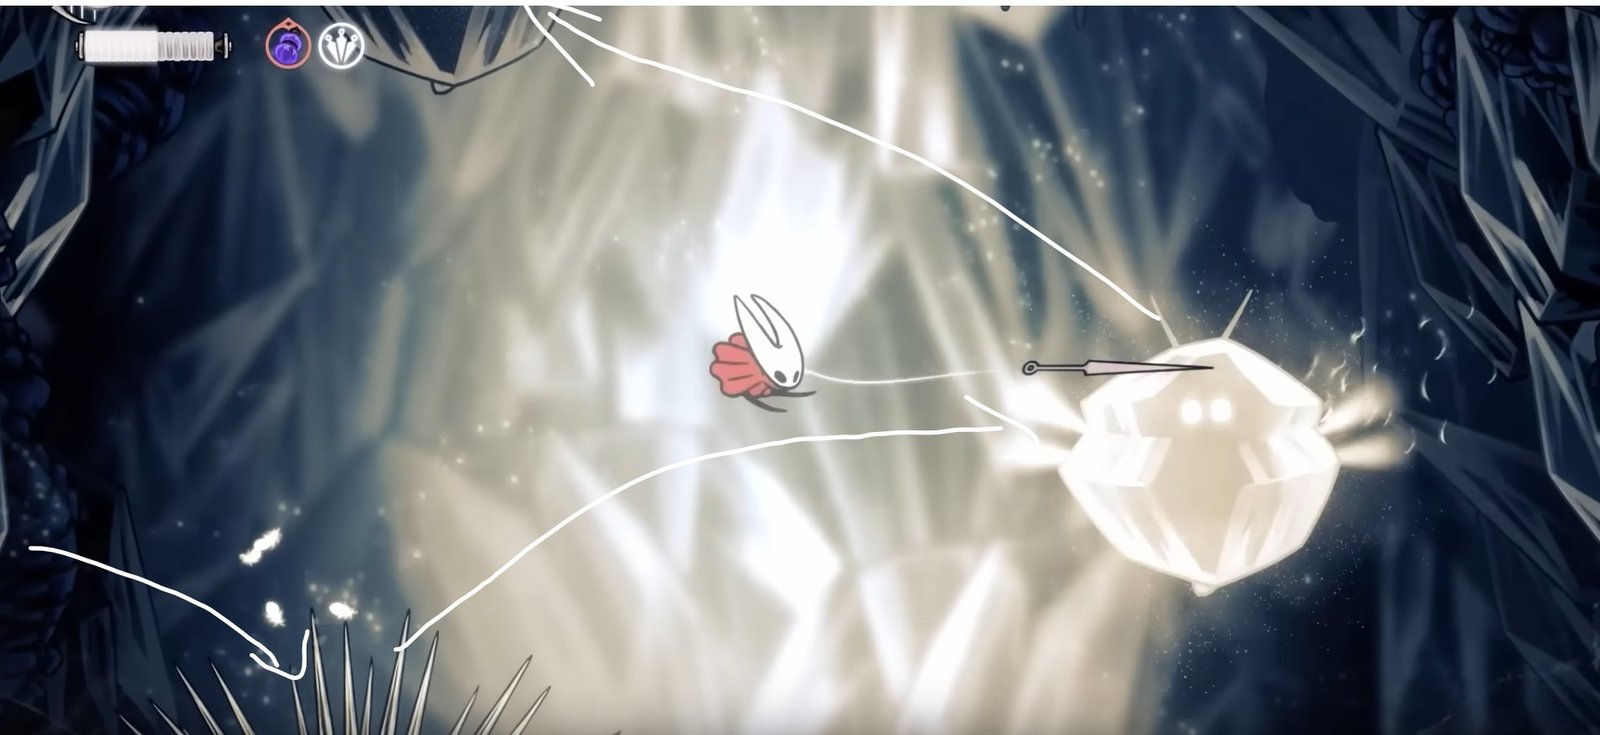
Now go further right, avoid the spikes, and use the wall to climb up. Go up and then dash to the left side to reach the platform above the spikes. Go left, jump across the gap, and you will see the Mask Shard ahead. Make sure to sprint there because a boulder will fall over your head here as well.
Mask Shard #6:
For this Mask Shard, we are heading to The Slab in the following location:
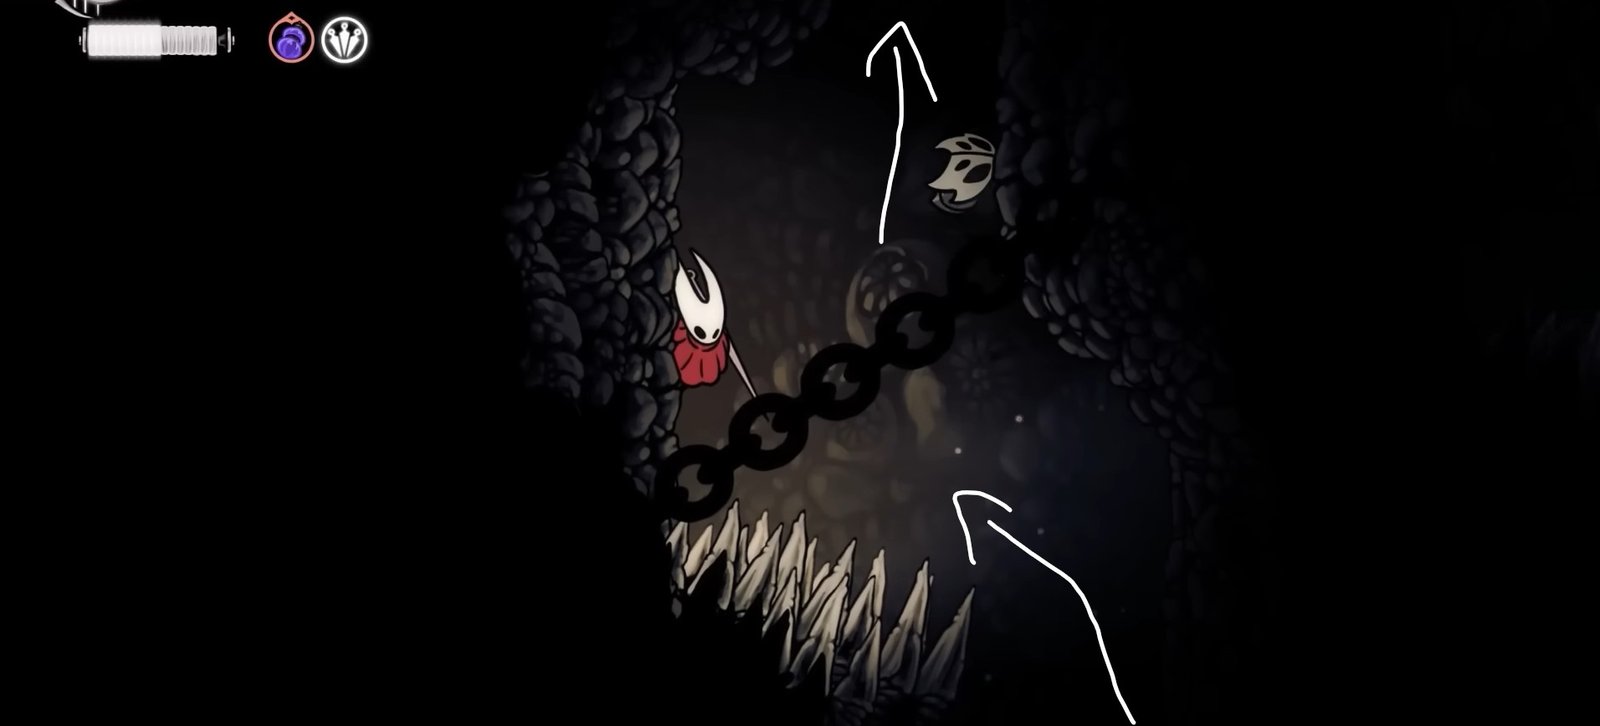
At this location, there is a door with a lock on it. Go through the door, drop down, and head further right into the area. On the platforms between the spikes, there is a pressure plate that you need to step on to start moving the spikey wheels above.
Once the wheels start moving onto their tracks, you will need to bounce off them and start going up. Once you reach the platform in the middle, use the spikey wheel above here to climb further up by going to the right side. The wheel track goes right, so keep bouncing off it until you can reach the wall above on the right side.
Once you make it to the wall, climb further up, and then use the spikey wheel here to move left, and then climb up the platform ahead. The Mask Shard is sitting on the platform on the left side.
Mask Shard #7:
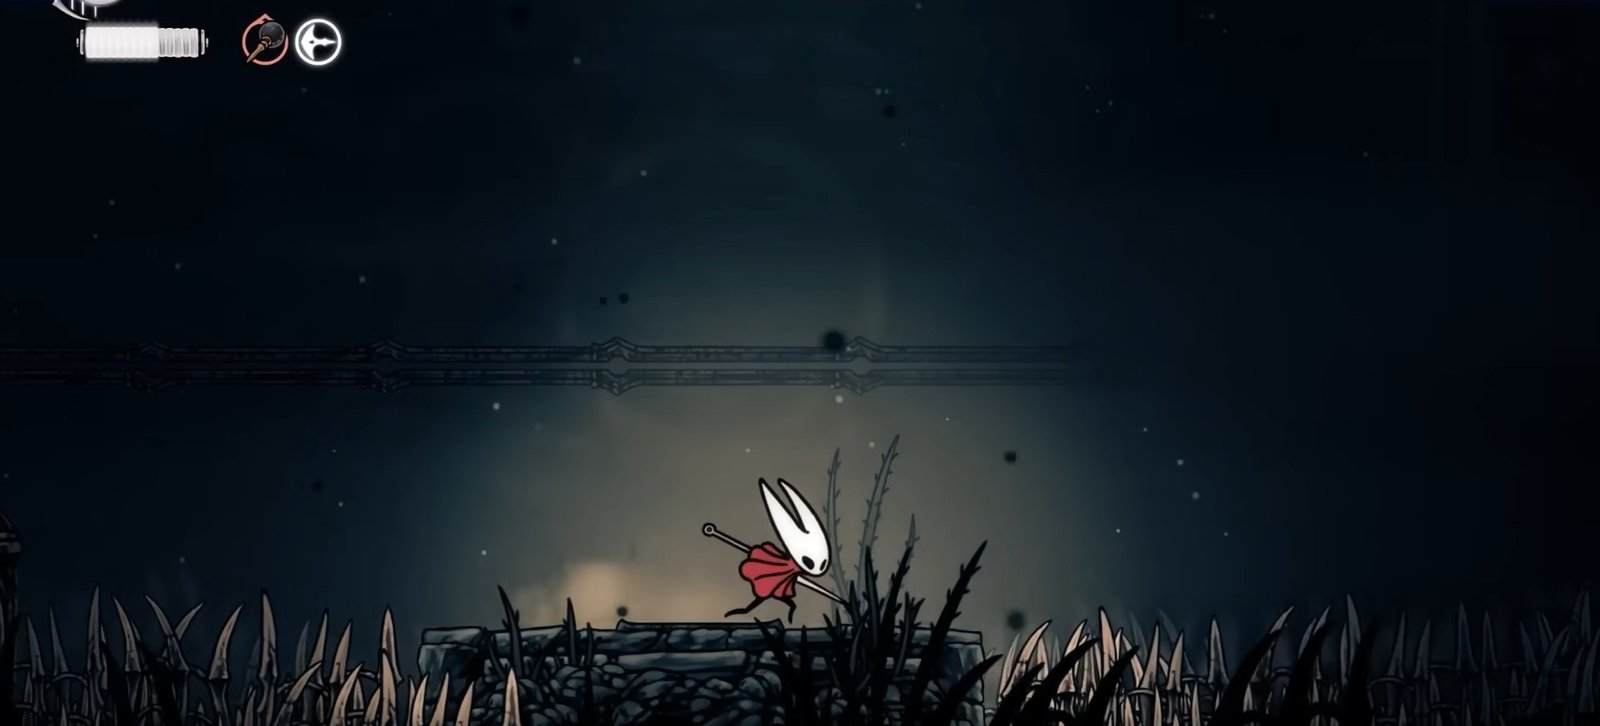
You can find a Mask Shard in Mount Fay. Head to the following location:
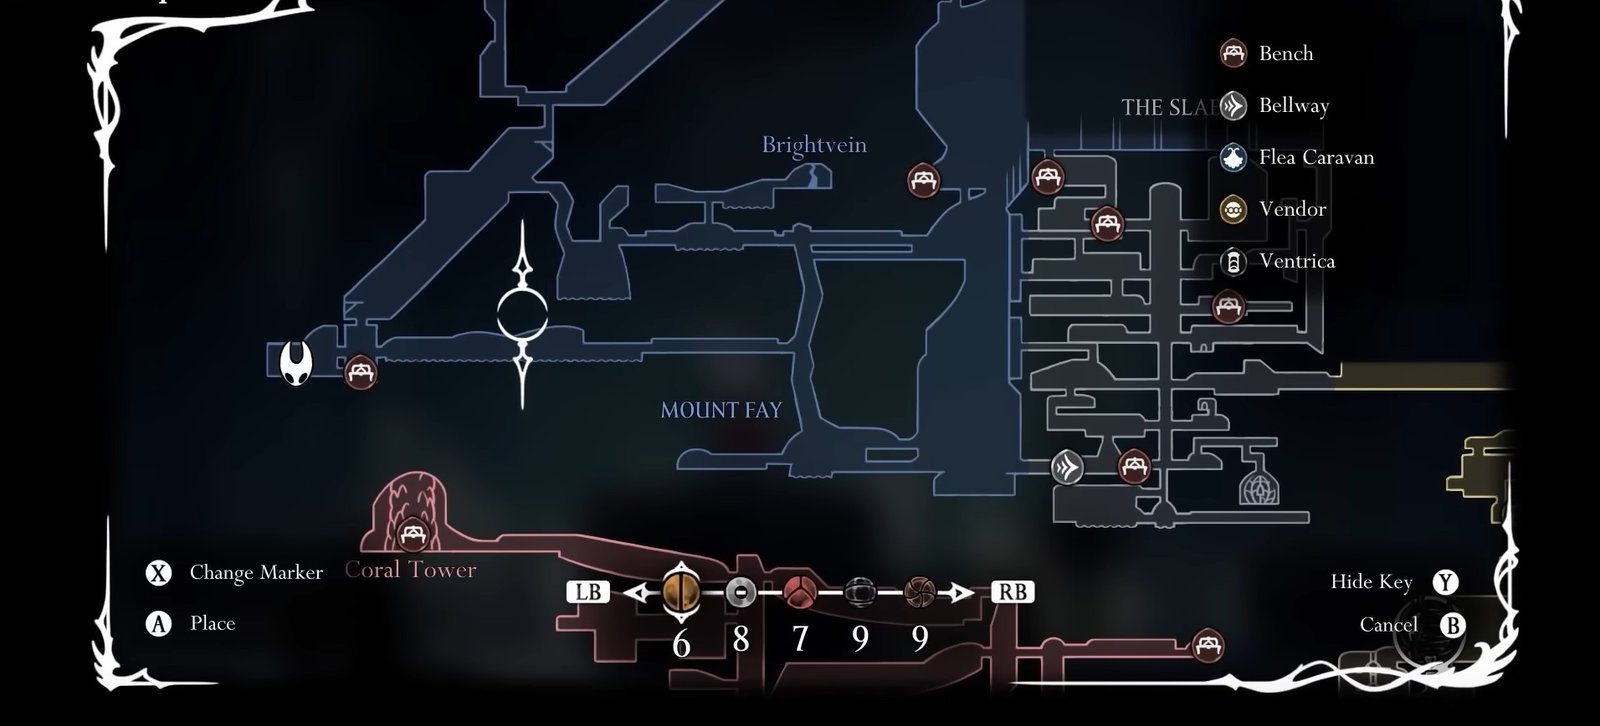
At the starting location, there is a small alcove right above you.
Double jump into it, and you will find the Mask Shard in this small hollow rock.
Mask Shard #8:
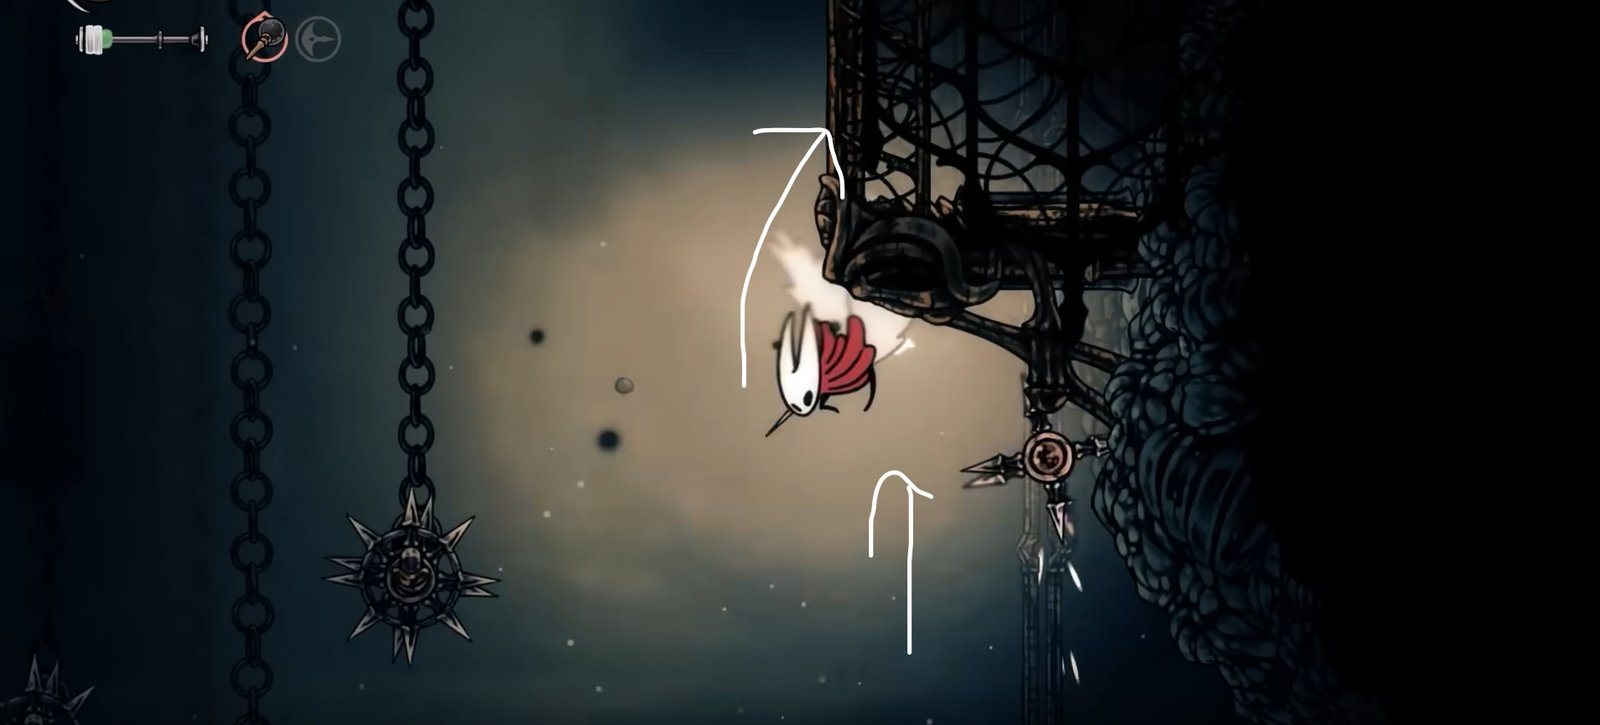
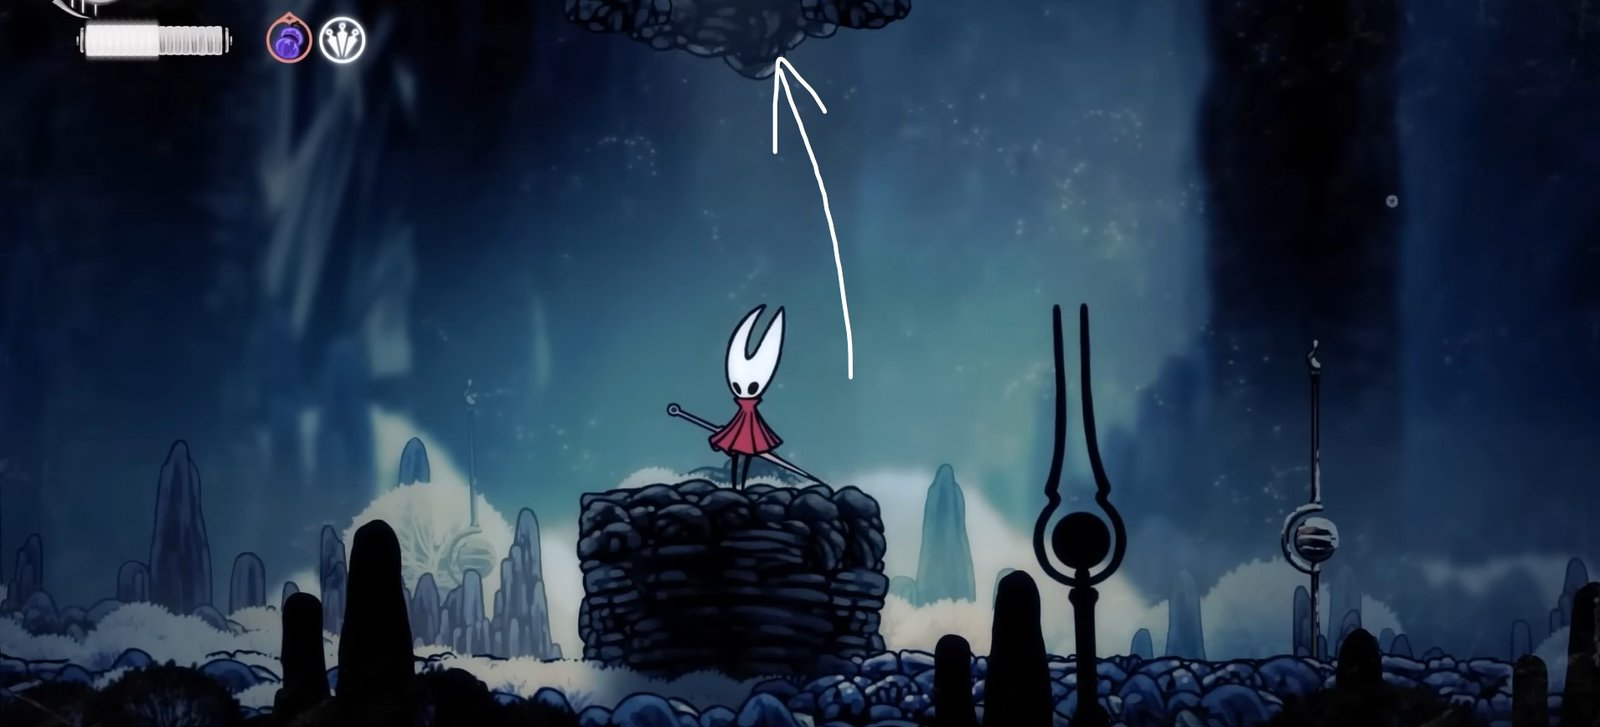
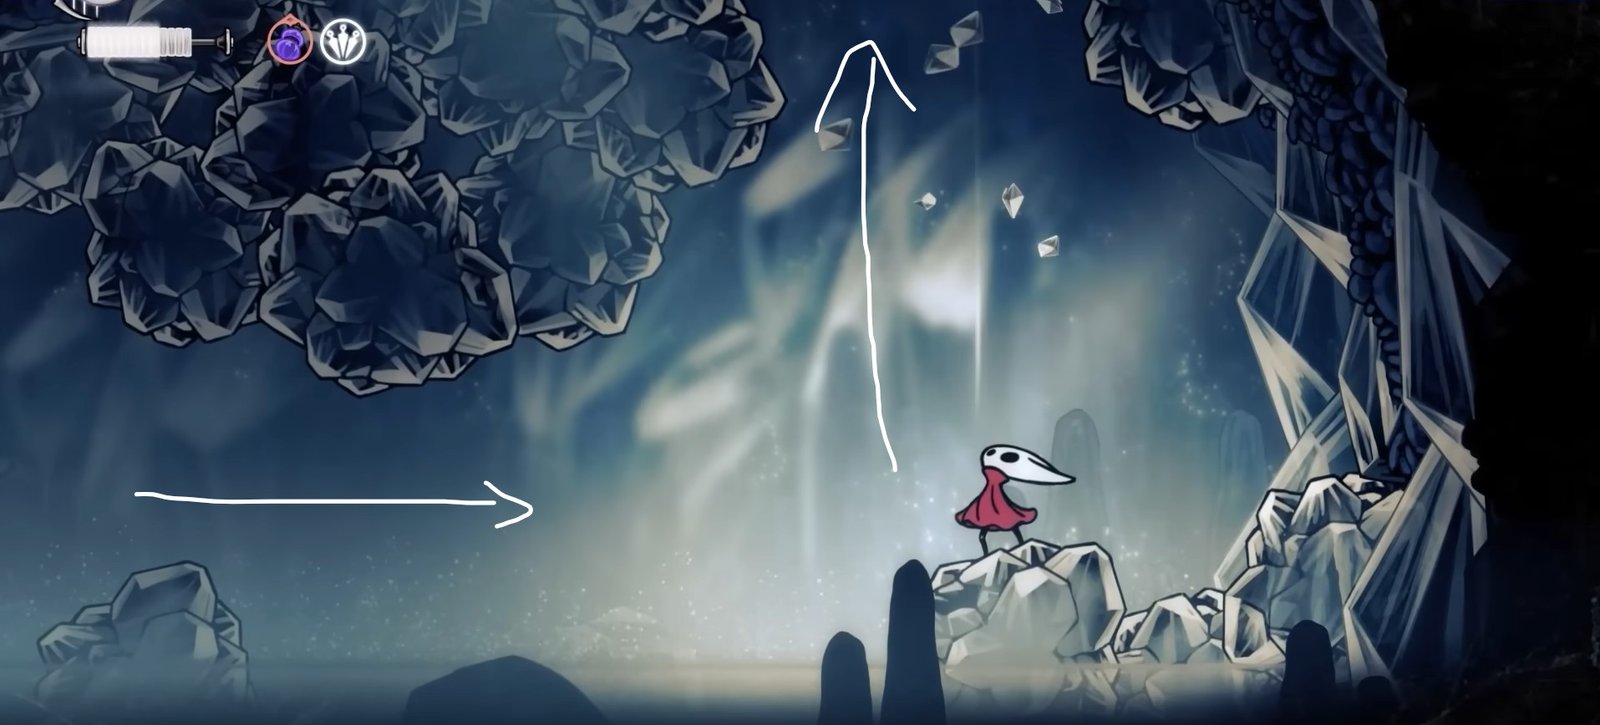
The next Mask Shard is also present in Mount Fay, on the path leading into Brightvein. We have marked the starting point on the map below:
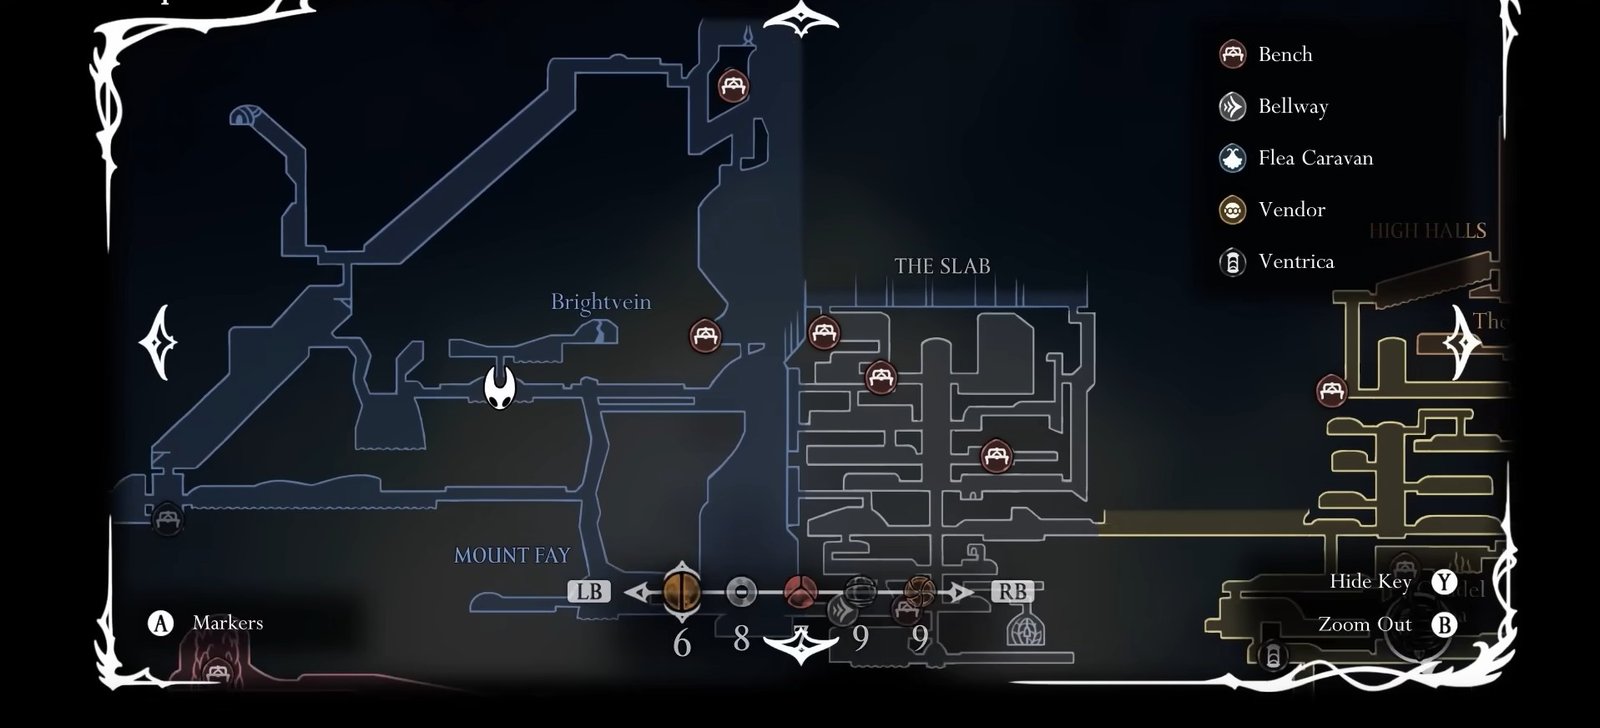
At the starting platform, use Silk Soar to reach the area above. Break through the ice, and you will arrive in the area above, leading into Brightvein.
At the top, start heading right, using the platforms, breaking through ice wherever you need to. Reach the end, and then stand on the small platform here, use Silk Soar once again to go even higher in the area. Once you reach the platform, go right to enter the next area.
At the start of this area, use Silk Soar once again to go up and land on the platform on the right side.

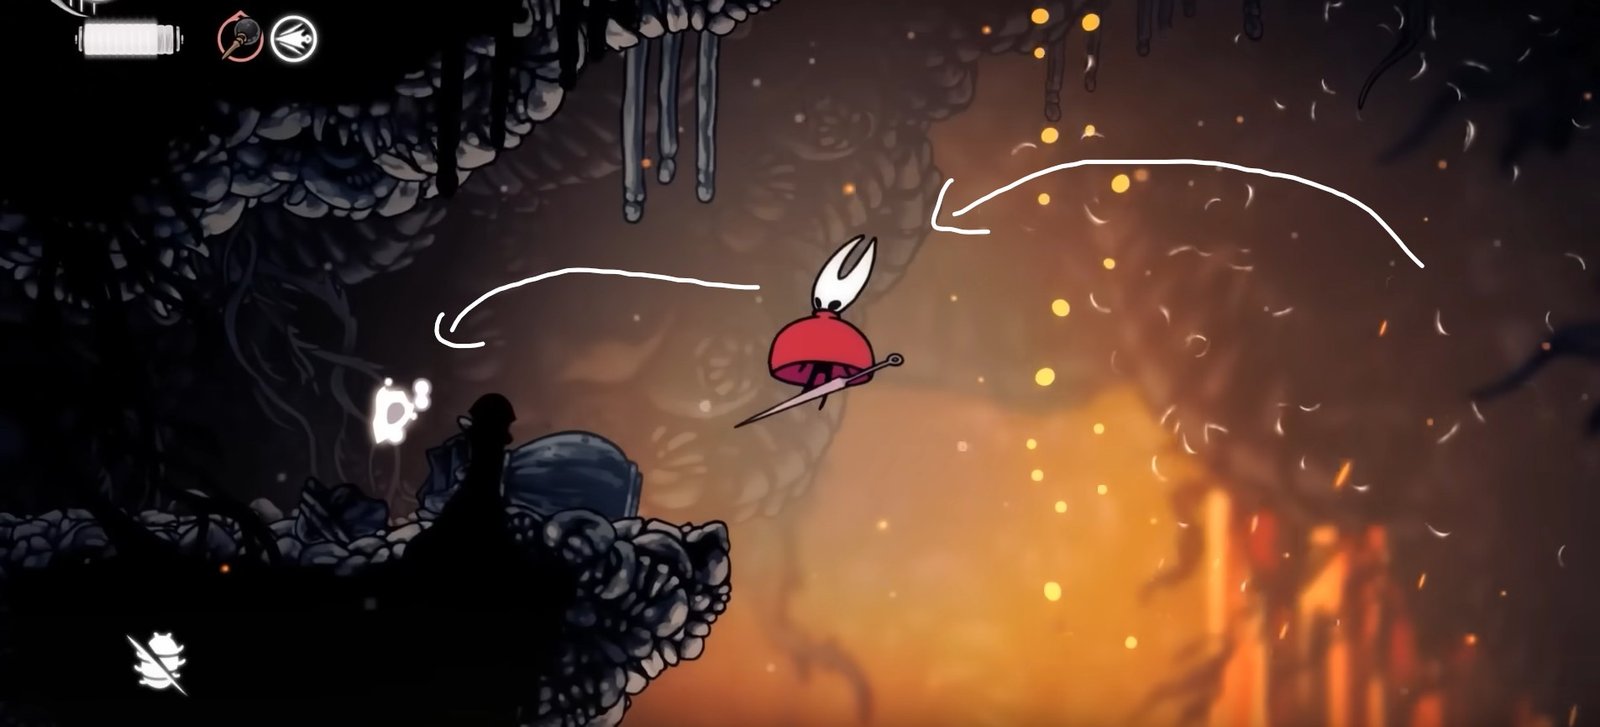
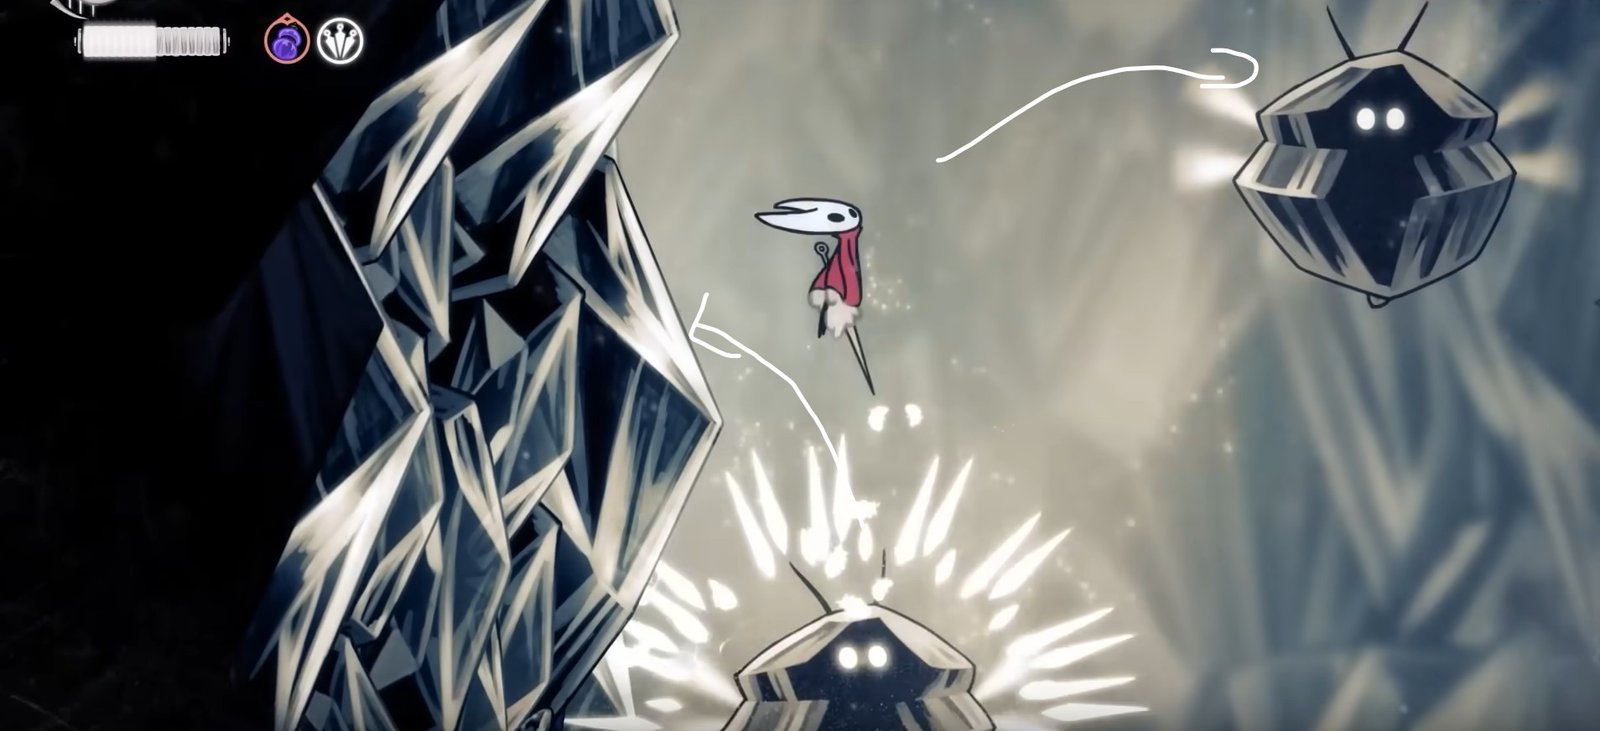
Now, you will need to climb up using the big icy enemies floating around and the walls on either side of this chamber. From this platform, you can see one of these big flying enemies. You must jump to it and bounce off it to go further right, but as soon as you come close to it, it will start glowing, indicating an upcoming spike attack. Bounce off quickly to avoid the attack and reach the wall further ahead on the right side. Once you cling to the wall, up ahead, go up until you come to some ice blocking the path. You can break the ice. Smash through the ice to go further up.
Go up until the way is blocked again. This time around, you have to go left. Look for the big enemy floating, dash towards it using your spear, and then quickly dash to the big enemy above it before either of them can attack you. Use the small wall right above this enemy to use as leverage, and then jump off towards the big enemy on the right side. From the big enemy, you must dash towards the wall on the right side.
Use the wall to go up. Break through the ice here and continue going up until you cannot go any further. There will be a big enemy here close to the wall, but you can avoid it and go further up to the very end.
At the end, dash towards the big enemy on the left side in the middle of the chamber, and then bounce off it to reach the wall on the right side.
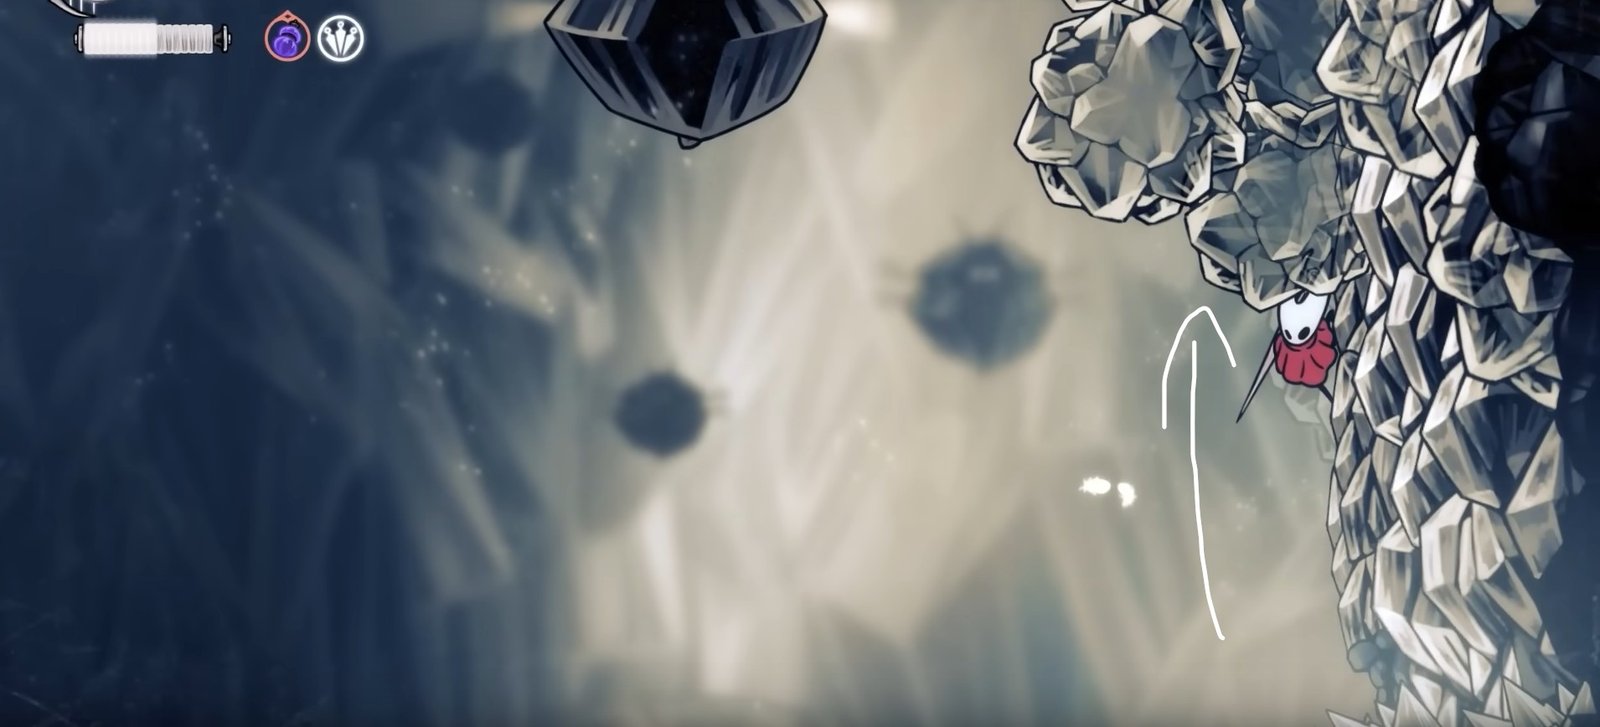
Go up, break the two ice blocks here, and then jump towards the enemy on the left side. Use it to reach the enemy further ahead and then bounce off to reach the enemy further up ahead. You will need to double jump and dash in this section a lot because there are no walls to cling to.
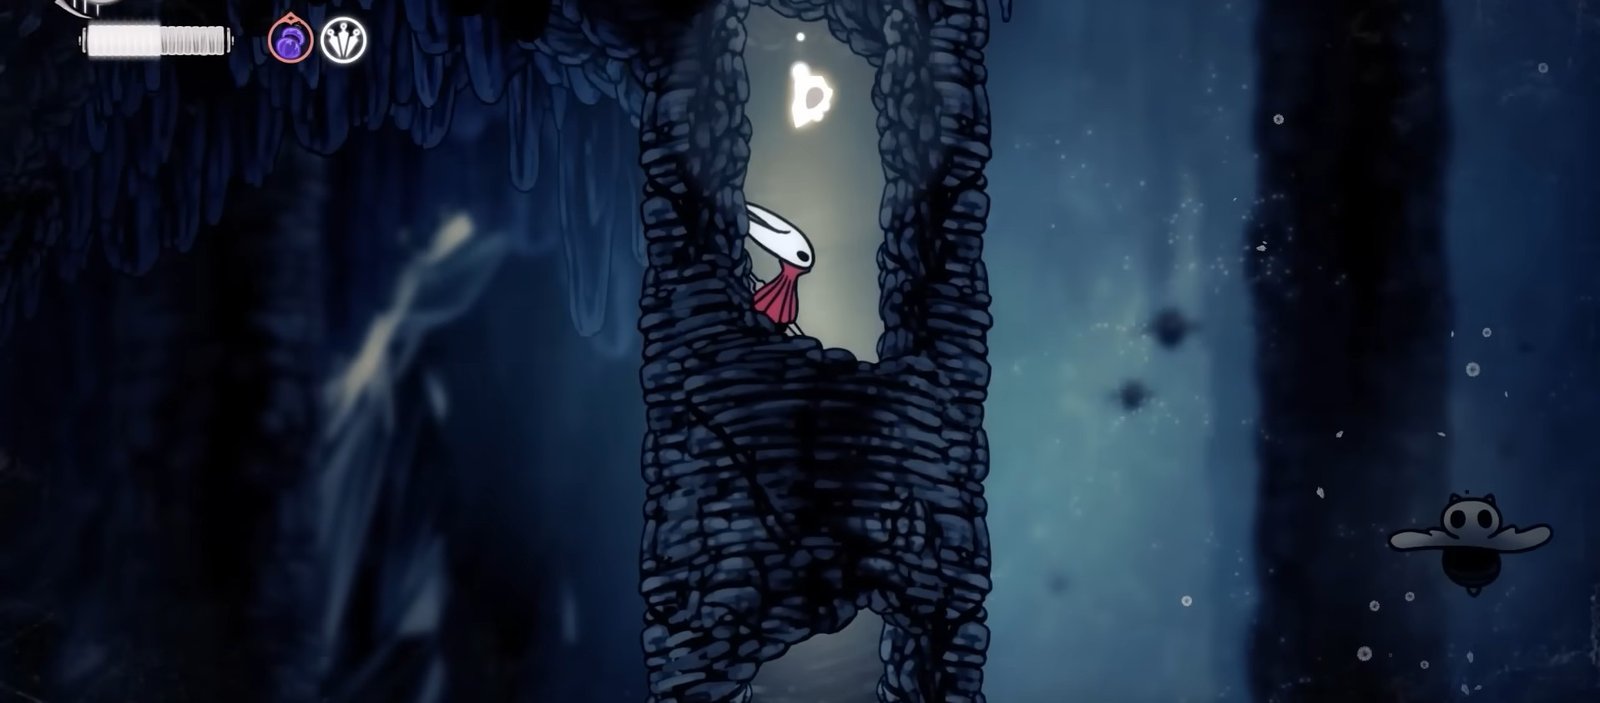
This will allow you to reach the platform above. Use Silk Soar on this platform once again to break through the ice above and reach the final chamber where the Mask Shard is present. The Mask Shard is inside a protective casing, so break it off and then jump to claim it.
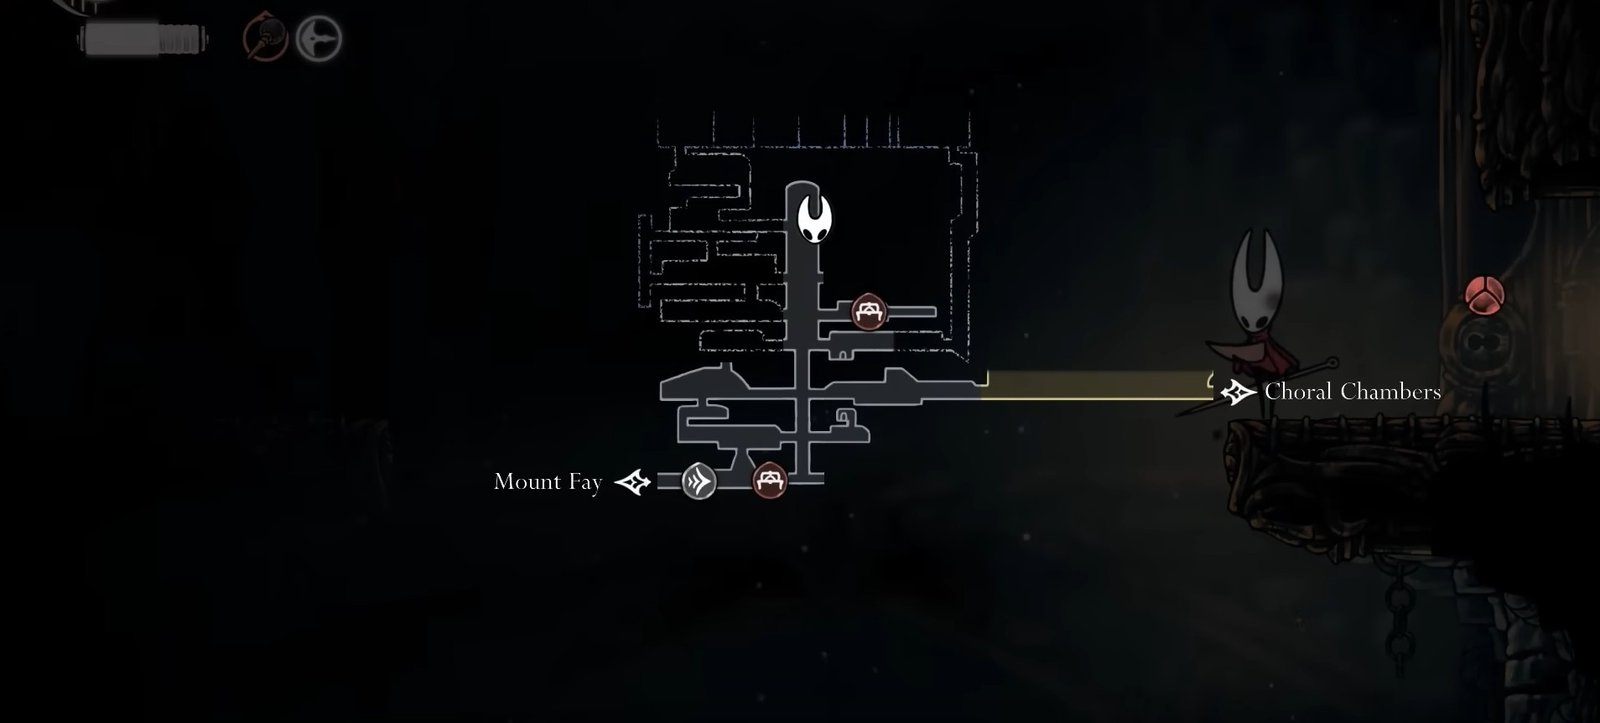
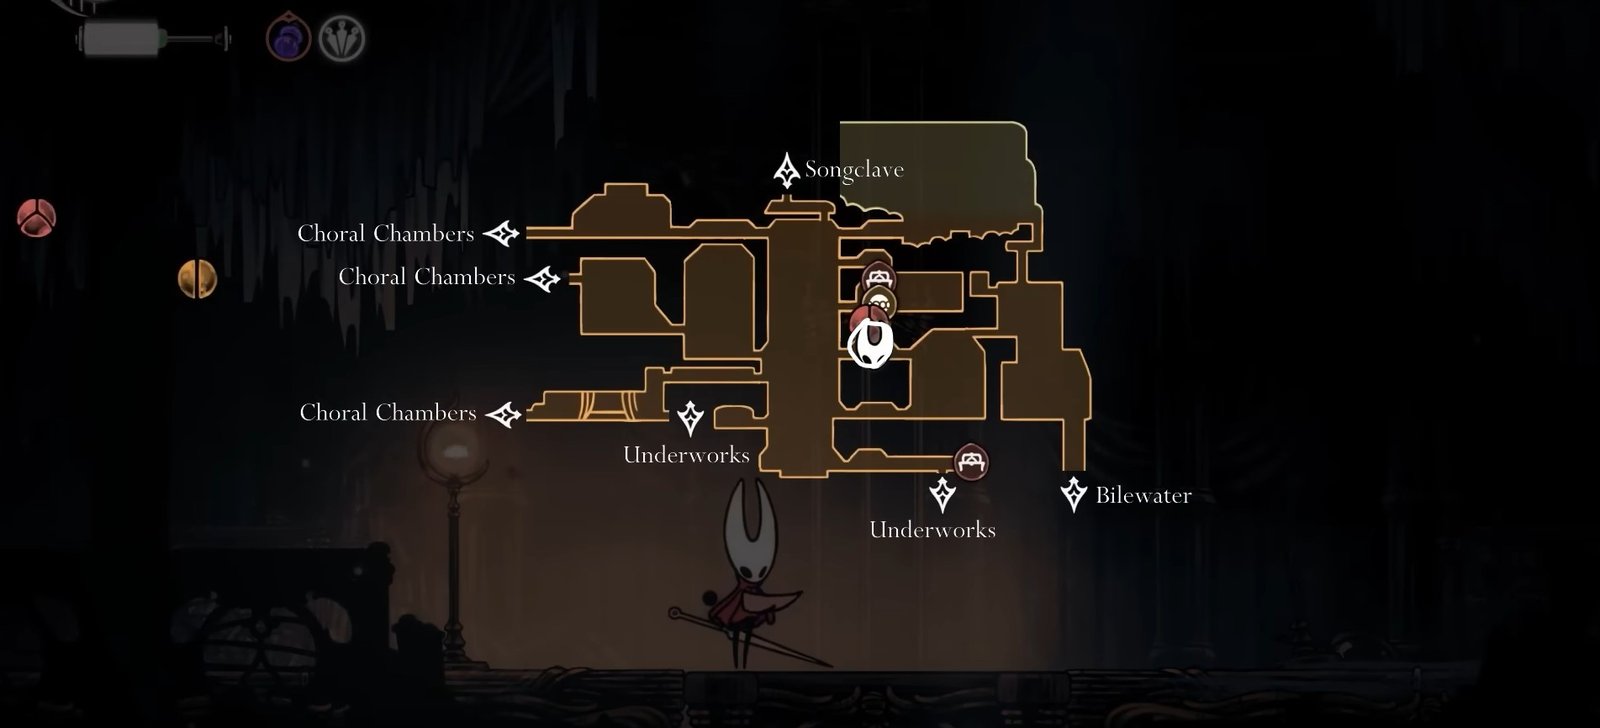
Mask Shard #9:
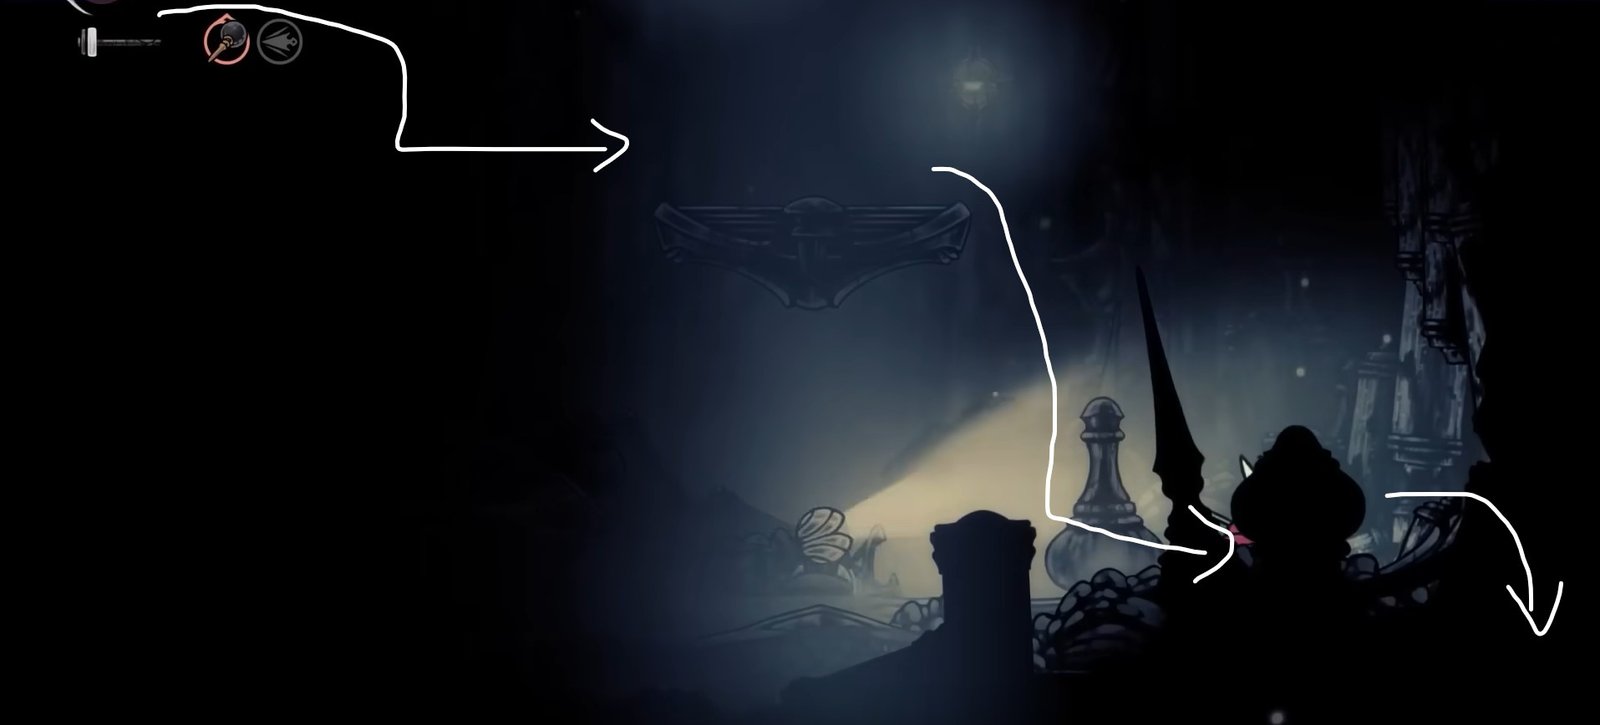
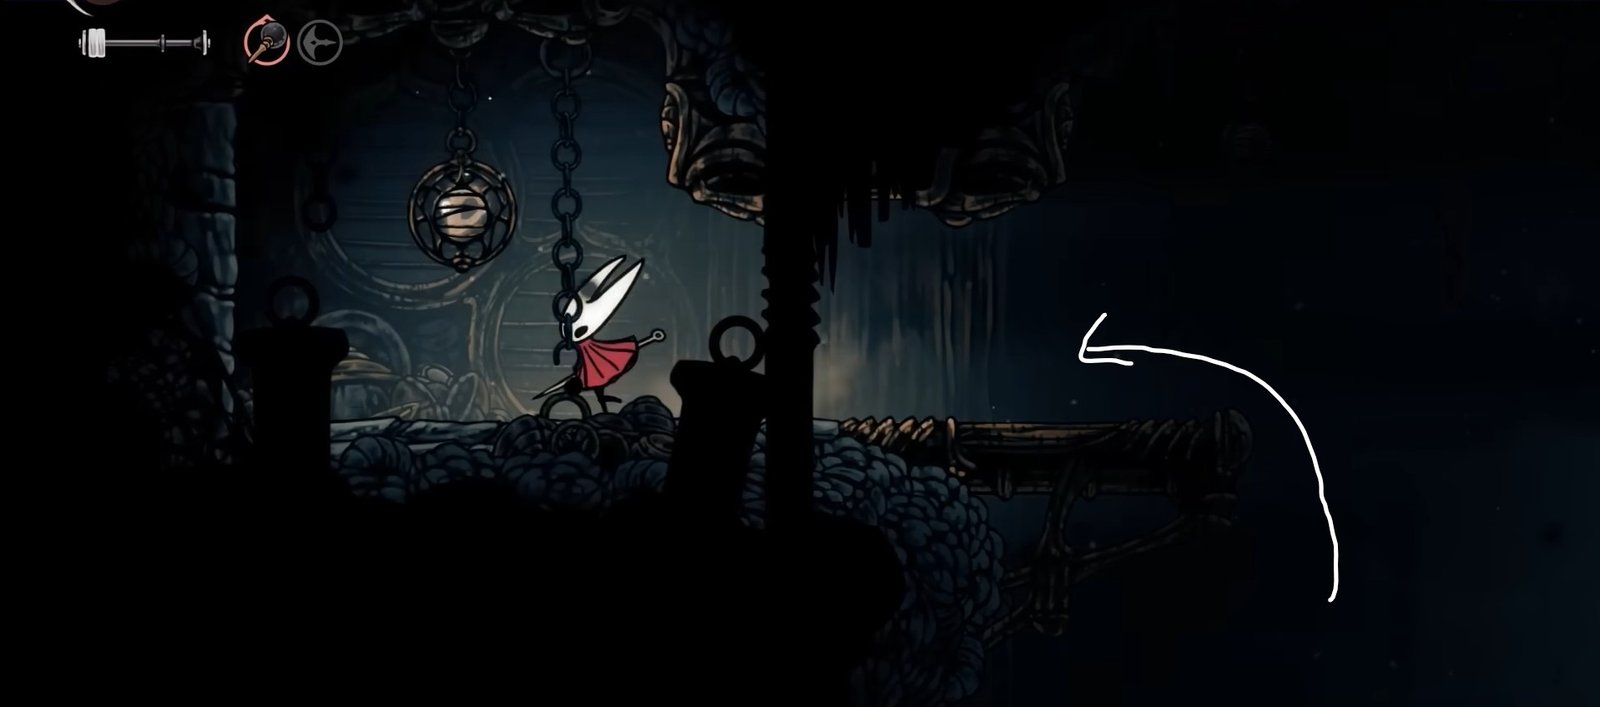
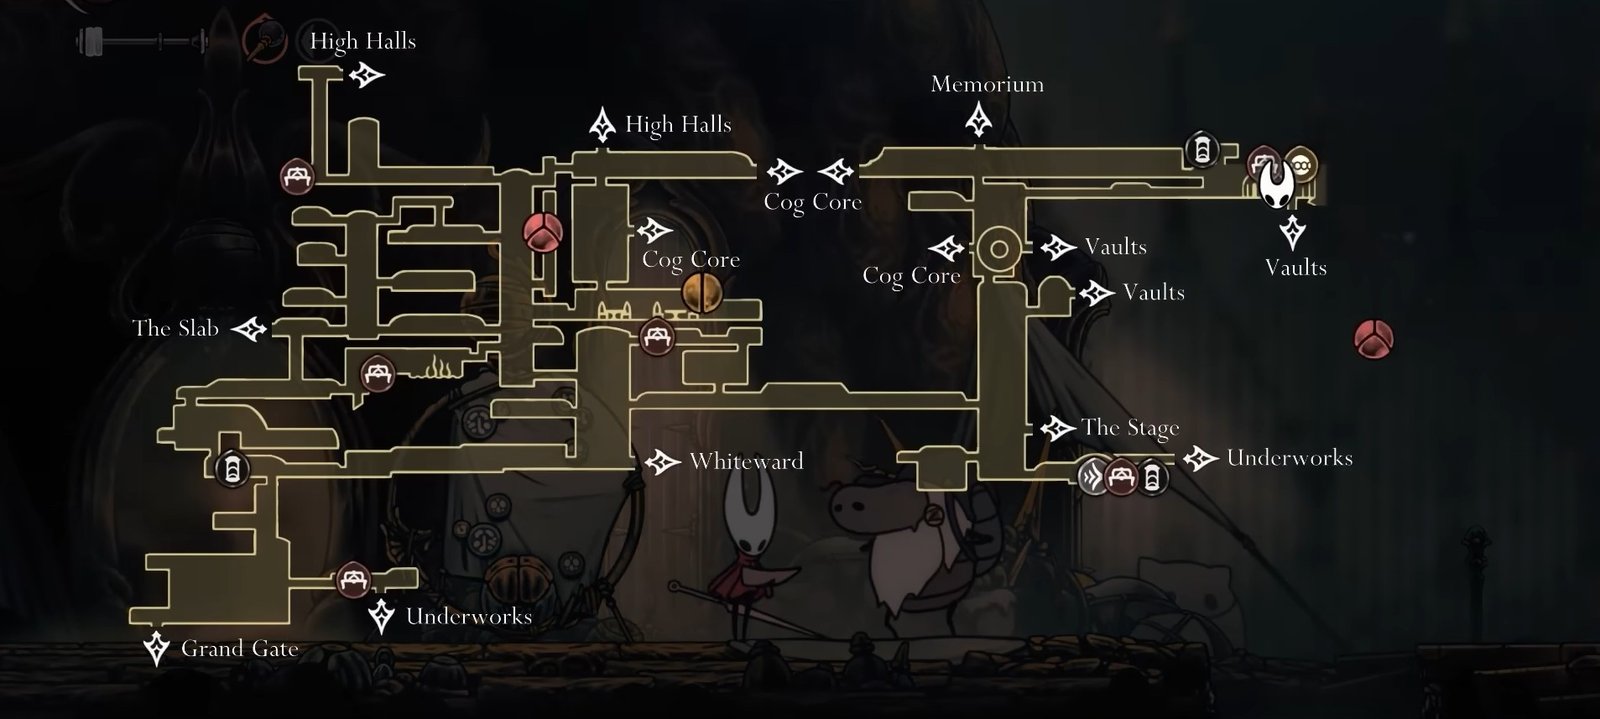
Next, we are heading into Choral Chambers for the Mask Shard; however, the starting location is inside Cogwork Core. Head to the Choral Chambers’ entrance in the bottom-left section of Cogwork Core, marked on the map below:
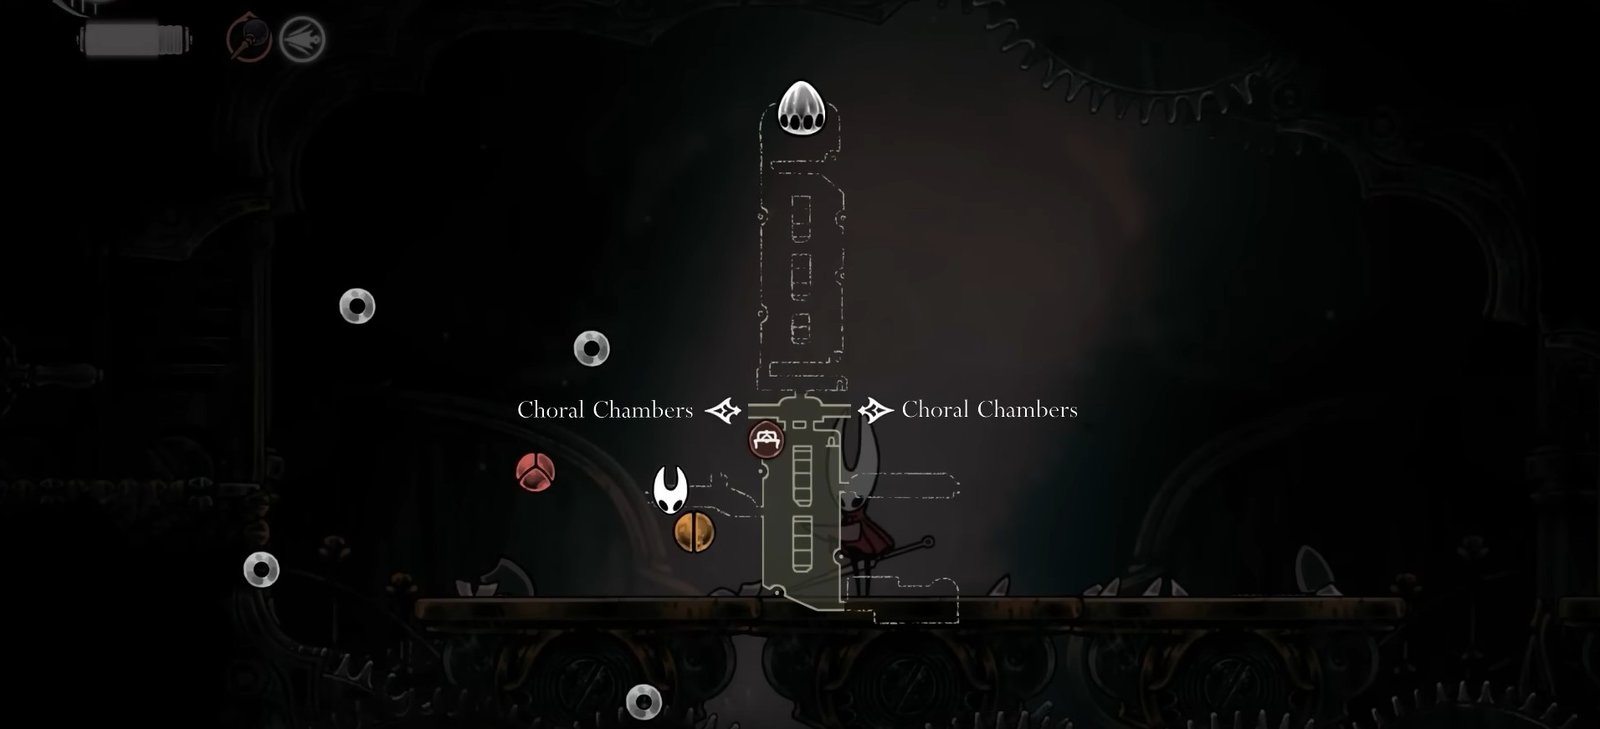
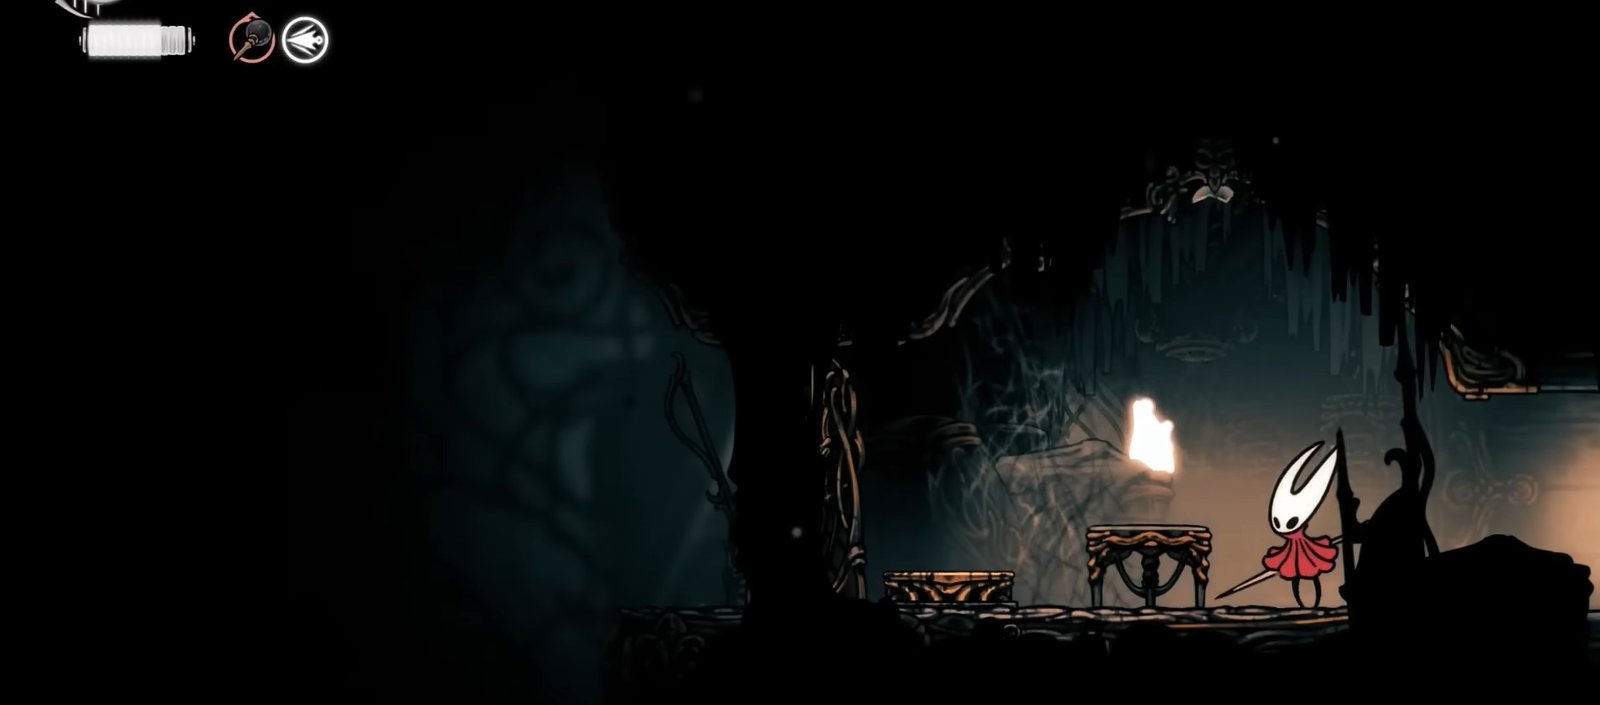
Head left, hit the switch, and enter the next area, and you will find a narrow path leading up. Keep going up until you come across a path leading to the left side.
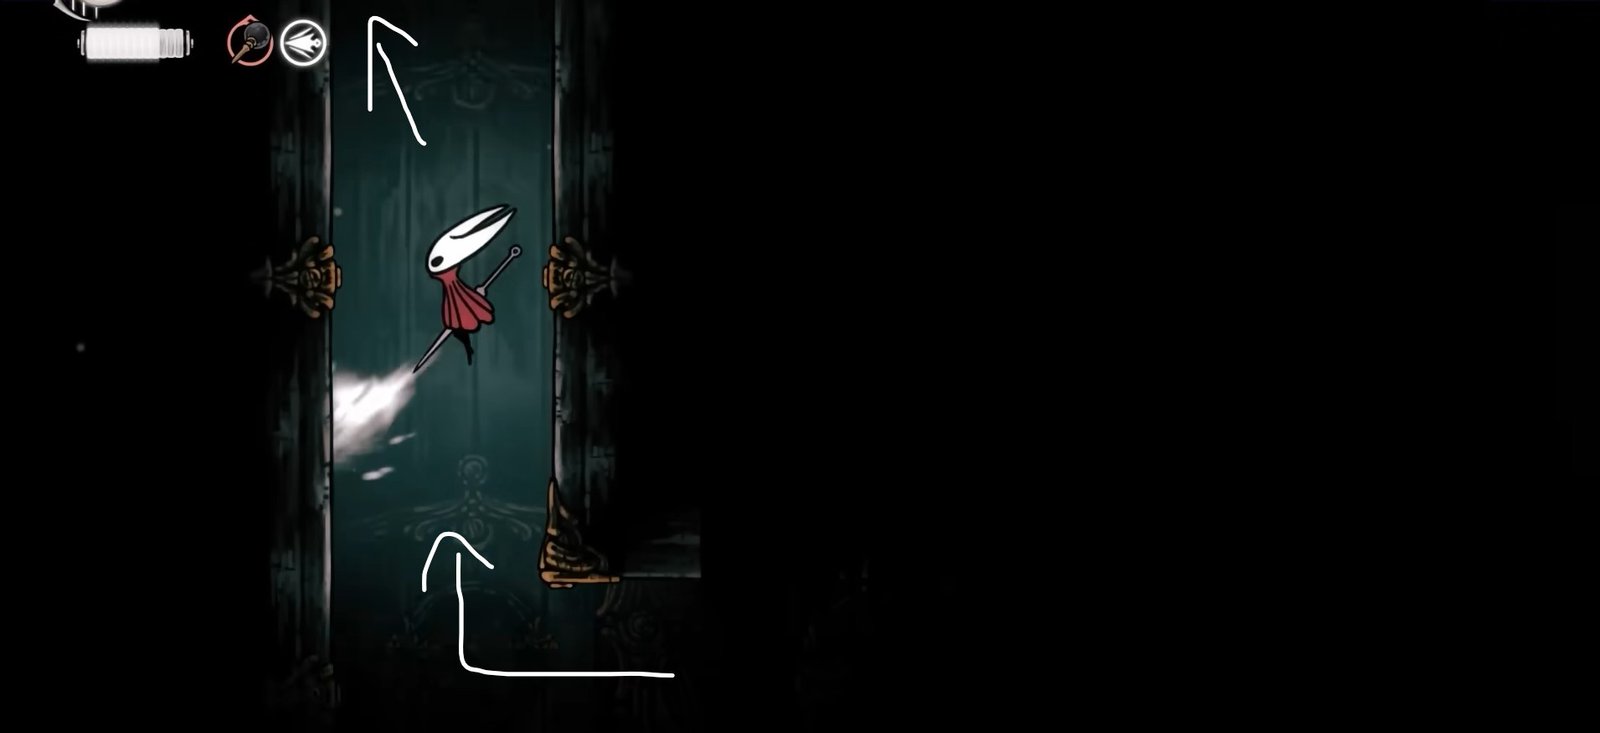
Go here, and you will find the Mask Shard up ahead.
Mask Shard #10:
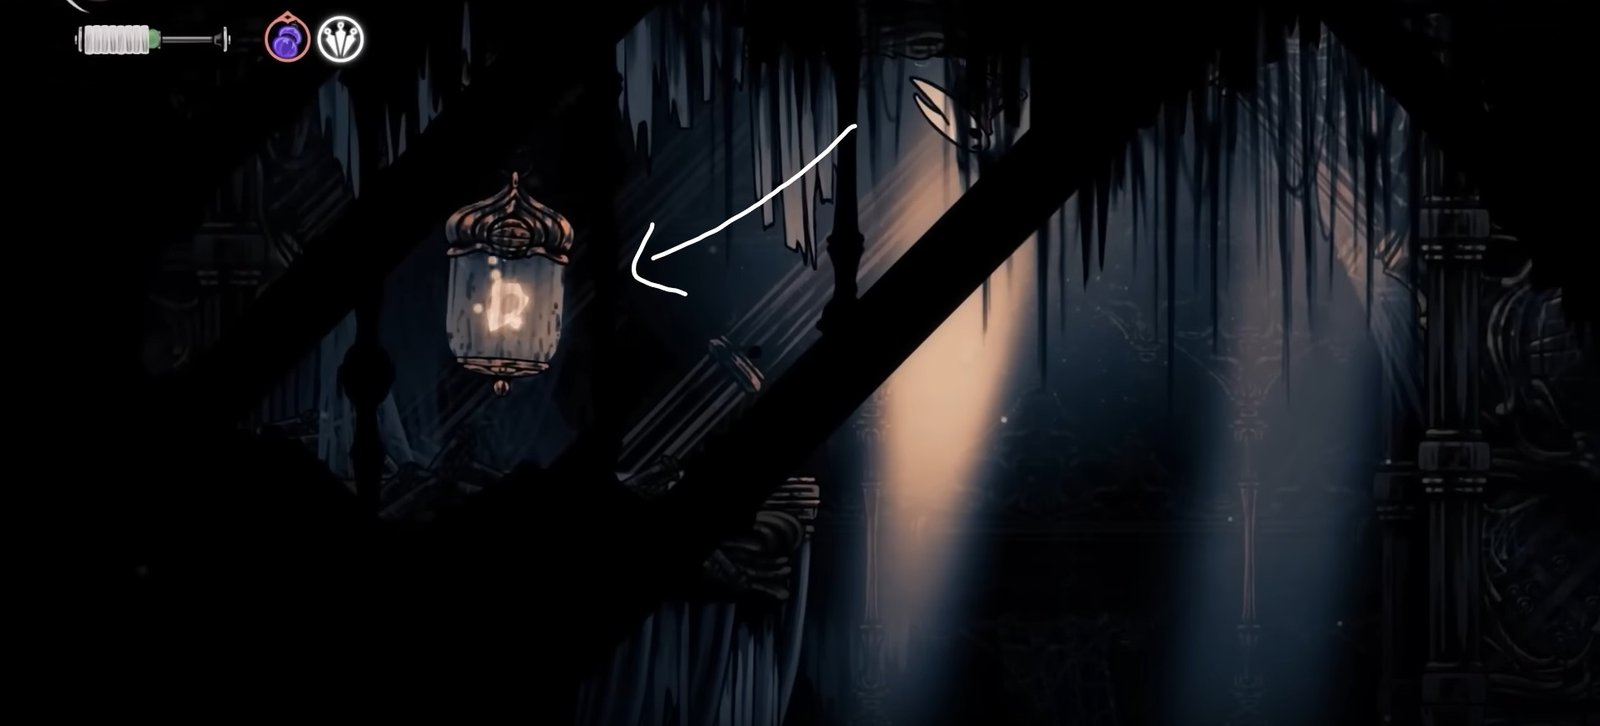
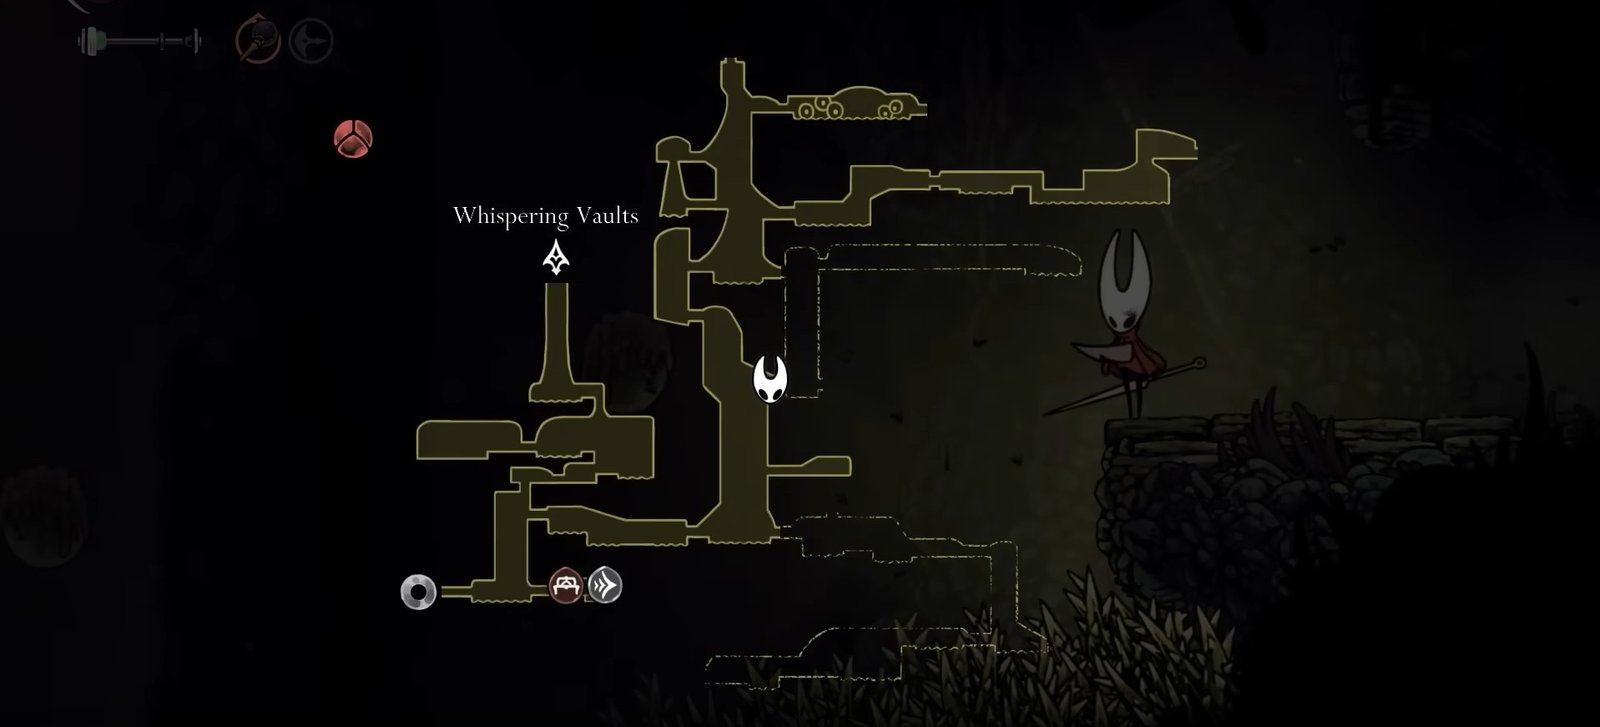
There is a Mask Shard located in Whispering Vaults. To find it, head to the location marked below:
At the starting location, use Silk Soar to get up to the wall above. You need to use the ability here:

Once you go up, simply glide to the left side platform, and you will find the Mask Shard here.
Mask Shard #11:
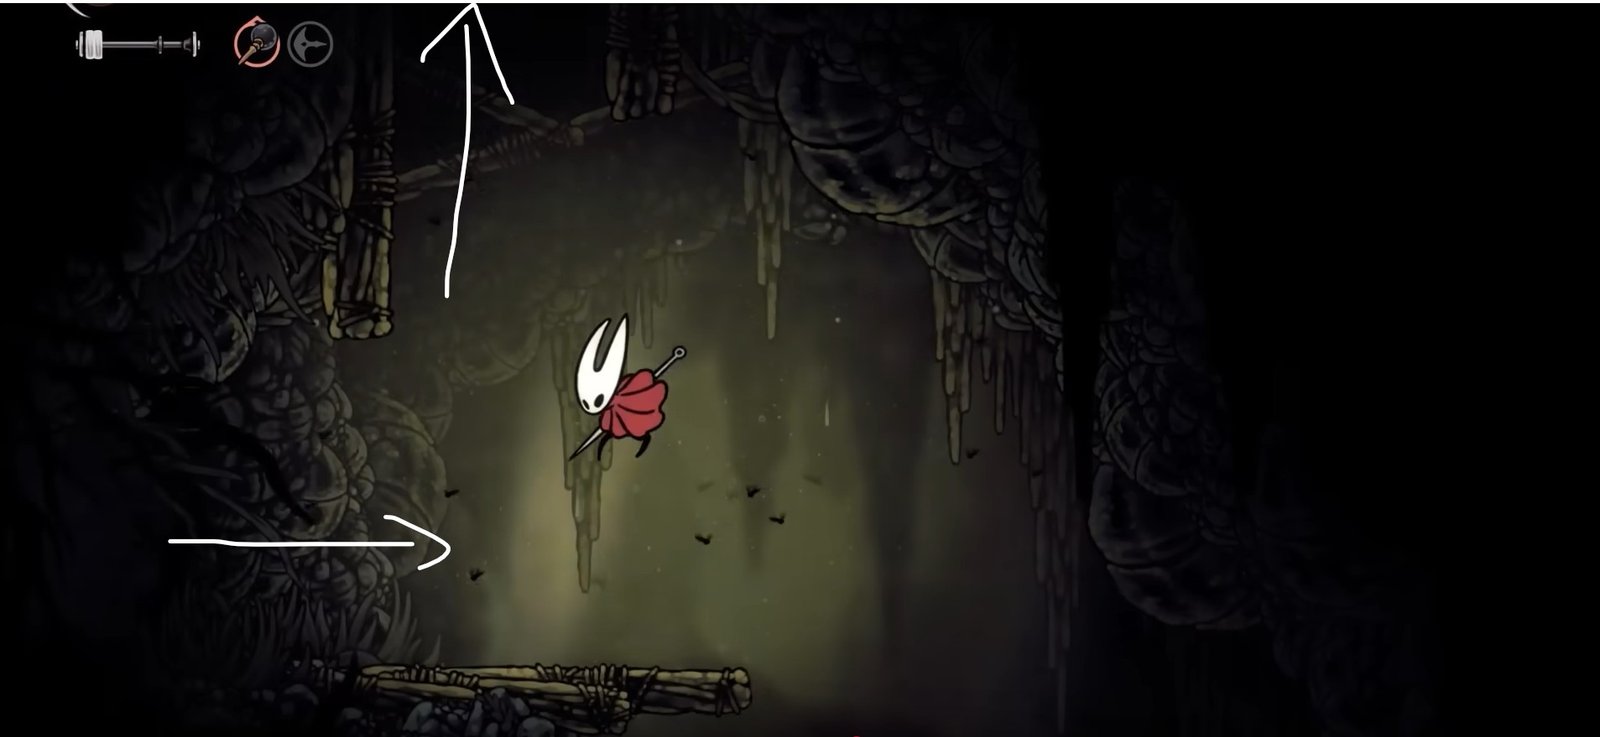
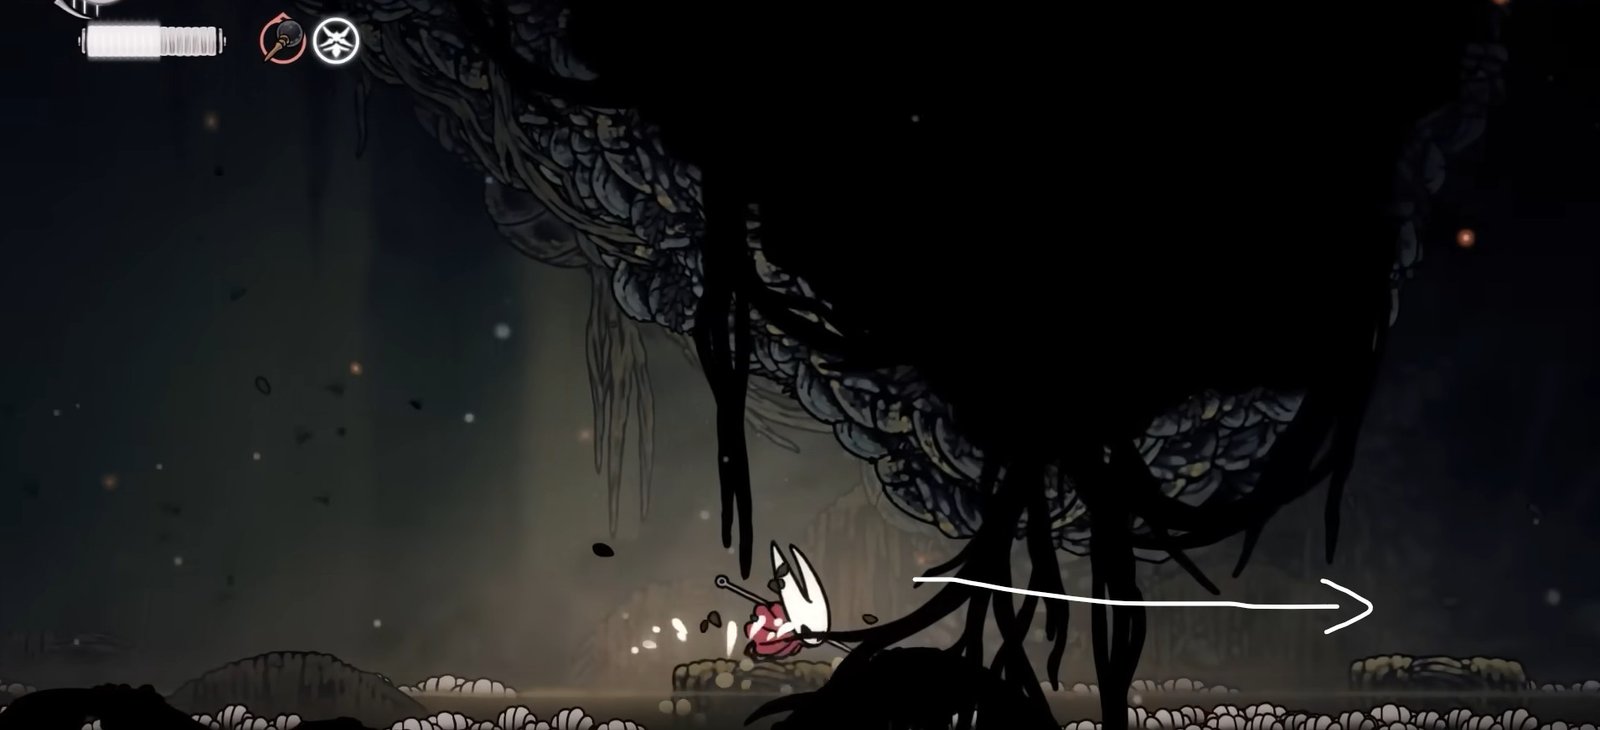
For this one, you must head to Bilewater. We have marked the starting location below:
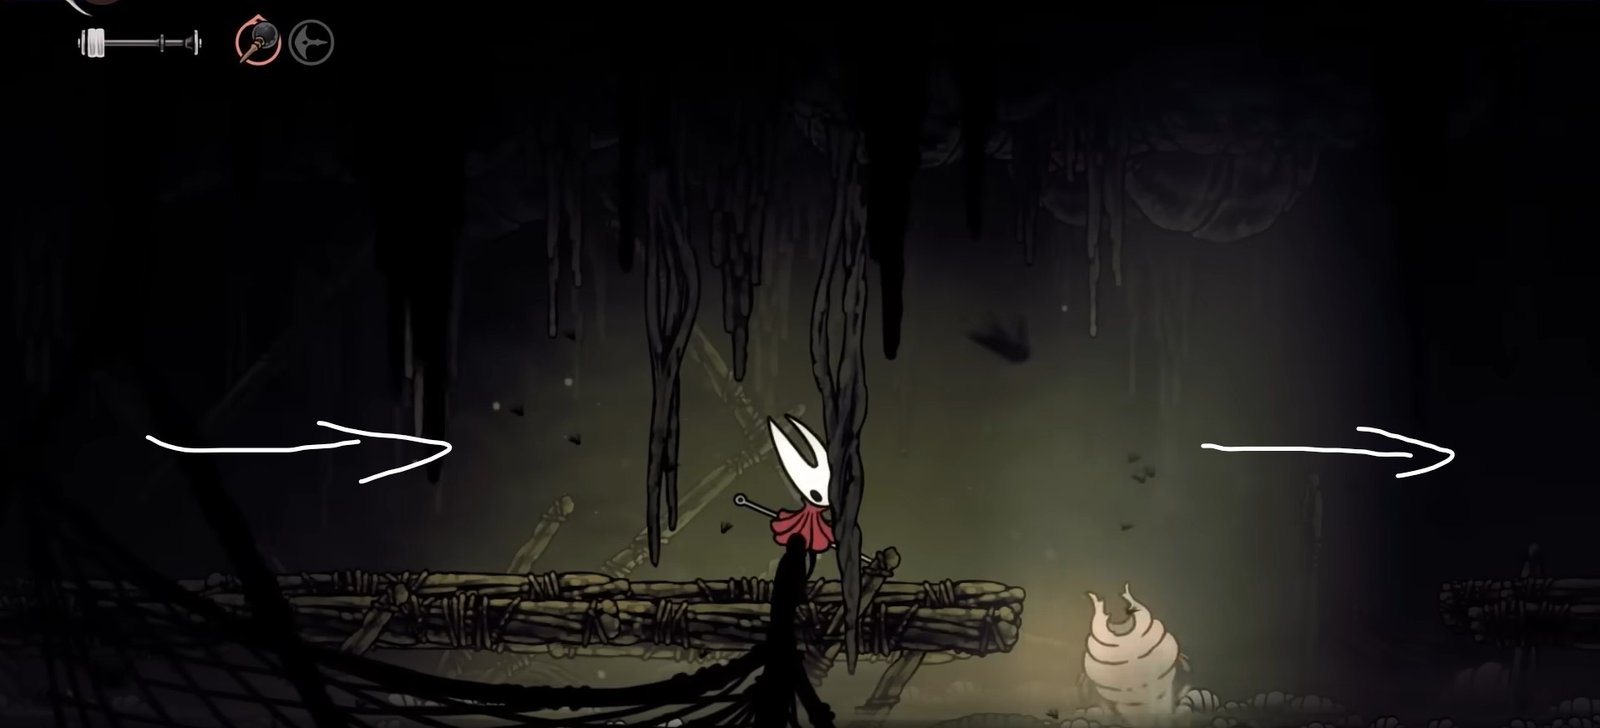
From the starting point, go right and enter the next area. You will find the next area filled with spikes. Use the two floating enemies to cross this chasm and enter the next area. In the next area, go instantly up the path you see after entering here. Keep going up and then go further right into the next area.
Keep going right in this area on the bridge. Some enemies will jump out of the toxic water here; avoid them. In addition, do not fall into the water here because it will start eating up your Silk.
Use the platforms, avoid the enemies and the water, and you should be fine. Reach the end of this area and then use the wall to go up here.

Repeat the same process in the next section, but the enemies are more aggressive here. Time your jump between the platforms according to the enemies, and keep moving to the right section slowly. Stick to the platforms and avoid falling into the water. If an enemy grabs you, they will not only deal damage but also take you down into the water, which will result in you getting infected, and your Silk will start reducing. Look out for a small wall at the top of the arena after crossing around 8 to 9 platforms. There is no platform below this wall, so you need to jump and dash towards it to grab it.

Climb up through here, and you will find the Mask Shard in the right section above.
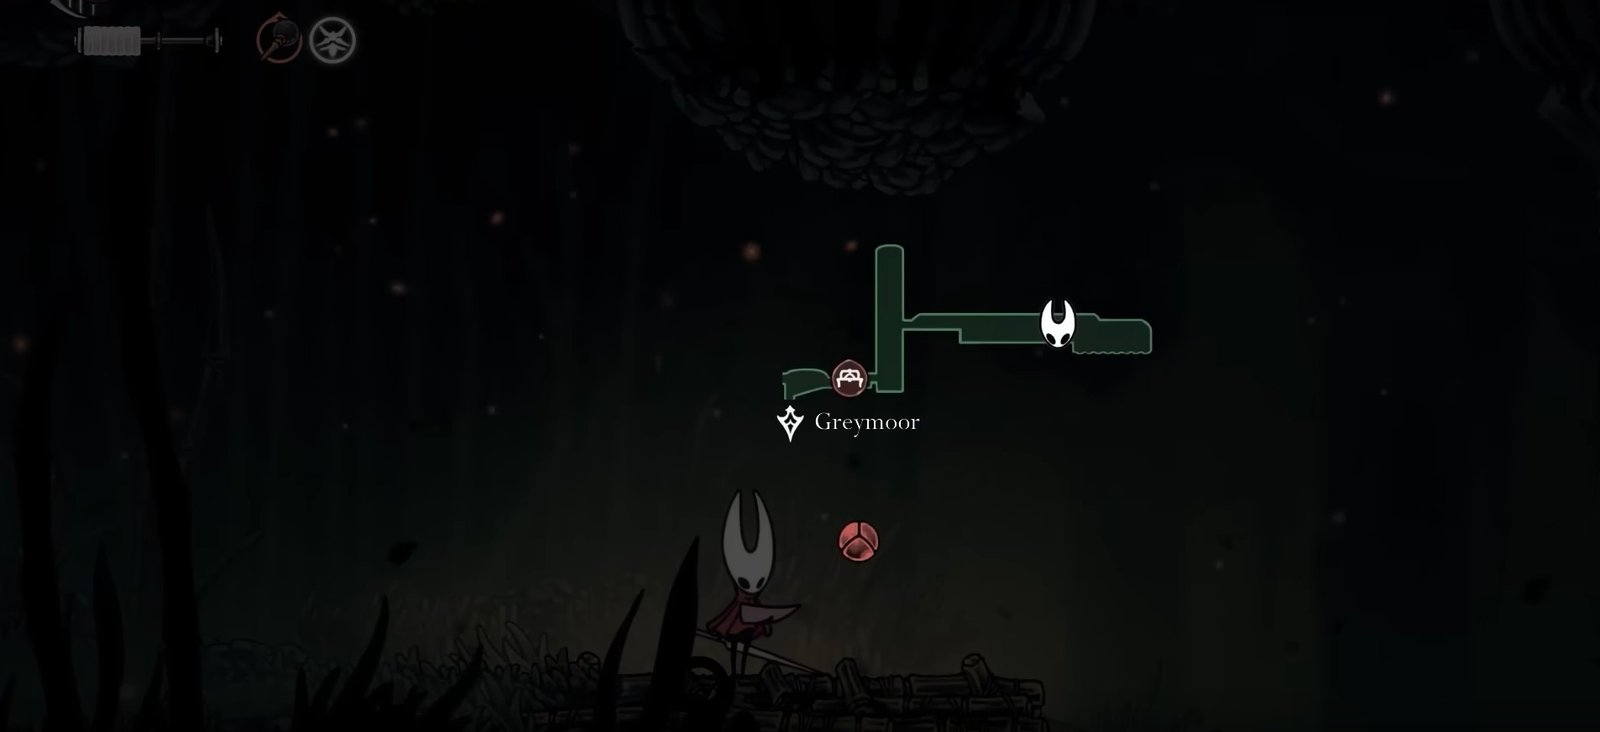
Mask Shard #12:
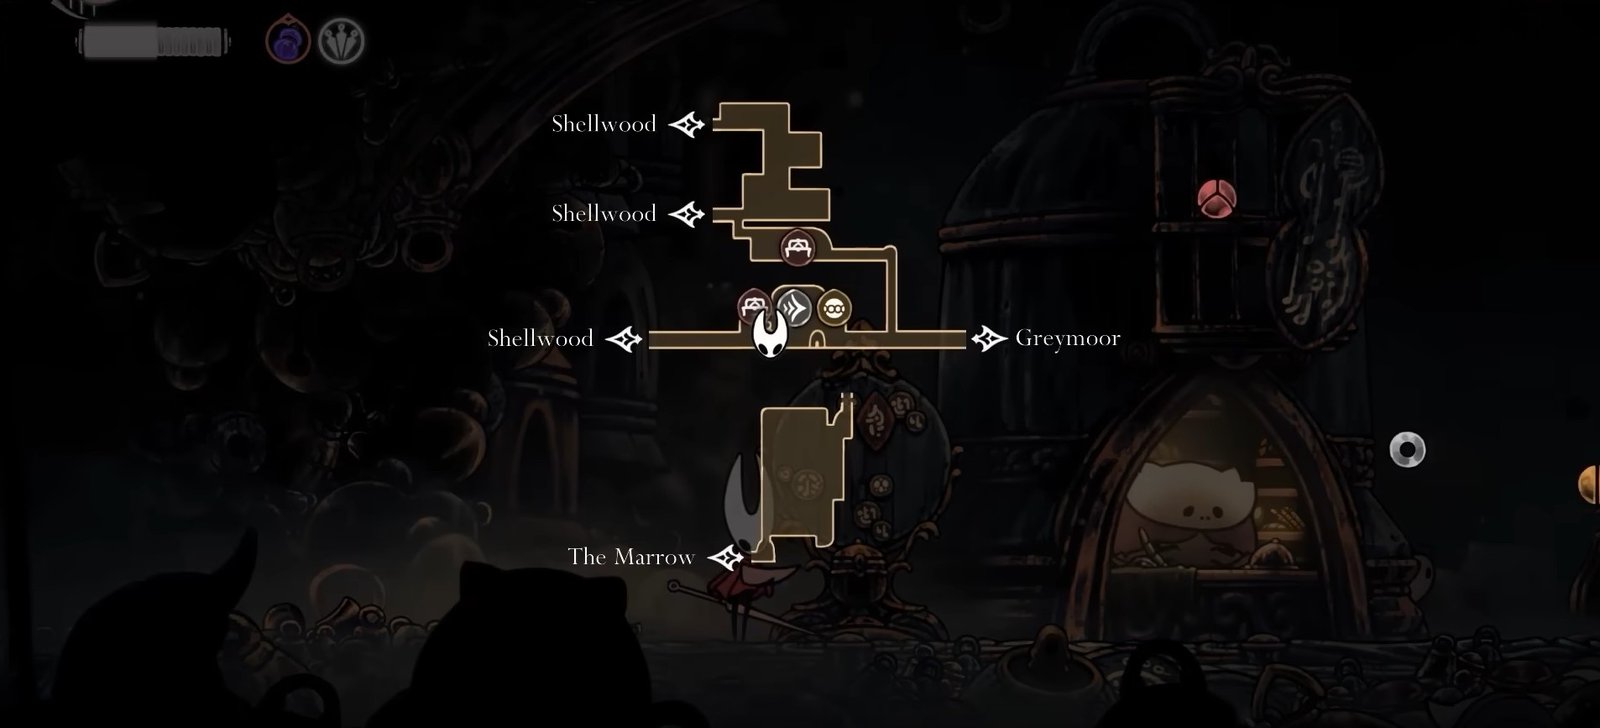
This one is sitting in Wisp Thicket. This is not a very big area, and you can access it from Greymoor. Head to the location marked below to proceed:
From the starting location, jump down the platforms to the right and go to the point where the toxic lake begins. From here, you need to go right using the platforms. While most of this is fine, there is a tight squeeze up ahead after 2 or 3 platforms, so you will need to dash here to the next platform while avoiding the toxic water.
After crossing this section, you need to climb up, but the walls are very far apart, and there are tons of spikes everywhere, with the possibility of you falling into the toxic water. Use the walls on the right side of the chamber to climb to the top while avoiding the spikes.
At the top, you need to dash to the left side above the spikes to reach the next side of this chamber.
Once you arrive here, you will see the Mask Shard up ahead. Grab it.

Mask Shard #13:
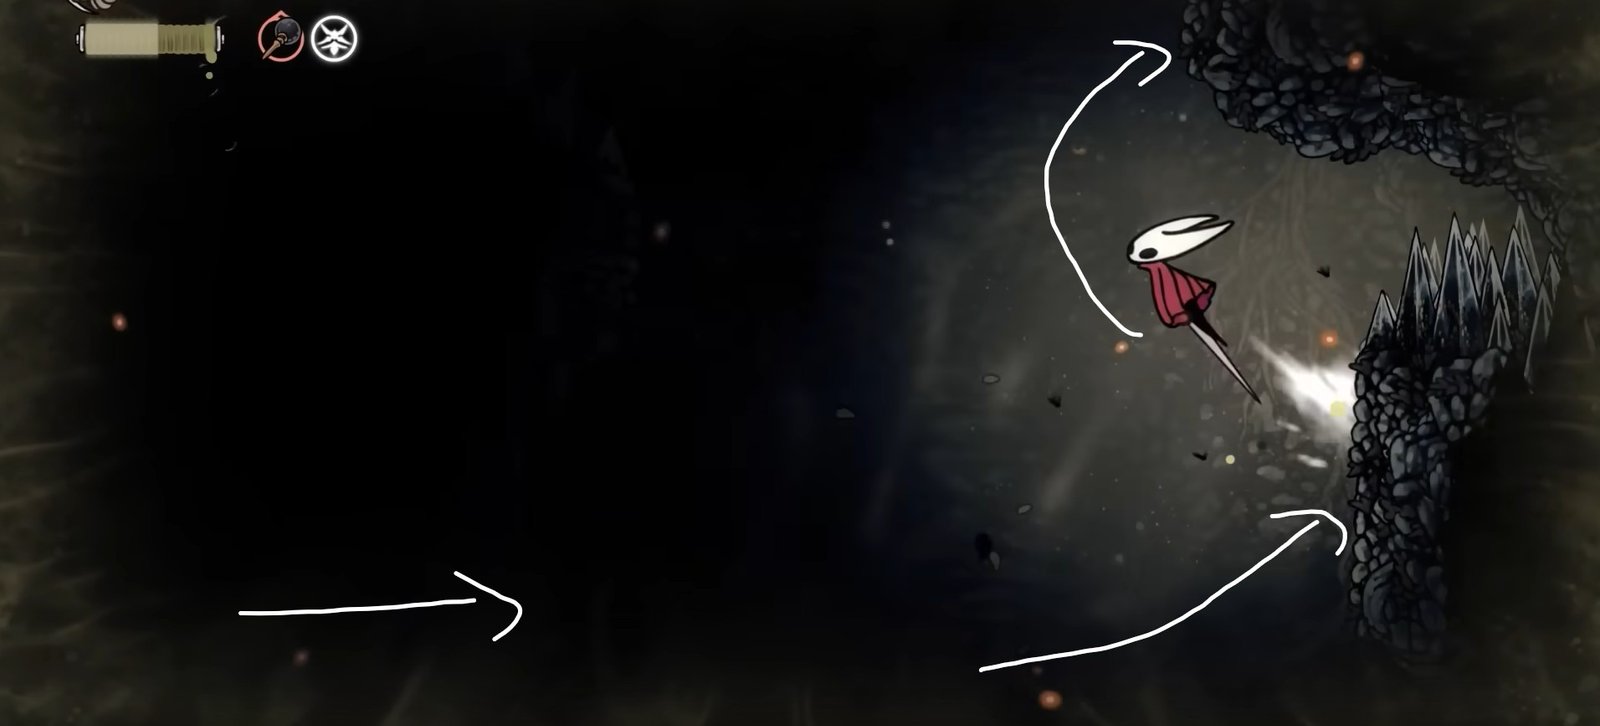
The Far Fields are hiding a Mask Shard as well. To find this one, you will need to head to the starting point marked on the map below:
You will find yourself at the front of a large floating tent. Start going right, jump off the platform, and glide to the right side of the area.
Land on the platform ahead, and you will see an air draft ahead. Use it to go up. After this ends, use the other draft on the right side above the spikes to go further up.
Land on the platform above, then head left, and you will find another wind draft. Go up again.
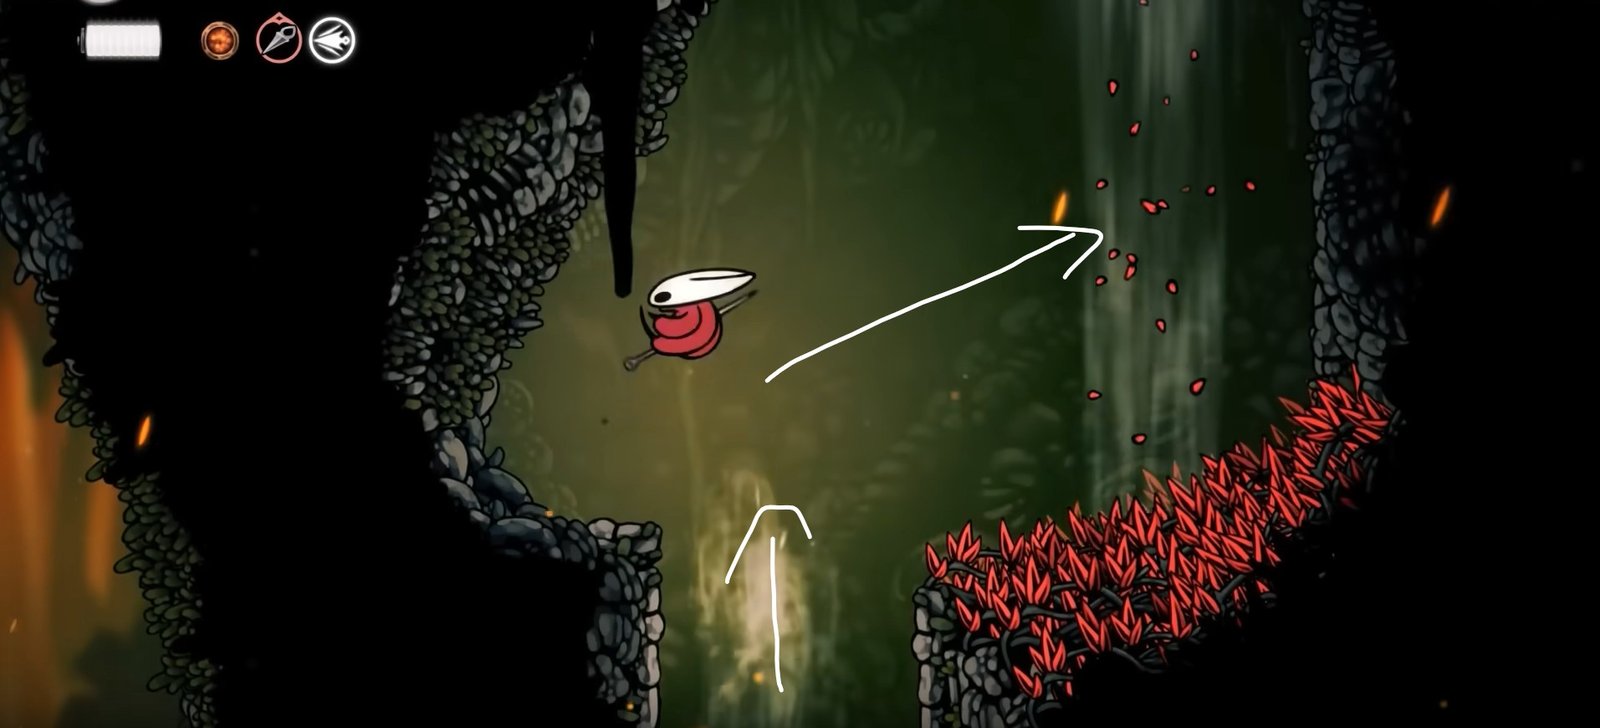
Go to the maximum height this draft takes you, then glide to the left side to find another wind draft, next to another wind draft. Use both of these wind drafts to gain even more height. After hitting the roof of this area, drop down and glide to a platform below on the left side. It is visible from the draft’s starting point, but you have to go up and then glide down to it. Do not hit the lava stuck above it at this point. Enter the next area.
Use the wind draft ahead to gain enough height and then glide over the spikes on the left side. Cross this section, and you will find the Mask Shard in a small opening in the ground.
Mask Shard #14:
This next one is also present in Far Fields; however, it is much easier to obtain than the last one. For finding this one, head to the starting point as shown on the map below:
You will find yourself present in front of a door in the eyes of a dead giant bug.
Enter through here and then use the air vent in the next area to go up. At the top, go right, and you will find the Mask Shard.
Mask Shard #15:
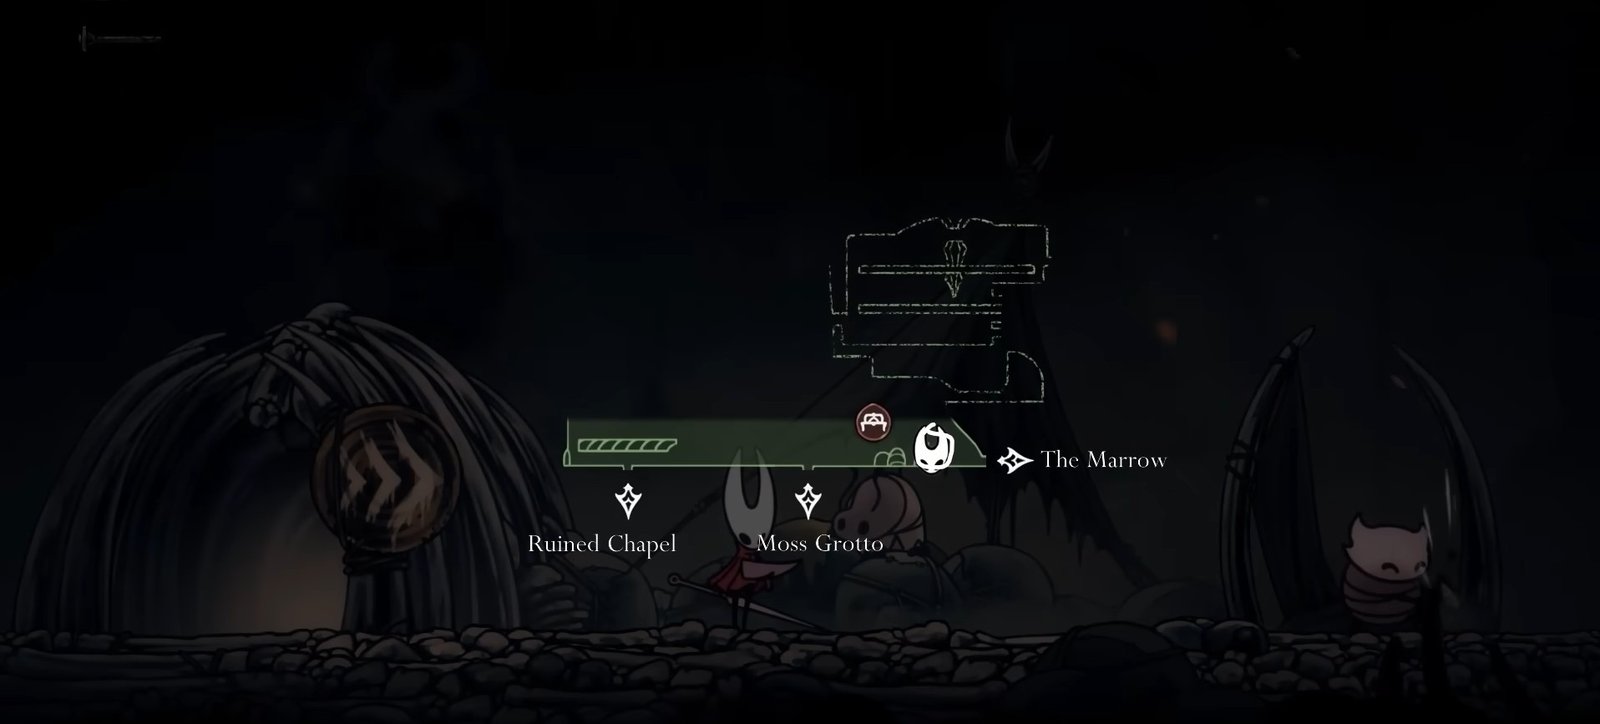
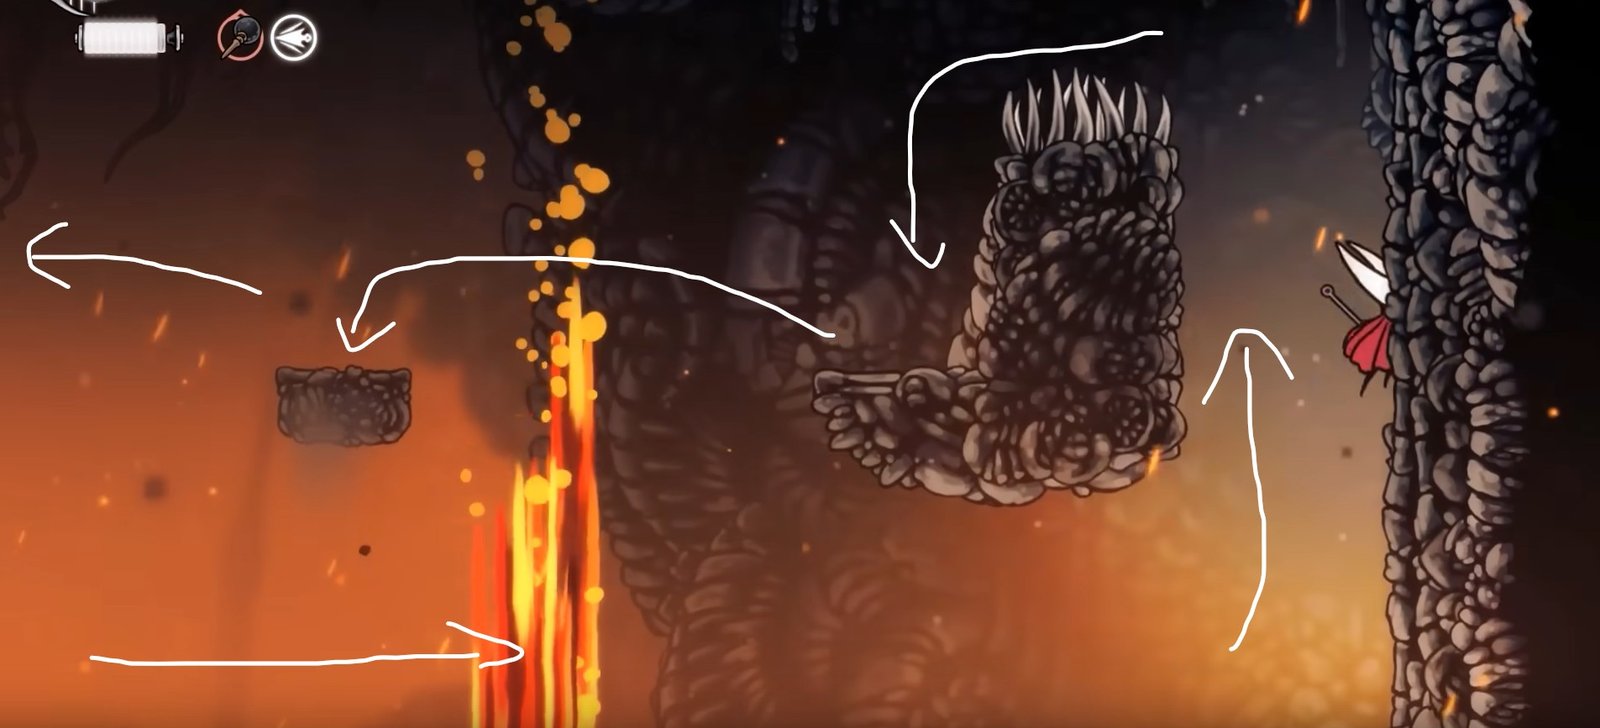
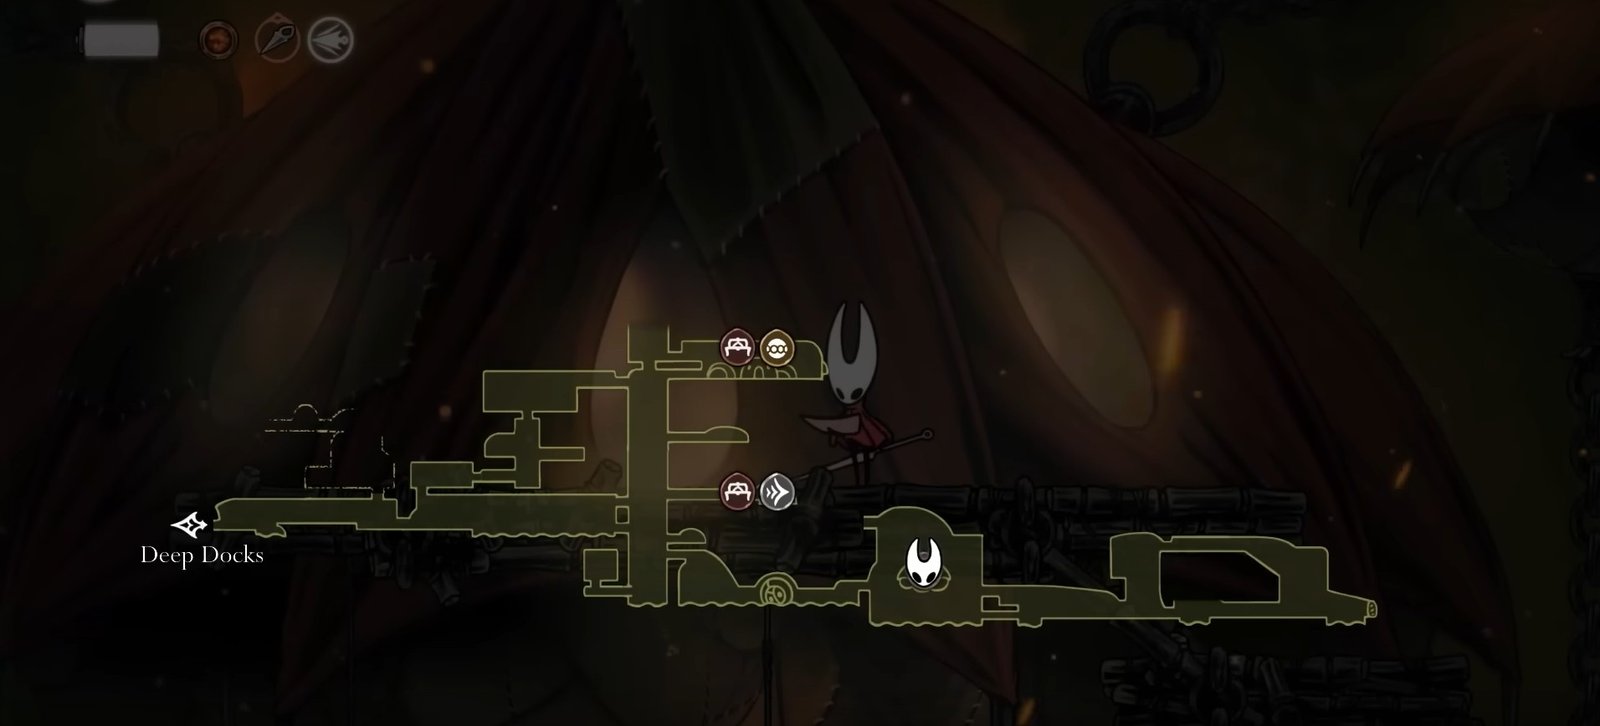
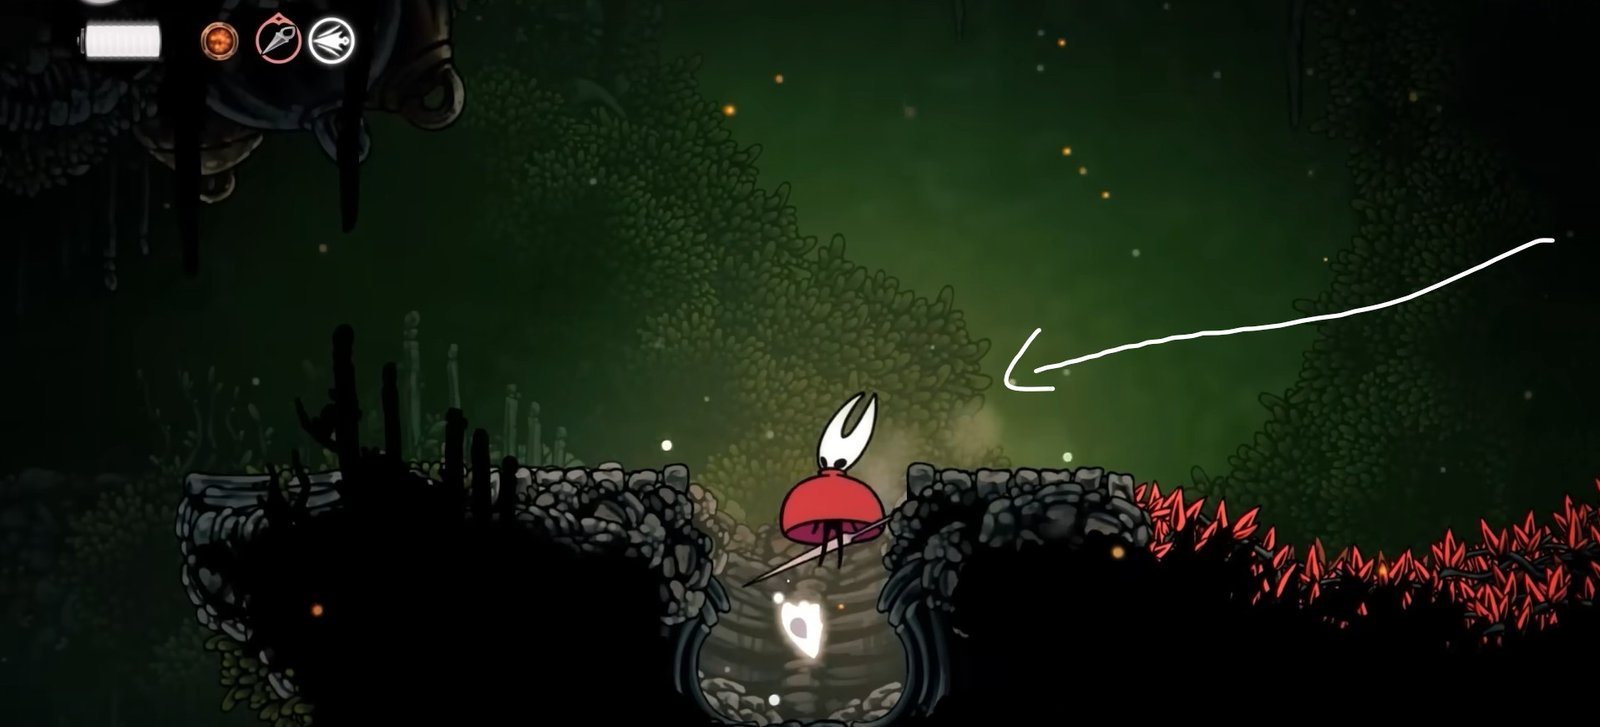
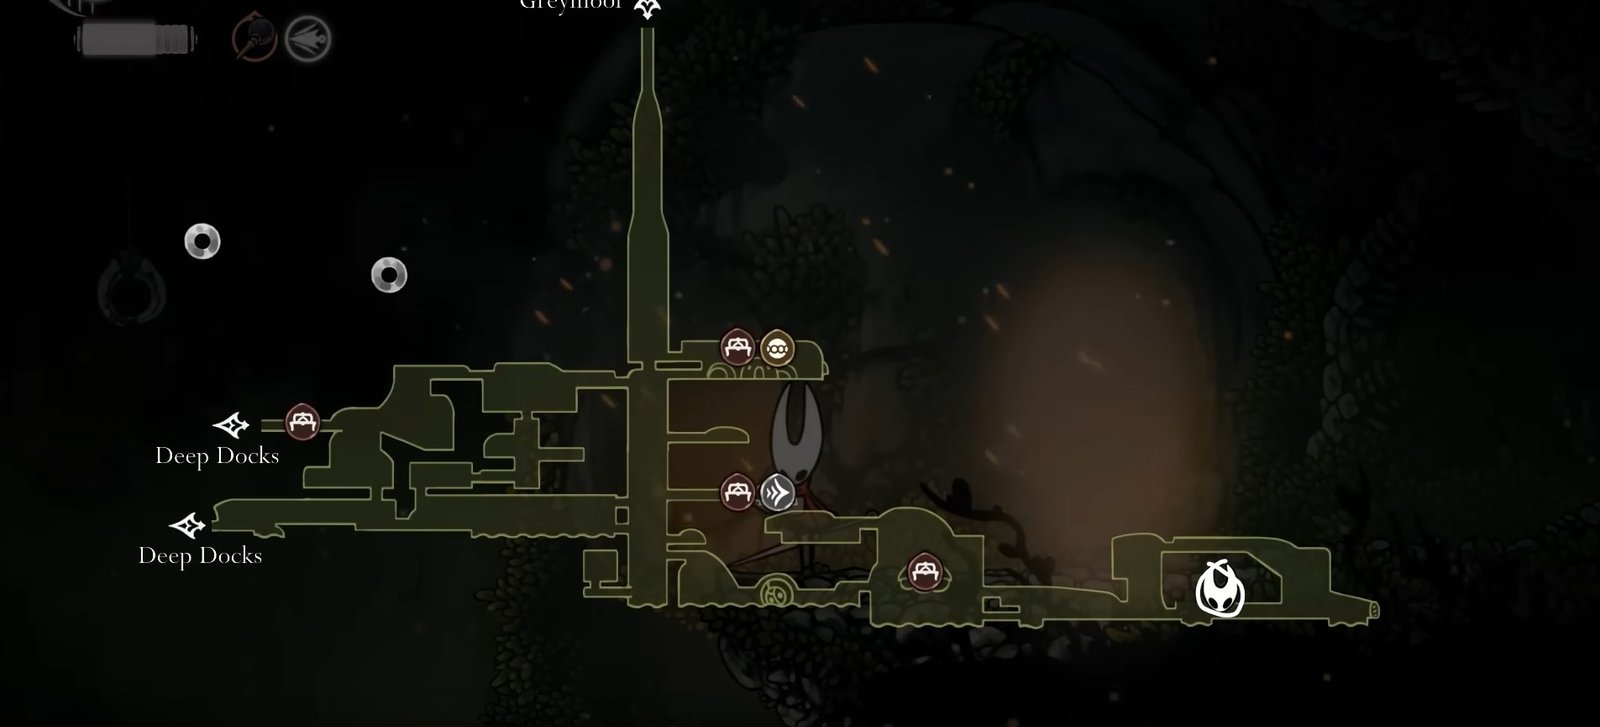
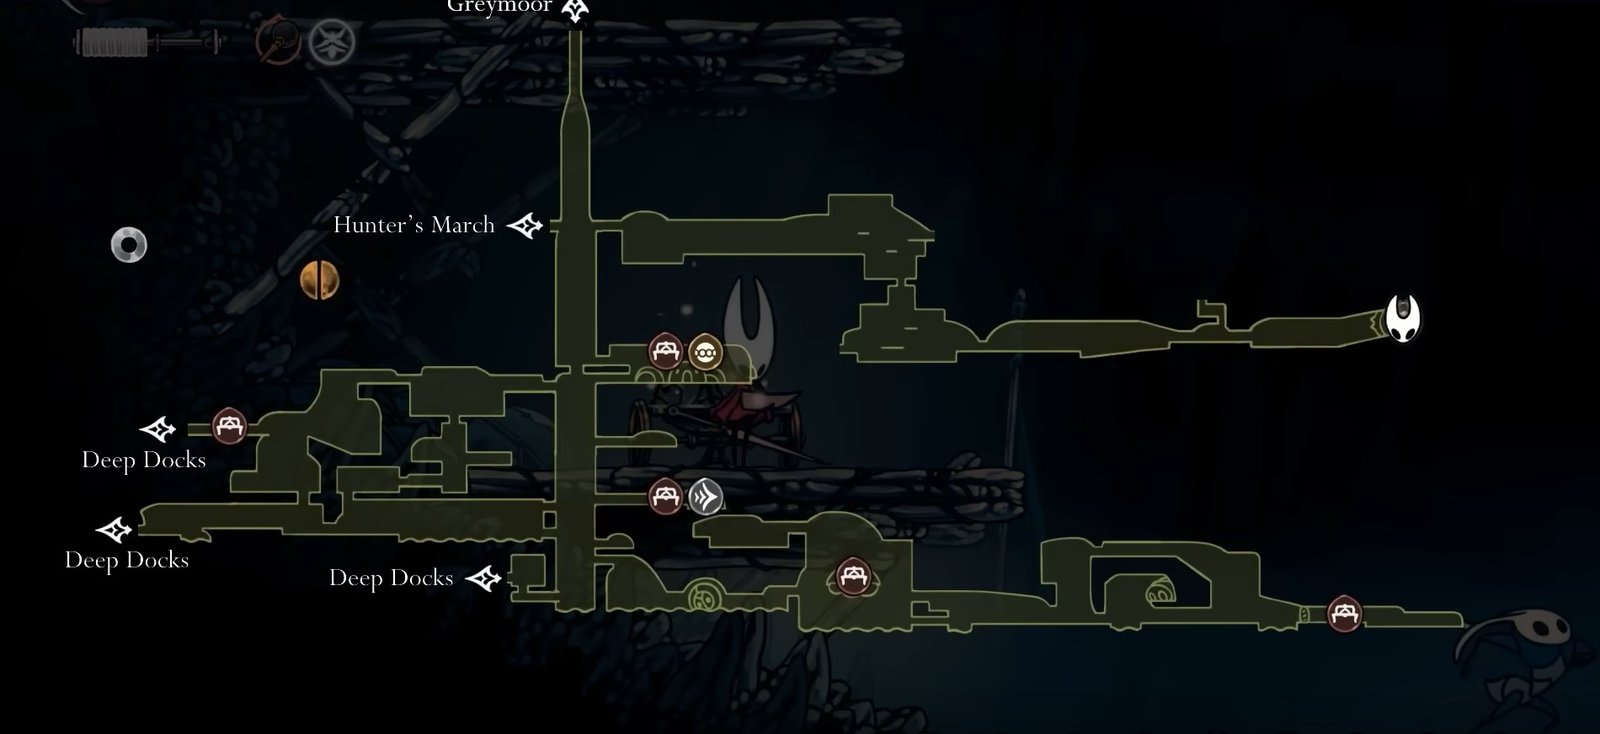
This is the last Mask Shard that you have to find randomly on the map. For this one, you can head over to the location marked below in The Marrow.
This is the area you first arrive at when you are heading into the Deep Docks, and it transitions from the cold rocky area to the hot molten lava. Stick to the uppermost platform and start going to the left side of this area. This is the path where you come across one large charging Skulled enemy.
Stick to the upper platforms and keep going right. At the last platform, there is a hidden enemy up high on the wall. As soon as you land on this platform, it will launch projectile attacks at you, so be prepared to dodge them.
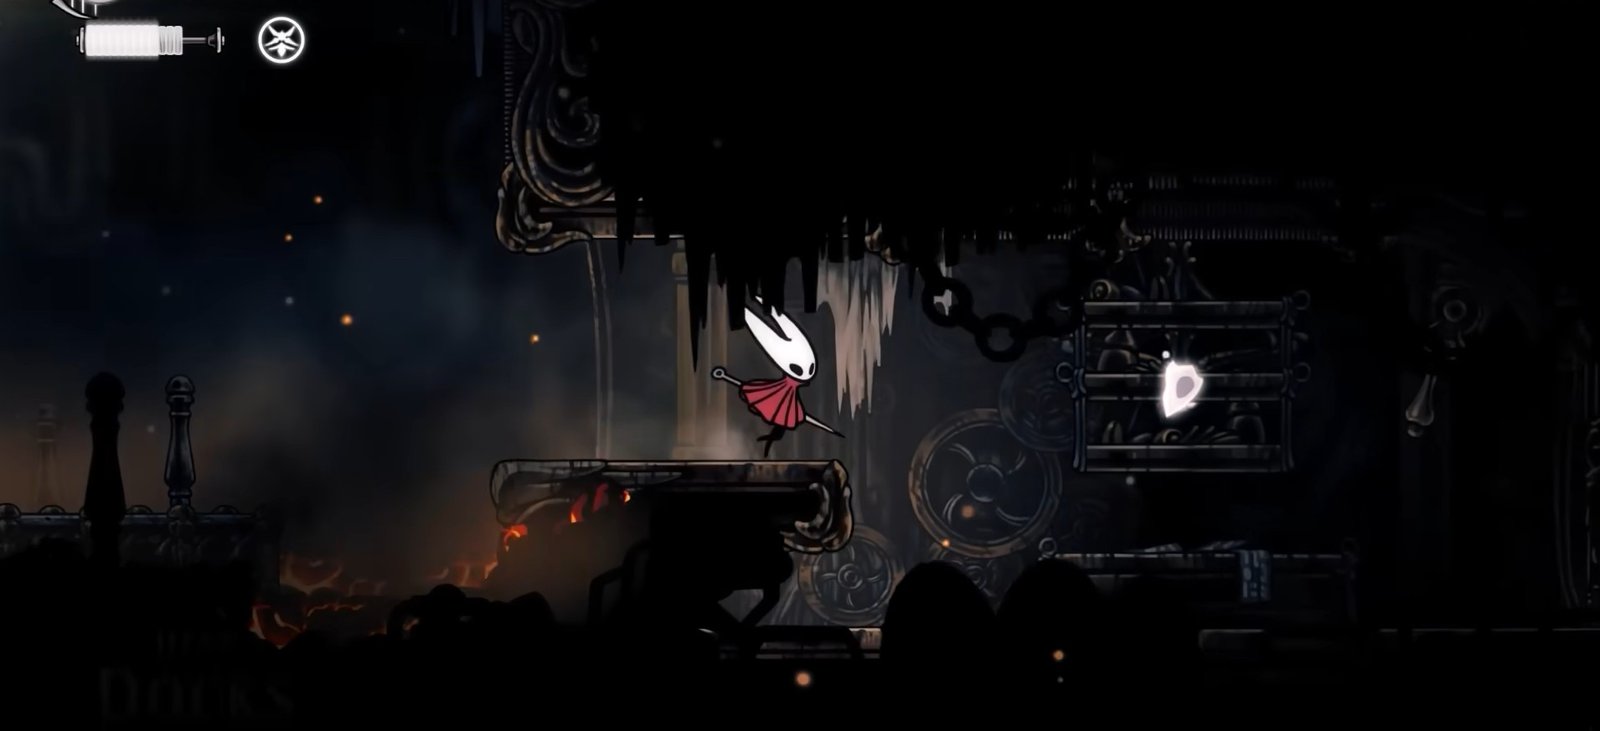
After the attack, jump further ahead and land on the big platform ahead. Go right and enter the next area. In the next area, cross the small gaps and go to the end to find the Mask Shard sitting there. This is the start of Deep Docks from this side.
The next set of Mask Shards is obtained after you complete their attached Wishes. Wishes are side quests in Hollow Knight: Silksong, and you can find them on Wish Walls in different towns and cities that you come across on your journey. Detailed guides on these Wishes are found in our Wiki, linked at the end of this guide.
Mask Shard #16:
You can buy a Mask Shard from Jubilana, who is unlocked in Choral Chambers after you complete the Wish The Wandering Merchant. You will find him at the location marked below:
You will need 750 Rosary Beads to buy them.

Mask Shard #17:
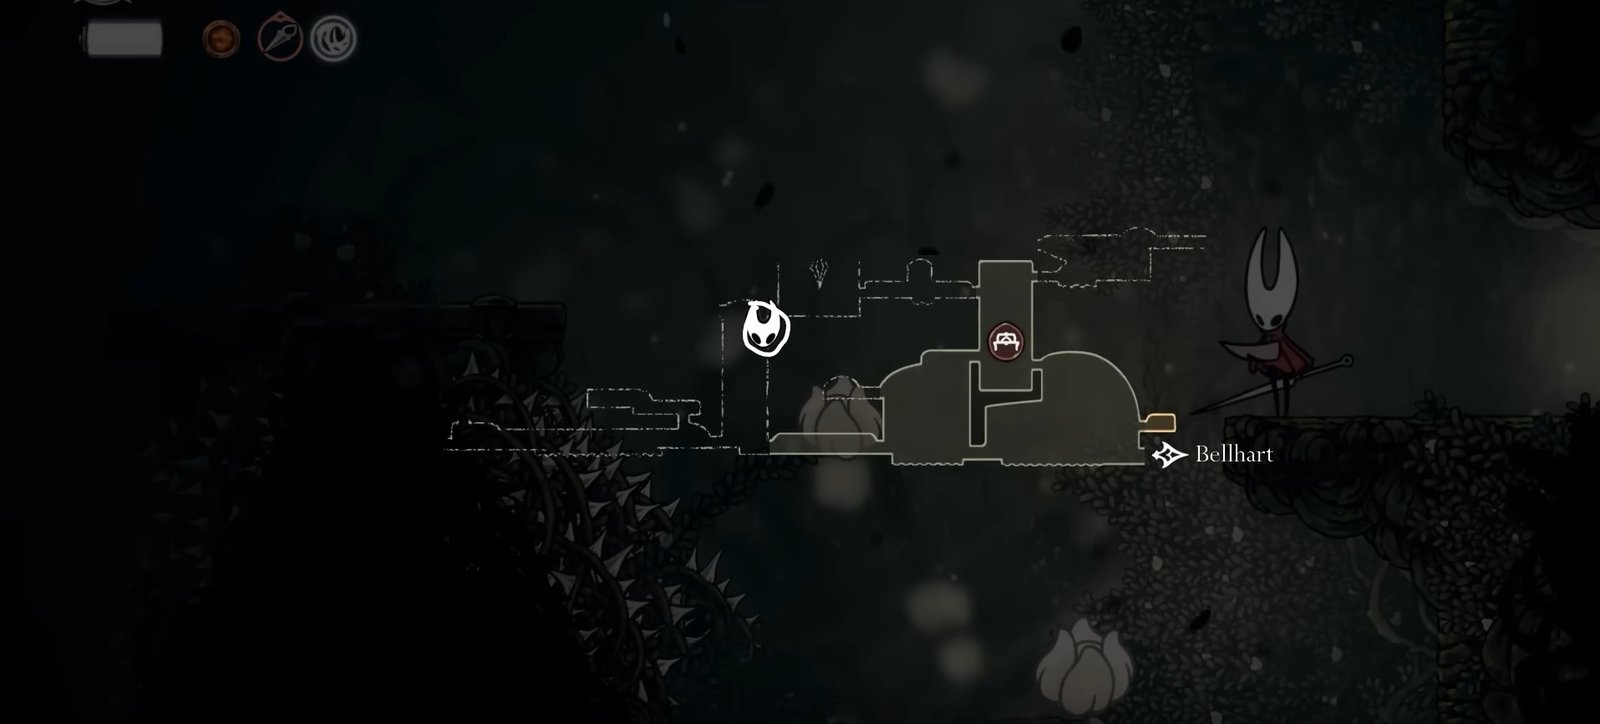
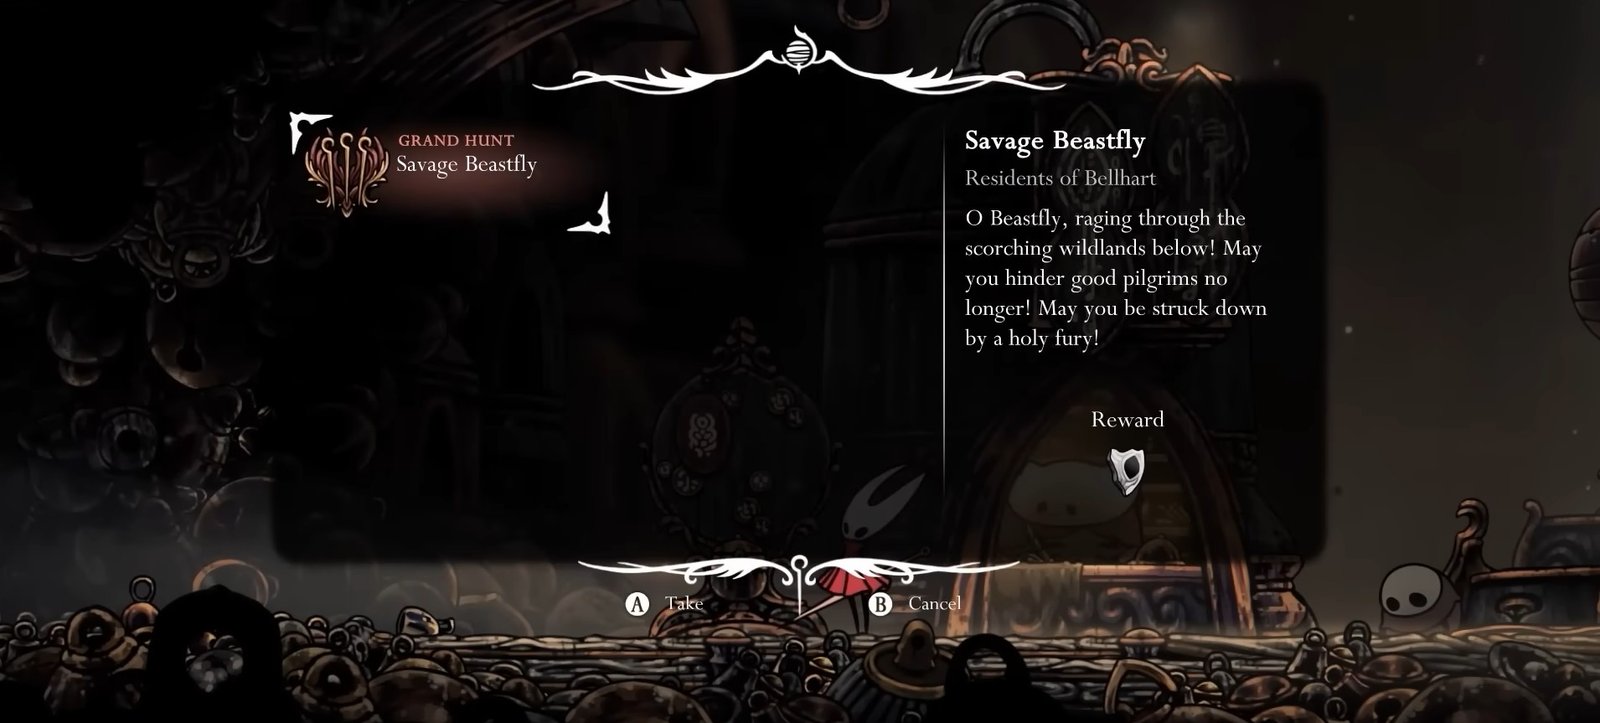
You can also obtain a Mask Shard by completing the Savage Beastfly Quest. You can pick this Wish from the Wish Wall in Bellhart. Location is marked below:
Once you accept this wish, you must go and fight the Savage Beastfly boss. Defeat the boss in Far Fields and come back here. Upon completion, you will be rewarded with the Mask Shard.
Mask Shard #18:
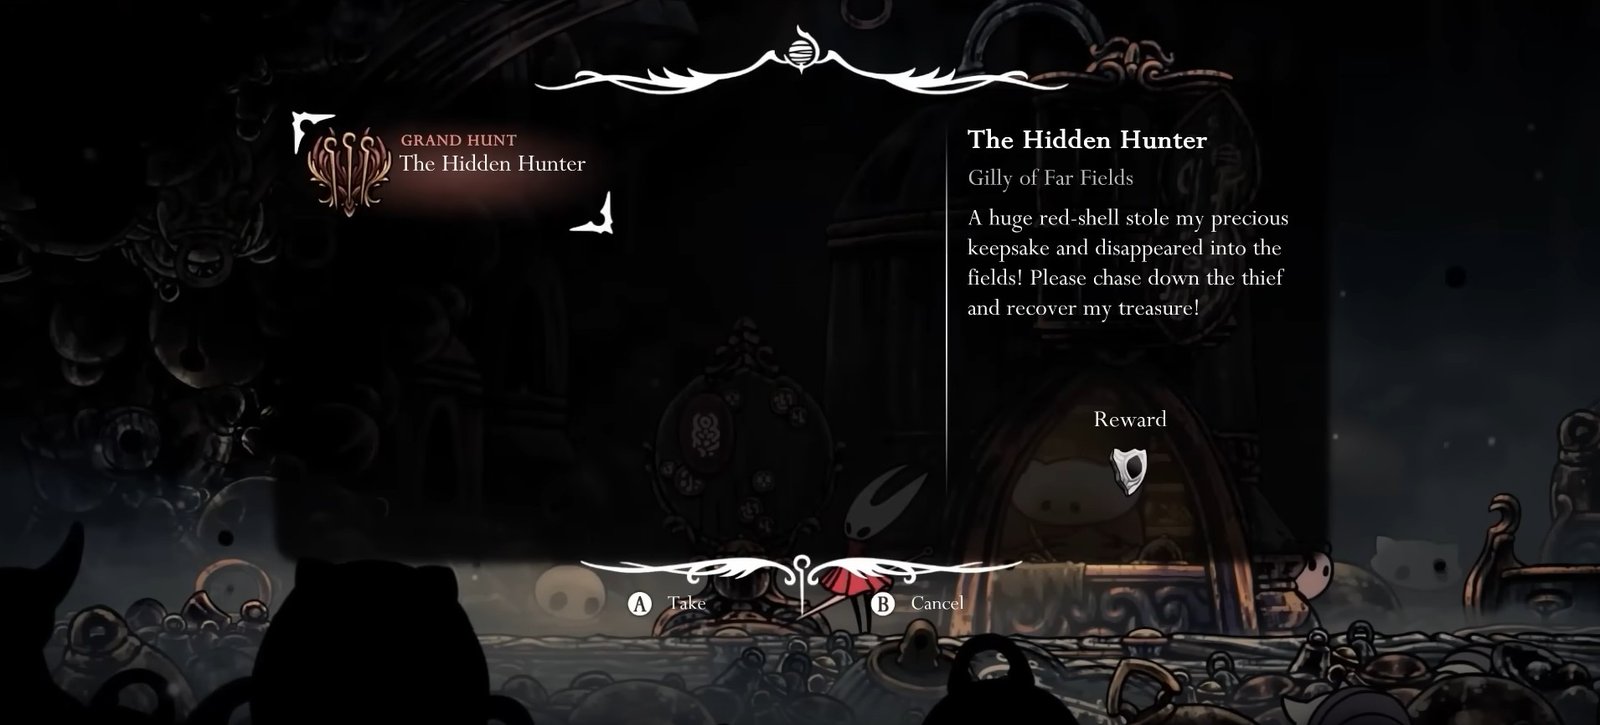
You can obtain another Mask Shard by completing The Hidden Hunter quest in Act 3. This is obtained from the Wish Wall in Bellhart as well.
Upon completion of this wish, return here and turn in to get the Mask Shard.
Mask Shard #19:
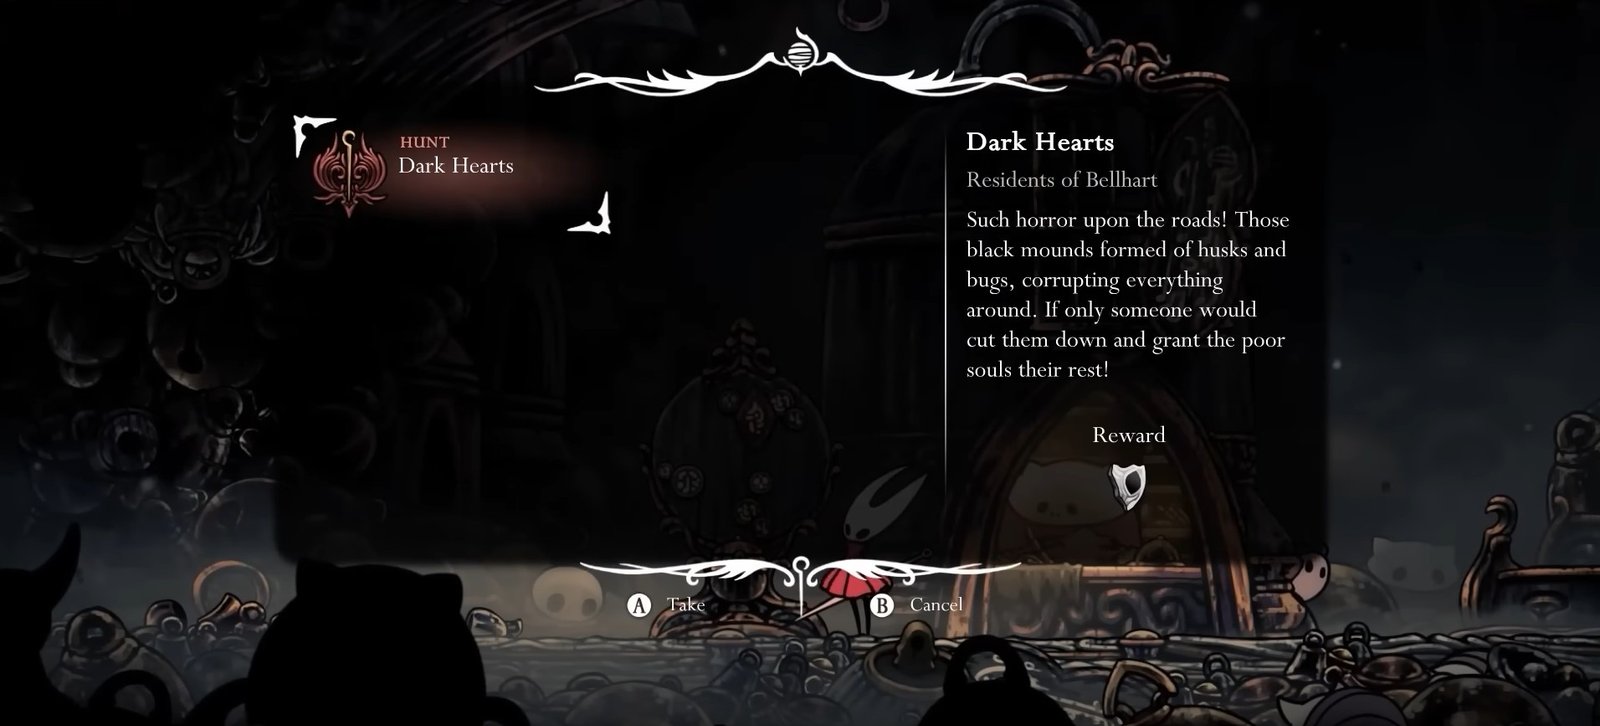
You can obtain another Mask Shard by completing the Dark Hearts quest in Act 3. You will obtain this wish from the Wish Wall in Bellhart.
Once this wish is fulfilled, you will be granted a Mask Shard.
Mask Shard #20:
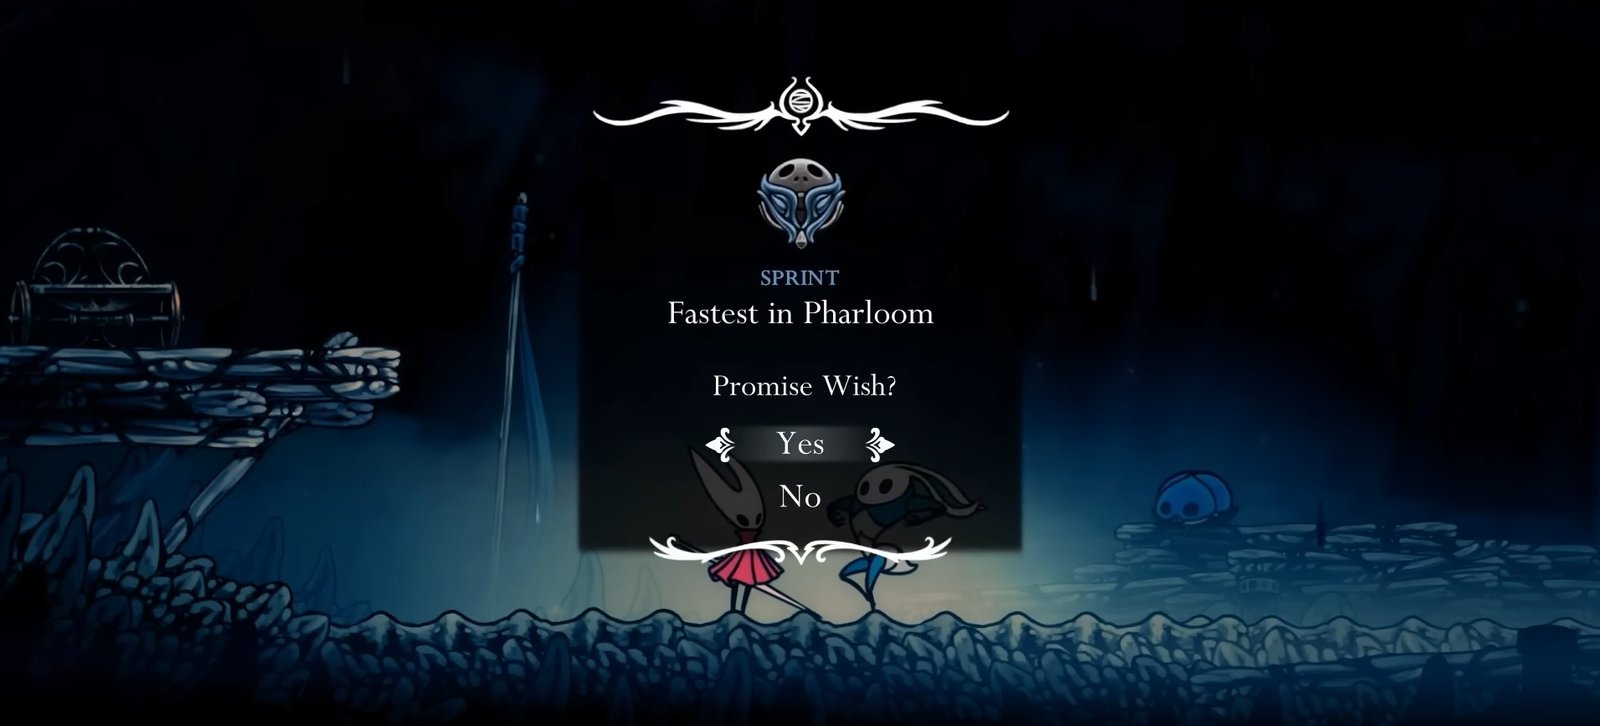
You can get a Mask Shard by completing the Fastest in Pharloom quest in Act 3. You can find this quest by speaking with Sprintmaster Swift in Far Fields. We have marked the quest location below:
This is basically a race. Win the race and then speak with Sprintmaster Swift, and you will get the wish. Complete the Wish and return to him, and you will be rewarded with another Mask Shard.
That is all for this guide. Additional Hollow Knight: Silksong guides are linked below:
- Hollow Knight: Silksong Rosary Beads Guide – How to Acquire, Easy Farming
- Hollow Knight: Silksong Fast Travel Guide – How to Unlock
- Hollow Knight: Silksong Bellway Pins Guide – How to Acquire, Mark Stations on Your Map
- Hollow Knight: Silksong Beginner’s Guide – Tips & Tricks
- Hollow Knight: Silksong Steel Soul Mode Unlock Guide – How to Unlock, Cheat Code
- Hollow Knight: Silksong Mods Guide – Best Mods, Invincibility, Compass, More
- Hollow Knight: Silksong Spool Fragments Locations Guide – Increase Silk Bar, All Spool Fragments
- Hollow Knight: Silksong Crests Guide – How to Unlock, All Crests
- Hollow Knight: Silksong Guides Wiki
This concludes our Hollow Knight: Silksong Mask Shard Locations Guide. If you want to add anything to this guide, feel free to use the comments section below.