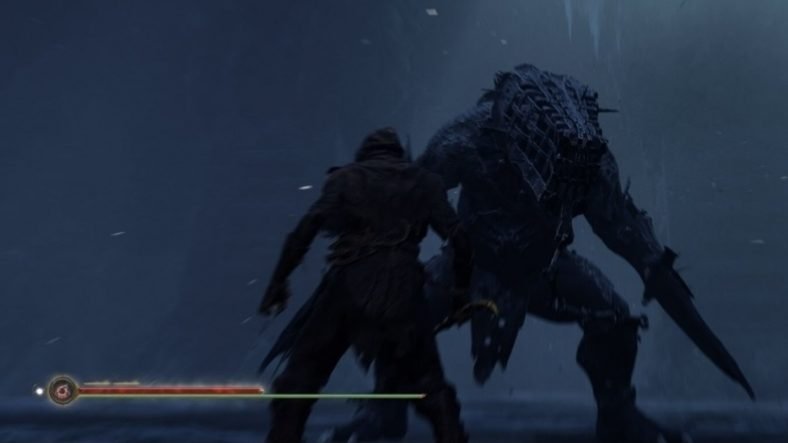
In this Mortal Shell Boss Battles Guide we will guide you on how you can defeat all of the bosses in Mortal Shell easily. Since Mortal Shell is a game about tough fights, the bosses in the game ensure that you get a tough fight. Although there are not too many bosses in the game, the current bosses in the game are enough to have you pulling your hair out as they cut through you like you are made of soft sponge. Below you will find some tips and tricks on how you can defeat all of the bosses in the game.
Boss Battles Guide – Mortal Shell
Our Mortal Shell Boss Battles Guide details everything that you need to know about all of the bosses in Mortal Shell and how you can defeat them.
Grisha
The very first boss that you come across in Mortal Shell is Grisha and he serves as a tutorial boss. Following the footsteps of all souls games, Mortal Shell also has a tutorial boss that wants you to fight without any sort of proper gear. The purpose of this fight is to basically give you a small taste of what is coming ahead for you in the full game. Naturally, you will have to fight Grisha with your limited experience with the game and mediocre weapons.
However, there are a few tips that will help you defeat Grisha easily. First off, Grisha is fat and is slow. You can take his slow speed to your advantage. However, despite being slow, it packs quite a punch and can easily kill you if you do not dodge its upcoming attacks. It also packs quite a long range so you have to watch out for its attacks even if it is a little far from you. You can parry its swipe attacks coming from over its head but you have to be very good with the timing.
During the fight, it will sometimes roar and Harden itself before unleashing a deadly combo of attacks. Whenever it roars, get away from it and try to stay out of its way until the combo is over. When it sticks out its claw, retreat once again because it follows this with an AoE effect and it can be pretty damaging if you are caught in its radius. You have to take your time with Grisha and make sure that you take a more hit and run approach. If you are running low on health, parry the overhead swipes and you will get a good amount of health back.
Hadern
Even before Grisha, you come across Hadern and it nearly kills you. However, before it kills you, a gigantic fish monster swoops in and you are rescued. Hadern is a tough boss and unlucky for you, you will fight Hadern more than once and every time, Hadern will have a different weapon. Overall, it has three variants, each carrying a different weapon. You have the Sword, Pick, and Mace variants of Hadern, and each of them is required to kill before you can acquire additional weapons in the game.
The three dungeons where you find additional weapons in Mortal Shell are protected by Hadern and you must first defeat the Hadern before you acquire the respective weapons. Hadern also comes with the ability to Harden itself so avoid it when it does so. Each of the three versions come with their own unique weapons and attacks. The Sword Hadern mostly follows the pattern of stabbing attacks so you will need to dodge quickly and use the small window while it recovers to attack.
The Mace Hadern is much slower but each attack packs more punch. It also has a great range and most of his attacks cover quite a lot of distance as it sweeps the Mace here and there. You can parry his attacks but you can also dodge and then go in for some attacks. The Pick Hadern is the fastest among the bunch and will land combo hits if he ever gets you in his chain. Avoid getting stuck in his combo chain and make sure that you are dealing with damage to it consistently while avoiding its fast-paced attacks.
Ven Noctivagu
This boss is simply a more powerful form of the normal poison monsters that roam the main area of the game. Since Ven Noctivagu can deal poison damage, you must ensure that you come with plenty of poison-healing mushrooms in your inventory. Not only does the boss deal great damage with its normal attacks, but each attack also has a poisoned debuff that adds even more to the damage.
The best strategy to fight this boss is to master the Harden timing and use it at the exact time at which the boss is about to attack you. Time it right and you will be able to follow up with even more attacks. Just make sure that you do not get caught in the normal melee attack of the boss because they will eventually stunlock you and you will have to time your Harden right. Avoid dodging or parrying this boss too much and it will go down pretty quickly.
Imrod, The Unrepentant
Your boss battle with Imrod, The Unrepentant will have two different phases. During the first phase of the battle, Imrod will use a large mace and will accompany that mace with a powerful kick and fire attacks. The Kick attack is pretty easy to spot and you can dodge it easily however when it comes to the fire attack, Imrod will take some time to charge the attack but once it is done, it will unleash a fire attack in a large area that is really hard to avoid if you are close.
For the first phase of the battle, your best bet is hit-and-run combat. Wait for Imrod to finish its attacks and then move in for some quick attacks and then back out. You must also use Harden and dodge a lot during this phase and try not to get stuck in the way of its huge mace because it will kill you really quickly. For the second phase of the fight, Imrod will drop its helmet and focus more on melee combat.
When you are far away, it will pick up the dead bodies from the battlefield and throw them at you. You can easily dodge them but make sure that you do not have your back to the boss at all times. When you go near, it will switch to its good old attacks from the first phase. Your best chance of survival during this phase of the battle is hit and run as well. Wait for it to throw bodies or land an attack combo, then move in for some quick hits and then back out once more. Keep at it and you will soon defeat Imrod.
Enslaved Grisha
This battle is pretty much the same from the first Grisha boss however this one can slam the ground and make ice spikes fall from the ceiling. To avoid the spikes, your best bet is to get back from the boss as much as possible and try to stay away until the spikes stop falling down. Apart from this additional attack, the rest of the fight is pretty much the same and you can use pretty much the same strategies for this boss as well.
Tarsus, The First Martyr
Tarsus comes with two different battle phases as well. One of the key factors to note in this boss fight is that Tarsus will fully use the icy floors around you. She will slide and move around quickly to get closer to you quickly and cut off your escape route from her quickly. You have to really good with your dodge or Harden during this boss fight. Right from the start of the boss fight, she will start landing quick attacks using ice to her advantage. You can use a combo or dodge and Harden to avoid these attacks.
Another big problem while fighting Tarsus is her Aura that can kill you instantly if you are out of your shell. Your only solution, while the aura is active, is to wait it out. Let her come in closer, drop a combo and it will go away. Wait for this window and then move in for some quick attacks. Land the attacks and then get back quickly. Keep at it and the fight will enter the second phase. During the second phase, she will start to skate around you and suddenly swoop in for attacks.
During this phase, your best strategy is to stick to a distance and wait for her to use her spike attack where she pierces the ground with her ice and spikes come out in your direction. When this happens, go in after the attack and quickly land some attacks. There is no easy strategy to fight her during this phase apart from that you must take your time and defeat her with quick and short attack combos.
Crucix, The Twiceborn
Before we begin with the actual boss fight, there is a small trick that you need to do while you are entering the boss arena. Since you are dropped inside the arena, you will take damage after you land so basically, your health is already down before even the boss fight begins. To avoid this annoying damage, Harden yourself quickly to avoid any sort of fall damage. Crucix is actually a combination of two different characters where one is a small one while the other is a much bigger one but they are both combined together.
During the first phase, your target is the smaller one that has a crossbow and will continue to fire its bolts at you while the bigger one nibs away at your health with its long spear. As tempting as fighting the bigger one sounds, your main goal should be to kill the smaller one because it will allow you to enter the second phase of the battle. Focus all of your attacks on the smaller one and make sure that you have plenty of Resolve for this battle as it will help you defeat the smaller one quickly and go to the second phase of the battle.
When you’ve killed the smaller one, you will be left with the bigger one which has the long spear. Seeing his smaller brother die will send him in wild fury and it will start dishing out more aggressive attacks at you. However, as his damage increases greatly, without the smaller one in place, his movement is seriously hindered and you can easily run circles around him. You can plenty of dodge to avoid his attacks and kill him off as well. Just do not get greedy with the attacks or else you’ll end up dead because the attacks pack quite a punch.
The Unchained
You will face The Unchained at the very end of the story as this is the final boss of the game. Make sure you have a decent amount of useful items at hand. Since this is the final boss of the game, make sure that you are not too conservative with your items as well. Use whatever you have and do not hold back on anything for this fight. The Unchained is a really big boss and it can jump from a great distance. It can also roll around so make sure that you do not linger on its sides for too long.
The whole battle if fought in water so this further adds to the challenge as the boss also uses the water to its advantage. One of the boss’s attacks includes the tidal wave attack which launches two tidal waves in the whole boss fight area. They not only deal damage but also knock you down allowing the boss to follow up with attacks. To avoid them, you can eight use Harden or dodge right through them. Make sure that you are running straight for them if you are trying to dodge through them.
Apart from the main boss, you will also have to fight smaller minions of the boss as well. Every time the boss lifts its hand and slaps on the water, the minions will move ahead and attack you. During this phase of the boss fight, you MUST make sure that you are not cornered by them. They come with powerful scythes and boast decent enough range as well. If you remain at one place for too long, you will get trapped and eventually die of their attacks.
Be on the move and if you are down on health, parry their attacks and you will be able to get some of your health back. However, these minions are not there for your health restoration only because The Unchained will also use them to gain its health back. When the boss starts a whirlpool, it will try to drag all of its minions in it and try to regain its health back. At this point, you must try your best to kill as many minions as possible but do not fall into the whirlpool because it will kill you instantly failing the boss fight.
The Unchained is a truly deceiving boss because it will sometimes deliberately slow down its attack while attacking as to confuse you. If you rush Harden too quickly or be too slow to use it, the attack will end up hitting you instead. It is really a patient fight so the more patiently you play, the better you will perform in the fight. Also, it is good if you learn the attack pattern of the boss and then use the breaks in-between the combos to land a few jabs and then retreat towards safety. This is the final boss fight so patience will be highly rewarding in the fight.
Check out more Mortal Shell guides below:
This concludes our Mortal Shell Boss Battles Guide. If you have some tips or tricks for us, share them in the comments section below.


