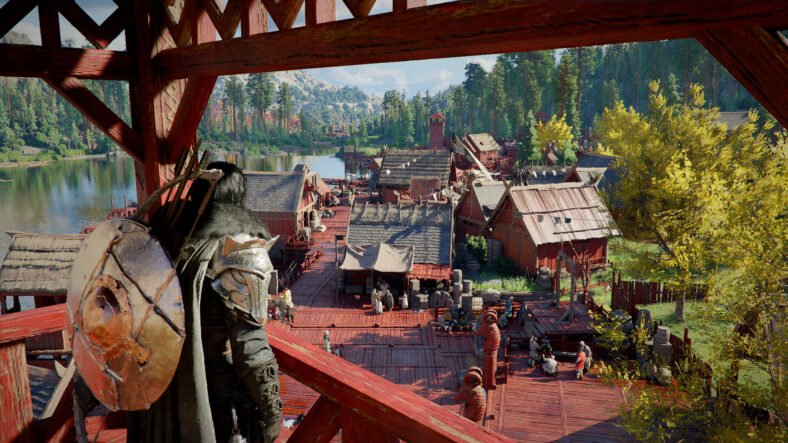
Lost Colony features many Outpost Missions spread across both the city and the inner-city areas. At first glance, these Outposts may look alike, but once you enter them, you quickly realize that each one behaves differently. Enemy types, mission triggers, boss mechanics, and even success conditions can change from one Outpost to another. As a result, many players struggle with unclear objectives and frustrating mission failures. In this ARK: Lost Colony Outposts Guide, we will detail how you can complete all Outpost Missions in the game easily.
Outpost Missions Guide – ARK: Lost Colony
There is a total of eight Outpost Missions available. These are:
- Gladiator’s Keep
- Marksman’s Hold
- Molten Works
- Breeding Pits
- Resource Caches
- Outpost Defense Small
- Outpost Defense Medium
- Outpost Defense Large
We will now see each of them in detail below:
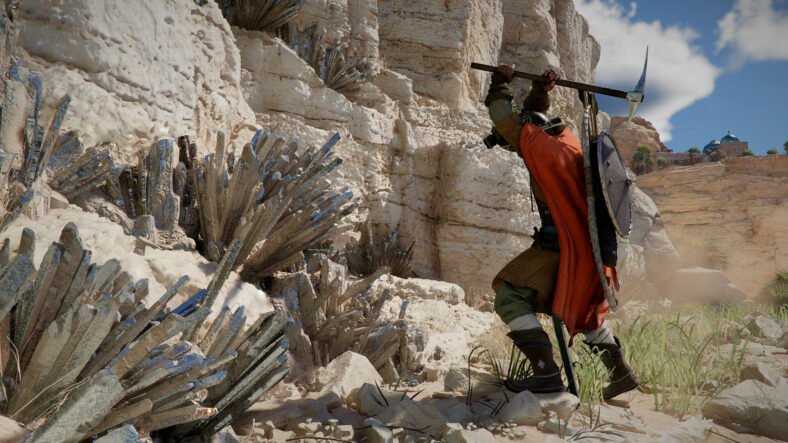
Gladiator’s Keep
Difficulty Level: Easy
Area Location: Inner city, generally safer than outer zones
Gladiator’s Keep is one of the most straightforward outpost missions on Lost Colony. The mission area is filled with enemy-controlled buildings and standard guards. Most danger comes from automated turrets placed around the edges, not from the enemies themselves.
Ideally, the mission should begin as soon as enemies detect you. But currently, it only starts when you attack. Players often have to attack a structure or enemy first to trigger the mission.
Main Objectives
- Destroy every structure inside the outpost.
- Eliminate all enemy units guarding the area.
Common enemies that you will face are:
- Soldiers using whips, which can pull items directly out of your hotbar.
- Enemies equipped with bolas make it easy for them to immobilize you.
- Flying enemies that attack from above.
Whip enemies are more frustrating because they repeatedly remove weapons and tools from your hotbar. Because of this, whip users should be targeted and killed immediately when seen.
Structures, Turrets, and Map Limits
- Most buildings have very low health and are easy to destroy.
- Turrets are placed mostly along the outer edges of the outpost. One specific turret deals very serious damage and is the biggest threat to both players and dinos.
- The mission area is strictly limited. Staying outside the mission zone for more than five seconds:
- Instantly fails the mission
- Affects the entire tribe, not just one player
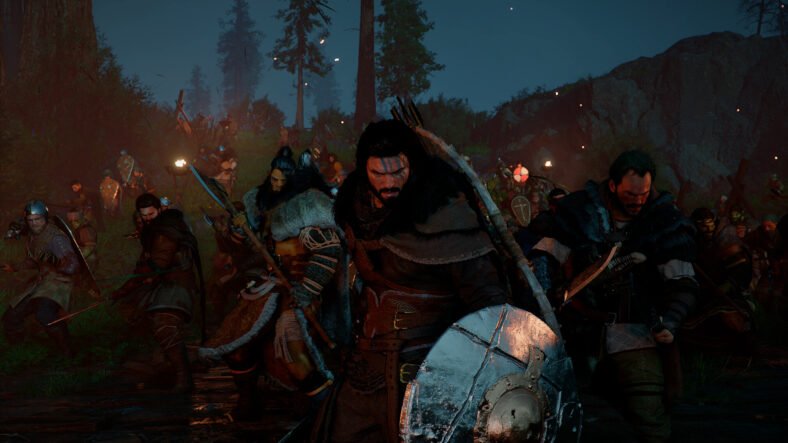
- Once about half of the structures are destroyed, the mission becomes harder. As a new wave of enemies appears, including:
- Rexes
- Stronger and more aggressive NPC units
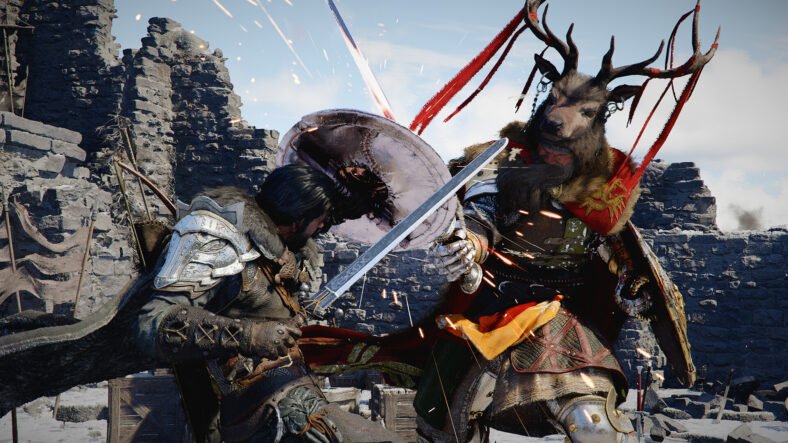
Main Boss – Osiden
Osiden can trap players inside an energy ball. While trapped, the boss attempts to push players outside the mission area. Being trapped and pushed out at the same time often leads to an instant mission failure.
Osiden does not have very good health. The fight is more frustrating than difficult due to constant crowd control. The boss is much easier to handle when more players are present, and Combat dinosaurs are used. Fighting on foot is risky because of the whip enemies that keep disarming you and the Bola NPCs.
After Osiden is defeated, a second boss appears. This boss is a mounted commander-type enemy. It has extremely low health and usually dies within seconds. This encounter poses little to no threat.
Rewards
You will receive a Vault Key upon completing this mission. You can then open the Vault using this key.
Vault Rewards
- Thrall Herald, a flamethrower-based unit
- Red Element
- Boss Plates, which are required later for the final boss
Marksman’s Hold
Difficulty Level: Medium
Overview: Very unstable and prone to issues
Marksman’s Hold is one of the difficult outpost missions on Lost Colony. While it introduces some interesting presentation, it is also one of the most bug-prone missions, making it unpredictable and sometimes frustrating to complete.
Main Objectives
- The main goal is to disable and destroy several power generators spread across the outpost. Destroy towers that spawn or support enemy units.
- Each generator is protected by multiple NPC enemies and defensive structures.
- Destroy decorative statues that count toward completion.
- The mission runs on a time limit, so moving too slowly can cause failure.
- A powerful ballistic turret oversees parts of the area. You also need to destroy it.
All structures in this mission have low health, allowing them to be destroyed quickly once reached. However, reaching them safely is often harder than destroying them.
In addition to combat, the area contains animated mannequins, which are mostly visual elements but add to the atmosphere of the mission.
This is the first outpost mission that includes spoken dialogue, which plays during certain moments.
- Some NPCs trigger short, scripted scenes when approached.
- These moments usually end with a new enemy wave spawning, adding sudden pressure on you.
Enemy Waves
- Early Stage: You will face standard NPC enemies armed with basic weapons. Defensive turrets are active and can deal heavy damage if ignored.
- Middle Stage: Larger enemies, such as Megatheriums, begin appearing. Flying enemies emerge from towers, attacking from above and making movement harder. Combat becomes more chaotic as enemies attack from multiple angles.
- Later Waves: Multiple Osiden enemies may appear at the same time. Enemies often spawn in the same spot, stacking on top of each other.
Final Boss – Sniper Commander
The final enemy is a long-range commander-type boss. He uses a railgun-style weapon with extremely high accuracy. The railgun can shoot directly through structures, offering little protection.
The boss frequently moves backward and may step outside the map boundary. Even while out of bounds, he can continue shooting players through solid structures. Once fully outside the playable zone, he cannot be damaged, making completion impossible without workarounds.
Due to bugs, players often need:
- Rockets for splash damage
- Crossbows for indirect hits
- Admin tools if the boss becomes unreachable
Rewards
After completion, a vault key is supposed to appear. In many cases, the key spawns inside buildings or in unreachable locations.
Vault Contents
- A short cutscene plays upon opening
- An audio log becomes available
- Two new Thrall units are rewarded
Major Bugs
This mission has several major problems that affect gameplay: Enemies may spawn inside walls and pillars. When this happens, they cannot be reached or killed normally. Osidens sometimes become trapped inside map geometry.
Molten Works
Difficulty Level: High
Area Location: Industrial zone filled with lava and fire
Molten Works is a small but extremely intense outpost. Even though the area itself is not very large, it quickly becomes overwhelming because of constant fire damage, aggressive enemies, and poor mission bugs. Turrets are placed outside the main structure, covering many angles. Power generators are guarded by NPCs who stay close to them, while some NPCs are just wandering around the outpost. Again, defeat the enemies and destroy structures.
Mission Activation
You need to start the mission by entering the mission area, like in the missions we discussed above. Entering the area does not always start the mission correctly. Nothing happens until a structure is damaged or destroyed. This can confuse players and delay progress. Even sometimes after destroying the structure, you need to attack one of the enemies to start the mission.
Enemy Types
The common enemies that you will face in the mission are:
- NPCs using flamethrowers. Flamethrowers are everywhere, dealing constant damage over time.
- Raptors that can pin players with pounce attacks. Pouncing makes you very weak.
- Larger dinosaurs like Carnos and Rexes add more pressure and damage.
- Enemies are using crossbows and rocket launchers for ranged attacks.
- Many enemies carry whips that disrupt your control and constantly remove items from your hotbar, and also use bolas against you.
- Many enemies move unpredictably. Some dodge attacks or jump backwards to avoid damage. This makes it harder to land consistent hits.
As the mission goes on, the danger rises quickly. Additional waves of enemies begin spawning, including the Groups of Rexes and Stronger NPCs with distinct colors. A heavily armored Yutyrannus appears mid-mission. It acts like a mini boss, has high health, and takes longer to bring down.
Final Boss – Flamethrower Commander
The boss relies almost entirely on fire-based attacks. The flames that he used are constant and difficult to avoid. Fire trails are left on the ground, limiting safe movement.
The boss frequently runs away, forcing players to chase it. Small pauses occur occasionally, which are the only real chances to deal damage. The boss also summons smaller minion enemies during the fight.
Fire damage affects most dinosaurs very heavily. There is no reliable way to counter the fire damage properly. Powerful flying options are not available yet. On Alpha difficulty, the fight becomes extremely difficult.
Rewards
Upon completion, you will get:
- Three different Thrall units:
- Deadeye
- Murderer
- Enforcer
- Small amounts of Red Element
- Flamethrowers
Most other loot items feel low-value. The overall reward does not match the effort or risk involved. Many rewards can be said to be mostly useless.
Breeding Pits
Difficulty Level: Medium
Main Focus: Dino Combat
Breeding Pits is an outpost that heavily focuses on fighting large numbers of dinosaurs rather than only NPC soldiers. When the mission starts, the players are constantly put under pressure by repeated enemy reinforcements and dangerous turret placements. While it is not as fire-heavy as Molten Works, it is still very difficult.
Main Objectives
- The outpost once again contains power generators that must be destroyed. Many NPC enemies guard these generators at close range.
- Several mounted turrets that are not so fun to deal with. In addition to mounted turrets, many automated turrets are covering key paths.
- The goal is simple:
- Destroy all required structures
- Eliminate enemy forces
- Defeat the bosses to finish the mission
Like most runs, the mission only begins after a structure is destroyed or an enemy is directly attacked. Once the mission is started, reinforcement waves begin almost immediately. New enemies continue spawning without long breaks.
You should mainly focus on mounted turrets, as they deal constant damage, and NPCs using whips or bolas, as they restrict movement. On Gamma difficulty, the mission is not so challenging. On Alpha difficulty, the damage and enemy numbers increase rapidly.
Enemy Types
Breeding Pits has a wide variety of creatures and enemies:
- Large dinosaurs such as Rexes that deal heavy damage.
- Megatheriums that are aggressive.
- Carnos
- Raptors that can pounce and disable movement.
- Scorpions
- Occasional Yutyrannus units that increase difficulty
First Boss – Lost Desmodus
The Lost Desmodus is extremely fast and difficult to track. It uses ranged projectile attacks while flying. The boss can grab players and carry them into the air. Players are then dropped from a very high height, which can easily be fatal.
There are two types of fight phases: Air Phase – The boss flies around and attacks from above. Ground Phase – The boss lands, creating an opening to deal damage.
How to Deal with the Boss
- Fabricated sniper rifles are the best option for damaging the boss safely.
- High mobility helps avoid attacks.
- Running in zigzag patterns makes it harder for the Desmodus to hit you.
- Players must also watch the ground, as enemies with Bolas and whips can be deadly during the fight
Second Boss – Thrall Bounty Hunter
It appears after the first boss is defeated and is extremely weak compared to earlier enemies. It has very low health and is usually defeated within seconds.
Rewards
Completing the mission rewards you with a Thrall Piercer unit on Gamma difficulty. Vault rewards depend on mission difficulty. On Gamma difficulty, the loot is extremely disappointing. Due to poor rewards on lower difficulties, it is strongly recommended to avoid running this mission on Gamma.
Resource Cache Missions in ARK: Lost Colony
Difficulty Level: Very High
Overview: Frustrating, buggy, and rarely worth doing
The Resource Cache mission is one of the most challenging activities on the Lost Colony map at present. It is full of technical problems and far more stressful than rewarding.
How to Start the Mission
Beginning a Resource Cache mission is very simple. Walk up to the cache in the world and interact with it to activate the event.
Once the mission starts:
- The resource cache has 50,000 total health.
- You cannot place turrets or any kind of defenses.
- Enemy attacks begin very quickly. The first wave arrives in around 10 seconds.
- There are five total waves you must survive.
- Players cannot damage their own resource cache. This is extremely helpful, since enemies force you to fight very close to it.
Early Waves
The first waves usually include a large mix of random wild dinosaurs and a heavy presence of Neophytes, even early on. Most enemies do very little damage to the cache itself. Neophytes barely scratch the cache despite their danger to players.
Standing close to the cache makes enemies focus on you instead. Because of this, the cache often stays safe.
Neophytes are one of the most dangerous enemies in the entire mission. They are difficult because they have extremely high health. They take far less damage than expected. Killing even one can take a long time. So, it becomes very frustrating.
Their abilities make them deadly. They can grab players and lift them high into the air. Then drop them to cause instant death. To prevent this, it is recommended to bring these with you:
- Always carry parachutes
- Bring large amounts of medical brews
Always loot Neophyte bodies when possible. Their drops are often the only good rewards you will get during this mission.
Some weapons perform better than others, such as the Tech Spear, which works well against Neophytes on foot. It allows consistent damage without relying on dinos.
However, it comes with a risk. Splash damage from the Tech Spear can badly injure your own dinos. This makes fighting near friendly creatures very dangerous.
The High-level Malwyns with massive stats are also going to be spawned during the fight. But they can be downed very easily.
Major AI and Pathing Problems
One of the biggest issues with Resource Cache missions is broken enemy behavior. Such as enemies getting stuck on rocks, ruins, or terrain. They completely stop moving, and the waves are not progressing due to the stuck enemies that are still alive.
While stuck enemies can accidentally protect the cache. They also waste your time and force you to hunt down single enemies to continue. This can turn the mission into a slow, frustrating grind.
Inventory and Looting Problems
Another unexpected issue is inventory management. During the mission, your inventory fills quickly with meat and prime meat. Constant combat leaves little time to manage your inventory.
Once your inventory is full, you cannot pick up Neophyte loot bags. These valuable gears can be lost permanently.
Wave 3 – Serious Bugs
By the third wave, enemy numbers increase sharply. More Neophytes appear in the combat area. Hostile Malwyns may also join the fight.
This is when major glitches start to show:
- Enemies can become stuck in midair
- They may float without moving
- Ground-based weapons cannot hit them
To fix this:
- You may need to fly close just to damage one enemy
- If enemies drift too far away, the mission can fail instantly
Wave 4
Wave four increases pressure even further as more enemies spawn overall. Neophytes appear in higher numbers, and getting stuck becomes even more common.
Some Neophytes become trapped under ruins. They cannot be pulled, moved, or attacked easily. Clearing the wave may take far longer than intended.
Final Wave – Alpha Osiden Encounter
The last wave introduces a boss-like enemy – Alpha Osiden.
In this run, only one Alpha Osiden spawned. It became stuck in the ruins and could not attack the cache. Alpha Osidens prioritize players and dinos over the cache. Fighting them directly is more dangerous than defending the objective. There is no visible health bar for Osiden.
Once isolated, the Alpha Osiden is manageable. Defeating it grants Alpha Osiden Skulls. These are required for later boss encounters
Additional Enemies:
Cryolophosaurus
These enemies are extremely annoying as they use frost-based attacks. Their attacks can deal serious damage and turn your screen blue, which makes it hard to see anything.
They constantly fire attacks and can also jump backward when you get close. But they have very low health and are easy to kill once you land hits.
Manas
Manas are a major source of mission-breaking bugs:
- They frequently get stuck in midair
- They can become fully invulnerable
- Weapons may stop working entirely against them
Even admin tools may fail:
- Some Manas cannot be targeted at all
- They may exist outside normal interaction rules
Out-of-Bounds Issues
Some enemies may spawn or glitch outside the mission area.
If you try to follow them, you have less than 5 seconds before the mission fails. Using the Admin gun on them can be your first choice, as it reduces enemies to 1 HP instead of killing them. But it still requires a final hit to finish them off.
Final Rewards
- After surviving everything, the resource cache itself gives:
-
- No Thrall units
- No meaningful gear
- Loot quality is extremely poor as there are no standout items. Nothing feels worth the effort.
- The only decent rewards come from: Loot dropped by Neophytes during the mission.
Outpost Defense Missions in ARK: Lost Colony
Difficulty Level: Scales from Easy to Very Hard.
Main Goal: Protect the vault at all costs
Outpost Defense missions revolve around defending a central vault from waves of enemies. There are three versions of this mission: Small, Medium, and Large. Each tier increases enemy count, wave numbers, and overall chaos.
One major problem across all tiers is that outposts are extremely hard to find, especially the medium and large versions.
Small Outpost Defense
Difficulty Level: The Small Outpost Defense is the easiest version of this mission type and the one you will see the most.
The outpost has a vault placed in the middle. Enemies must travel through hallways and walls, which control their movement. You do not have to defend the entire area, but keep an eye only on the main paths. You need to defend the vault from enemies. If the vault gets hit multiple times, you will lose the mission.
To begin the mission, you need to walk up to the vault terminal and activate it to start the event. Once activated, you are given about one and a half minutes to prepare. During this time, you can place defensive structures like turrets, coils, and cages. Position as many dinos as you want.
See where enemies will come from before the wave begins. Enemies only enter from two directions. This makes planning much easier than in later outpost types.
Enemy Waves
The Small Outpost has four total waves, with difficulty increasing each time, but it is random currently. Before wave number 1, put the dinos in the hallway so the enemies can’t pass them and reach you and the vault. Even if they get past the dinos, the turrets will take care of them. That is why these enemies first attack these turrets and then attack the vault.
Use Thrall units if you have any in turret mode to add constant pressure. You can also use Tesla coils, which slow enemies and help control large groups. Cages can trap enemies and keep them from reaching the vault.
First Wave
In this, you will mostly face some basic enemies. These are very low threat. It will give you a good chance to test your setup.
Second Wave
It is a mix of basic enemies and dinosaurs, but has stronger variants beginning to appear. It is still manageable with basic defenses. It also spawns some different types of Revenants.
Third Wave
It is similar to the previous wave but has now more enemies. Some enemies may spawn in odd locations. Usually clears quickly despite the confusion.
Final Wave
In the final wave, a mini-boss appears – Therizinosaurus. This boss is much larger than normal enemies, but can be defeated quite easily. After defeating it, the boss drops a key. The key is required to open the vault and claim rewards.
Rewards
Rewards from the Small Outpost include:
- A small amount of gear
- Two Thrall units: Snarer & Gunslinger
- Vault loot quality is generally low
Best reason to do this mission:
- Farming Thrall units
- Practicing for harder outpost missions
While the rewards are not impressive, the Small Outpost is still useful because it is easy.
Medium Outpost Defense
Difficulty Level: Moderate
Finding this outpost is a challenge on its own, even before the mission begins. Medium outposts are very uncommon compared to small ones. You may spend several hours just flying or traveling around to find one.
At its core, the mission works the same way as other outpost defenses, but the environment can make things much harder. The main objective is still: Protect the vault in the center and prevent enemies from damaging it too much.
Mission includes a total of 6 waves. Each wave contains more enemies than the small version. Later waves introduce multiple spawn directions and higher pressure on defenses and dinos.
The early part of this mission is easier than it looks. Early waves do not need heavy defenses. Instead of this, focus on getting points from generators.
First Wave
You will face mostly basic revenant enemies. Again, they are very low threat. You can easily complete this wave solo and without using dinos.
Second Wave
There is a slight increase in enemy types, but still only one main spawn direction. This wave is very controlled and can be easily managed. It is a good wave to continue gathering points instead of building defenses.
Third Wave
Enemies with ranged attacks start appearing. Dilosaurus, which are spit-based enemies, start to appear. They can damage structures and slowly wear down your defenses. Now, enemies begin spawning from two different areas, and positioning starts to matter much more at this stage.
Fourth Wave
Enemy numbers rise sharply, to around 50 total enemies. Larger dinosaurs start showing up, including Stegos, Carnos, and Rexes. If dinos are placed correctly, the vault usually stays safe, and damage remains minimal.
Fifth Wave
Attacks now come from multiple sides. You will now face very large Bronto-like mini-boss enemies. These enemies can deal heavy damage and reach the vault quickly if ignored. These can only be damaged properly by players.
Sixth Wave
This is one of the most chaotic waves of the mission. Enemies flood the area from different directions. A mini-boss Therizino joins the fight, and it spawns very close to the vault. So, you need to defeat it as early as possible.
Rewards
Defeating the boss rewards you with a key needed to open the vault. Rewards are slightly better than those of the small outpost. However, they are still disappointing for the effort involved.
You will get Thrall rewards: Warden & Marauder.
Large Outpost Defense Outpost in ARK: Lost Colony
Difficulty Level: Hard
The Large Outpost Defense is an intense outpost mission. This mission is not forgiving and should only be attempted with serious preparation and with a strong team. Before jumping in, it is important to understand what you are dealing with. This is the hardest outpost defense mission in the game. Enemy pressure is constant and overwhelming. Attempting this alone is strongly not recommended unless you are overgeared and experienced.
The only goal in this mission is to defend the central vault. There are no side tasks and no NPC structures to destroy. Mission includes 8 total waves, and the vault health is set to 50,000.
Position Osidens at each major enemy entry path. Use Malwyns for fast movement, emergency responses, and chasing dangerous targets. Put Thralls in the turret mode. However, AI often ignores turret behavior and wanders. You will get roughly 90 seconds to prepare after activating the mission.
Opening Waves (1–2)
These waves have mostly basic revenant enemies. The attacks come from a single direction. All of the enemies put very little pressure on defenses.
Third Wave
Enemy groups become noticeably larger in the third wave. In this wave, Dinos ignore your commands, and Thralls stop behaving as turrets. Enemies frequently get stuck on the environment and slow down wave progression.
Fourth Wave
In this wave, you will again face mini-boss Bronto-style enemies. These enemies can fire ranged projectiles and can damage both dinos and the vault. From this wave, defensive mistakes begin to matter more. So, you need to be careful.
Fifth Wave
Enemies now approach from three different sides. As they are now attacking from multiple sides, Vault may take more noticeable damage. Strong dinosaur placement becomes critical in the fifth wave. Without active defense, the vault can be damaged quickly, and the recovery becomes difficult.
Sixth Wave
The sixth wave spawns three mini-bosses, Bronto-style enemies. Some of these enemies take reduced damage from dinos and need players to kill them. Failing to deal with them quickly can result in heavy structural damage, and you can lose control of the battlefield.
Seventh Wave
It is surprisingly less intense compared to the previous waves. It features large dinosaur enemies such as Mammoth-like creatures and Yuty-style attackers. In this, enemies attack from all four sides. Proper positioning of dinos here can stabilize the fight.
Eighth Wave – Final Battle
The waves end with a massive fight with the Therizino boss. The boss has extremely high health of 160,000 and soaks up damage for a long time. It focuses more on dinos than the vault. Upon defeat, the boss drops the vault key.
Rewards
The rewards that you will get in this mission are technically the best among outpost missions. These include:
- Tech Leggings
- Blood Forge
- Some Red Elements
- Two higher-tier Thralls: Warden & Piercer
But the rewards are still not worth the effort.
That is all for this guide. Additional ARK: Lost Colony guides are linked below:
- ARK: Lost Colony Best Base Locations Guide – Early Game, Late Game
- ARK: Lost Colony Solwyn Guide – How to Tame, Where to Find
- ARK: Lost Colony Giant Bee Queen Guide – How to Tame, Find Honey
- ARK: Lost Colony Cryolophosaurus Guide – Where to Find, How to Tame
- ARK: Lost Colony Gigadesmodus Guide – Where to Find, How to Tame
This concludes our ARK: Lost Colony Outposts Guide. If you want to add anything to this guide, feel free to use the comments section below.