StarRupture throws you into a hostile world where survival is crucial. At the start, the game may feel overwhelming, but once you understand the core systems, everything falls into place. Whether you are completely new or skipped the tutorial, this walkthrough will help you understand what actually matters early on. This StarRupture Beginner’s Guide details everything that you need to know about survival in the game if you are just starting it.
Beginner’s Guide – StarRupture
Below, you will find some tips and tricks that will help you kick off your adventure in the game optimally.
Core Survival Systems
Staying alive in StarRupture is simpler than it looks. You mainly need to manage three things: Health, Calories, and Hydration. Health represents your life. Calories drop as your character gets hungry, and Hydration decreases as you move and work. If either reaches zero, your Health will suffer.
There is one extra system that makes things more dangerous: Toxicity. Some foods increase Toxicity when eaten. If Toxicity reaches 100, your character will vomit, which drains a large amount of Calories and Hydration at once. Because of this, it is important to choose food carefully and not rely too much on items that raise Toxicity.
There is no sleep mechanic to worry about, but the planet itself is dangerous. Enemies and harsh environments can quickly put you in trouble if you are unprepared.
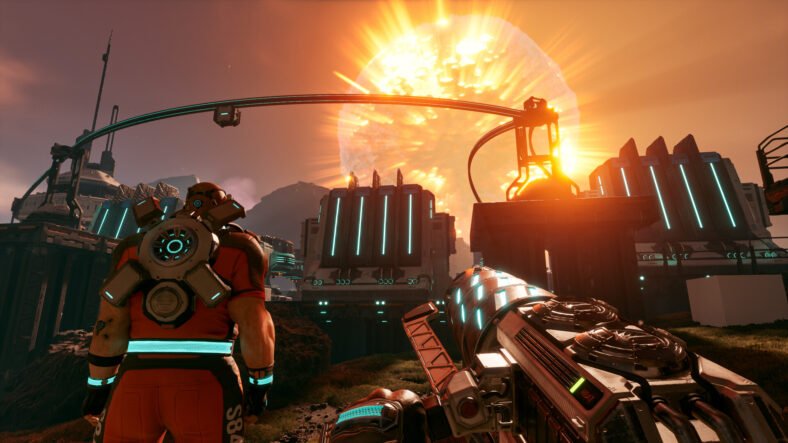
The Biggest Threat: The Star Rupture
The planet’s star, called Ruptura, will explode at regular intervals. When this happens, the entire surface becomes lethal. If you are not inside a sealed structure like a Habitat, you will die instantly.
Before this happens, the game shows a Wave Warning message. You will see it twice, followed by a 15-second countdown. Once the countdown ends, you have only five seconds to get indoors. After the explosion, extreme heat remains for a while, forcing you to stay inside until conditions improve.
Since Ruptures happen often, you should never travel far without a backup plan. Carrying materials to quickly build a small shelter can save your life while exploring.
Building and Exporting
While survival is important, your main goal in StarRupture is to build an automated factory. You progress by mining resources, processing them, and sending finished goods to offworld corporations. These exports unlock new technologies, weapons, and tools.
Exploring the Planet
StarRupture’s world is large and filled with interesting locations. You will come across abandoned bases, ruined structures, and massive landmarks visible from far away. Many of these locations contain valuable loot, but they are also guarded by hostile alien creatures. Some abandoned bases, like the “CRFHSRB Redleaf” Abandoned Base, offer excellent early rewards, but you should prepare before entering them.
Combat and Enemy Threats
Fighting is unavoidable in StarRupture. Early enemies are manageable, but stronger bugs appear as you move north and east on the map. At the beginning, your mining tool, Harvester, is your only weapon, and it is not ideal for combat.
It is best not to wander too far until you unlock the Pistol. Once you have it, combat becomes much easier. With a weapon, you can clear Abandoned Bases and loot fallen enemies. These enemies often drop War Bonds, which can be exchanged for better weapons and equipment.
Death and Respawning
Dying in StarRupture is more of an issue to you, but fair. When you die, all carried items drop at the spot where you fell. Most weapons are destroyed, except for the Pistol. You can respawn either at the Orbital Lander or at the most recent Regeneration Chamber you activated. This makes setting up regeneration points at your bases extremely useful, especially as you move farther across the map.
Understanding the HUD
Your screen provides a lot of important information. On the left side, you will see your survival stats: Calories, Hydration, and Toxicity. These change color when they get dangerously low or high.
Shields regenerate after avoiding damage, while Health usually only recovers when you eat healing food. Buffs gained from food appear above the shield bar, while negative effects build up at the bottom of the screen.
Energy works like stamina and is used for sprinting and double jumps. Other UI elements include weapon status, ammo count, grenades, dialogue messages, tips, and special tools like the Medtool once unlocked. This MedTool is used for healing when it is fully charged.
When Ruptura is about to erupt, a Wave Warning appears at the top of the screen, making it impossible to miss.
Choosing a Character and Entering the World
At the beginning, you pick one of four characters. This choice does not affect gameplay in the current version, so it mostly comes down to appearance and voice. You can always switch characters later at a Regeneration Chamber, so there is no worry about choosing.
You start inside an Orbital Lander. Before leaving, grab the food from storage containers and read the terminal to understand your mission. The tutorial helps.
When you first land on Arcadia-7, your main task is to gather resources from the nearby boulders. Equip your Harvester, either by pressing 1 or scrolling with the mouse wheel, and hold down the left mouse button to start mining. If the rock can be harvested, a progress bar will appear.
Each boulder contains smaller pockets called inclusions, which are easier and faster to mine. Hitting these individually fills your combo meter, which speeds up all future mining. For best results, mine each inclusion first, then finish off the entire boulder. Don’t forget, each boulder also holds a Meteorite Heart, a vital component for building new Base Cores.
While moving between mining nodes, pay attention to your Harvester’s heat. Press R to cool it down so you do not overheat while traveling between rocks.
Whether you play the tutorial or skip it, your next goal is to collect ore. You will find two main ore types: Titanium and Wolfram. Collect around 50 of each by mining them and return them to the Orbital Lander to turn them into Basic Building Materials. These materials are essential for building your first base.
Building Your First Base
Return to the ore deposits and place an Ore Excavator on each ore. After that, start building a small base.
You will need a Base Core (can be given by Meteor Heart, which you can get by destroying meteors), a Habitat with an Airlock, four Solar Panels for power, two Smelters to process ore, and two Orbital Cargo Launchers to export materials.
Once everything is placed, connect the machines using rails so ore flows from the Ore Excavators to the Smelters and then to the Orbital Cargo Launchers. Make sure each Smelter is set to process the correct ore type: Titanium and Wolfram.
The following will give you deep insights into how to build these structures:
Base Core
- Once you’ve collected enough materials, you can start building your base. You begin the game with 500 Building Components, which are the foundation for creating structures.
- The first thing to construct is a Base Core, which allows you to place a Habitat. It is best to build it slightly above the ground to avoid running into collision problems and to give yourself space for future expansions.
- Before placing other buildings, construct some platforms to move around your base easily. Platforms prevent your structures from becoming cramped and make maintaining machines much simpler.
- You can hold the right mouse button to place multiple platforms at once, then click left to confirm. If any platform is unstable due to distance, add support structures underneath.
- You can remove unwanted platforms with F, and pressing Y locks platform height, making it easier to align all your buildings. Once your walkways are ready, place your Habitat, attach an Airlock, and begin building your interior structures.
Interior Structures
- You can put the Analyzing Station as well as the Corporate Terminal as interior structures in your Habitat.
- The Analyzing Station lets you study organic materials and schematics to gain data points.
- Corporate Terminal allows you to trade those points for better technology, weapons, and advanced buildings. Be careful to select your desired reward before adding points; your progress might go to the wrong corporation.
- Orbital Cargo Launcher is always placed outside the Habitat.
Electricity Management
- Electricity in StarRupture is simple to handle. Just build Solar Panels and connect them to your buildings using rails or platforms, which conduct power automatically. Materials are cheap, and you get a full refund if you dismantle them.
- If you want to replicate buildings, hover over one and press Z. If your building materials run low, the Item Printer at the Orbital Lander allows you to craft more. Use Personal Storage to keep items you don’t need right away, saving inventory space until you unlock your own storage unit.
Fabricators and Efficiency
- Refining Titanium Ore into Titanium Bars and automatically sending them to Selenian Corporation will unlock a Fabricator.
- Once you have a Fabricator, you can produce more advanced materials, like Titanium Rods. To maximize efficiency, check production rates. If a smelter produces two bars every two seconds and the Fabricator consumes one bar every two seconds, a single smelter can support two Fabricators.
Unlocking the Map
The full map becomes available after completing tasks for Moon Energy Corporation. Before that, you must explore manually or use geo scanners, though these can attract alien attention.
Surviving Your First Rupture
Soon after setting up, you will experience your first Rupture event. Make sure you are inside your Habitat when the explosion occurs. Afterward, the surface will be burned, killing most plant life for a short time.
After each Star Rupture, new boulders appear, but the planet is temporarily empty of water, plants, and animals. It takes a few minutes to fully rejuvenate, at which point exploration can continue.
Although this limits food gathering, Ruptures also bring rare materials and open underground caves that can be explored. This makes them dangerous but rewarding.
Always carry a Meteor Heart and 100 Basic building materials to create an emergency shelter when traveling far from home. Remember, buildings can be dismantled for full refunds, so there is no penalty for emergency structures.
Exporting and Progression
Once your factory is running with Smelters producing Titanium and Wolfram Bars, start exporting Titanium and Wolfram bars to corporations using the Cargo Launchers. Open the Orbital Cargo Launcher and select which resources to export. Once set, drones will automatically deliver materials into orbit.
Inside your base, build a Corporate Terminal to view rewards and technology unlocks. You should focus on exporting items to Future Health Solutions for the exchange of the Regeneration Chamber and Griffits Blue Corporation for the UPP-7 Pistol.
Focus early on corporations that unlock survival tools and weapons, as these will make exploration much easier. As you progress, you will need more advanced materials, so expect to expand and redesign your factory often.
Food, Exploration, and Growth
While exports continue, use the time to gather food nearby. Polifruit restores Calories, while Hydrobulb helps with Hydration. These are essential for survival and crafting better food later on. Plants respawn after Ruptures, so harvesting them regularly is important, not just for survival, but for unlocking better food recipes later.
You need to unlock good weapons as soon as possible, like MedTool for healing and Grenade and rifles for killing bugs. Once equipped with better gear, start exploring nearby Abandoned Bases. Take things slow, prepare for combat, and always keep shelter materials with you, so you can build shelter during a Rupture.
That is all for this guide. Additional StarRupture guides are linked below:
- StarRupture Food Guide – How to Cook Food, Advanced Recipes
- StarRupture Crafting Materials Guide – Find Calcium, Glowcap, Grubbler, More
- StarRupture Recipes Guide – How to Unlock New Recipes
- StarRupture Survival Guide – Managing Health, Hunger, Hydration. Avoid Dying
- StarRupture Gun Guide – How to Get One Quickly
This concludes our StarRupture Beginner’s Guide. If you want to add anything to this guide, feel free to use the comments section below.